[HOW TO FLASH] how to flash Marvel 1
To flash the Sezam Marvel 1 (often referred to simply as the Marvel), you follow a specific procedure tailored for this high-performance triple-tuner receiver.
Preparation
-
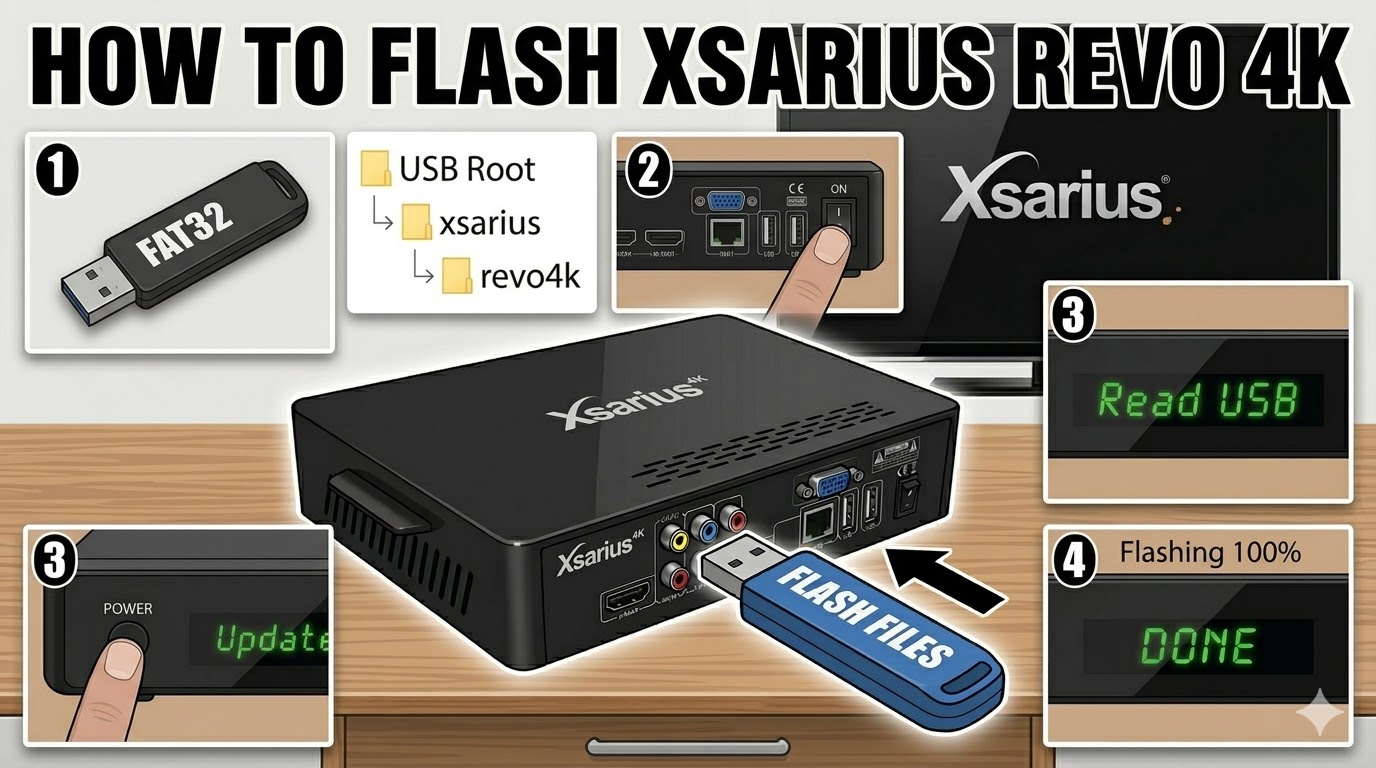
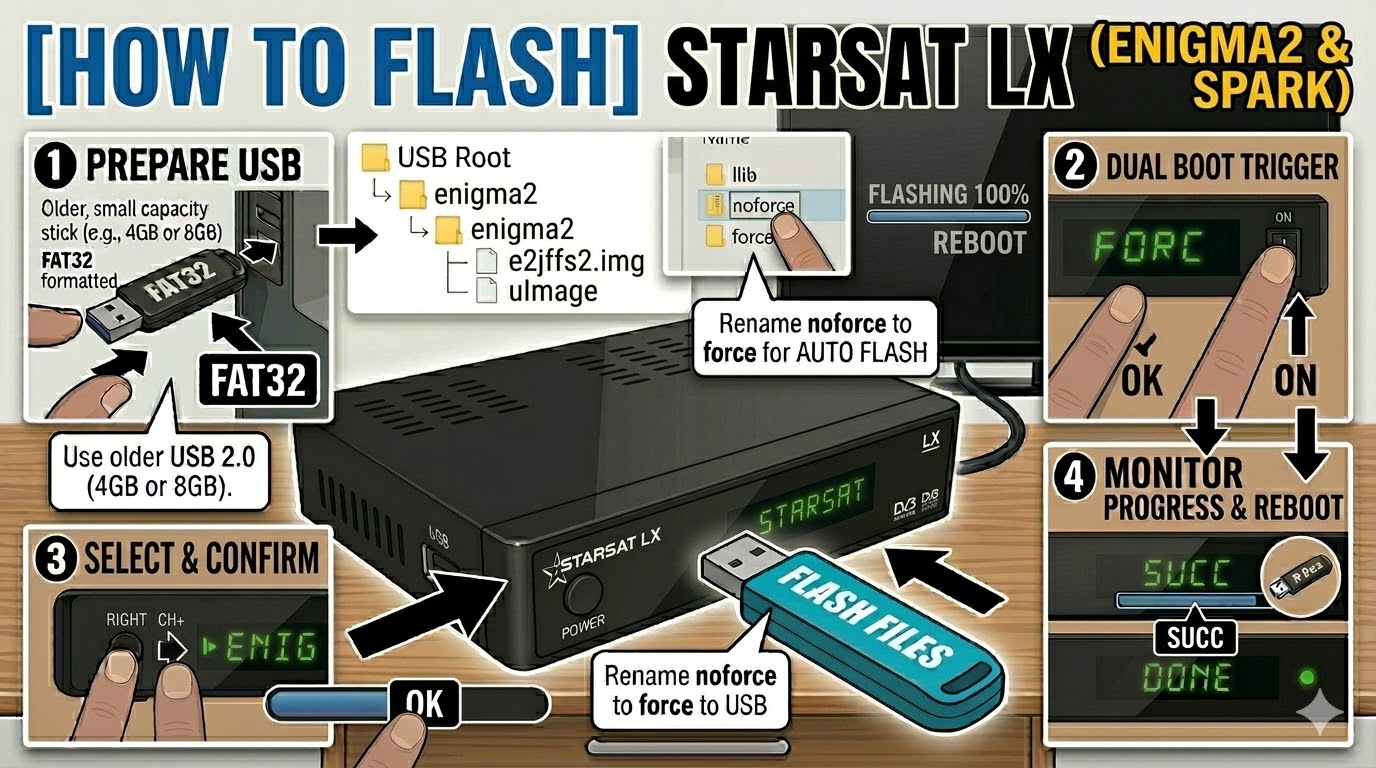
USB Drive: Use a USB stick formatted to FAT32. Older USB 2.0 drives (2GB or 4GB) are highly recommended for better compatibility with the bootloader.
-
Download Image: Ensure you have the correct firmware (OpenATV, OpenHDF, or Egami) specifically for the Sezam Marvel.
-
Extract Files: Unzip the folder on your computer. You should see a folder named
egamiorsezam. -
Copy to USB: Inside the folder, there must be a subfolder named
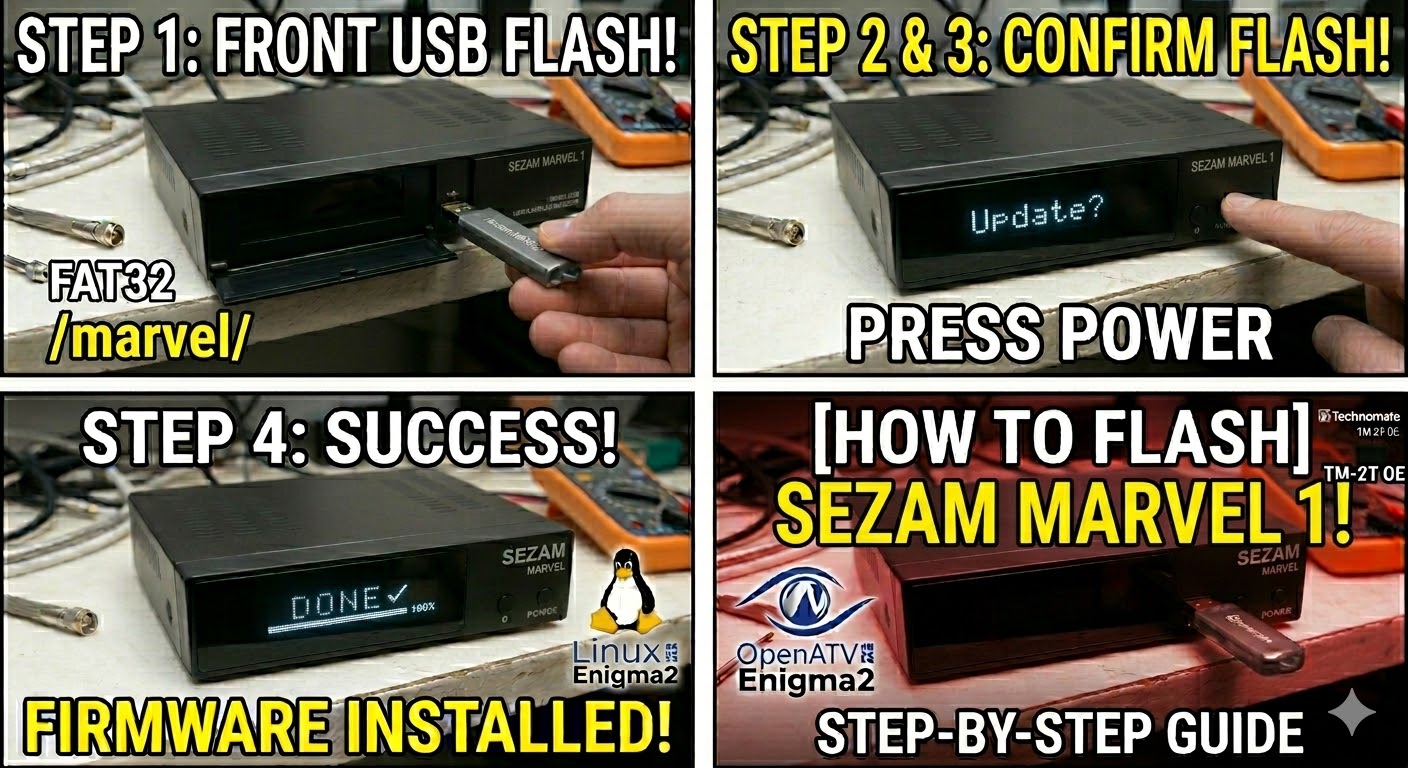
marvel.-
Path:
USB Stick -> marvel -> (image files: kernel.bin, rootfs.bin, etc.).
-
The Flashing Process
-
Power Down: Turn off the receiver using the physical power switch at the rear.
-
Insert USB: Plug the USB stick into the front USB port (located behind the front flap).
-
Power On: Flip the rear power switch to ON.
-
Initiate Flash: * Watch the front VFD (Vacuum Fluorescent Display).
-
When the display shows “Update?” or “Press Power”, press the Power button on the front panel immediately.
-
-
Wait: The display will show “Flashing” and usually a percentage count (0% to 100%). Do not interrupt the power until it is finished.
-
Complete: Once the process reaches 100% or says “Done,” the receiver will reboot automatically. You can then safely remove the USB stick.
Important Tips
-
Folder Name: Ensure the folder is named exactly
marvel. If it is namedsezamormarvel1, the box will likely ignore it. -
Force Method: If you can’t get the button press to work, find the file
noforcein themarvelfolder and rename it toforce. This will trigger an automatic flash upon boot.