[HOW TO FLASH] how to flash Roxxs 200HD
To flash the Roxxs 200HD, you will need to follow the specific folder naming convention used by this receiver’s bootloader. It is very similar to other Linux-based Enigma2 boxes but requires a precise path on your USB stick.
Preparation
-
Format USB: Use a USB stick (max 8GB is safest) and format it to FAT32.
-
Download Image: Obtain the latest firmware (e.g., OpenATV, OpenPLi, or EGAMI).
-
Extract Files: Unzip the file on your PC. You should see a folder named
roxxs. -
Copy to USB: Transfer the entire
roxxsfolder to the root of the USB stick.-
Structure:
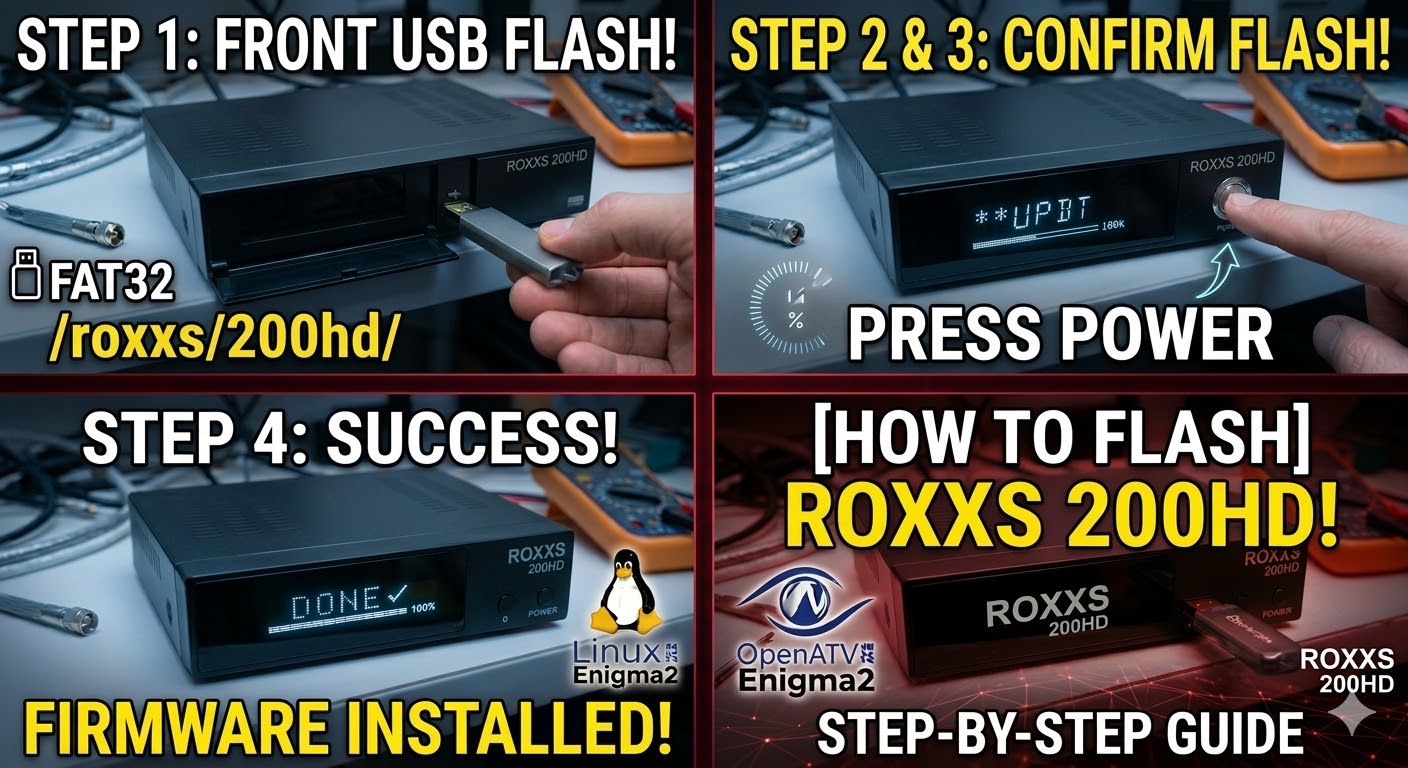
USB Stick -> roxxs -> 200hd -> (image files like kernel.bin, rootfs.bin, etc.).
-
The Flashing Process
-
Power Down: Turn off the Roxxs 200HD using the physical power switch at the rear.
-
Insert USB: Plug the USB stick into the front USB port (behind the flap).
-
Power On: Turn the rear power switch to ON.
-
Initiate Flash: Watch the front panel display.
-
When the display shows “UPDT” or “USB”, immediately press the Power button on the front panel.
-
If you miss this prompt, the receiver will boot into the existing image as usual.
-
-
Wait: The display will indicate progress (e.g., “FLSH” or a percentage). Do not turn off the power until it completes.
-
Complete: The receiver will reboot automatically. Once you see the setup wizard on your TV, you can remove the USB stick.
Important Tips
-
Folder Name: Ensure the folder inside
roxxsis named exactly200hd. If it is named differently, the receiver will ignore the update. -
Automatic Flash: If the front button is unresponsive, find the file named
noforcein the200hdfolder and rename it toforce. This forces the box to flash immediately upon power-up. -
USB Port: If the front port doesn’t work, try a rear USB port, but the front is the primary port for flashing.