[HOW TO FLASH] how to flash Qviart Lunix 4K

To flash the Qviart Lunix 4K, you follow a process almost identical to its larger sibling (the Lunix3), but with a specific folder name change to ensure the bootloader recognizes the hardware.
Preparation
-
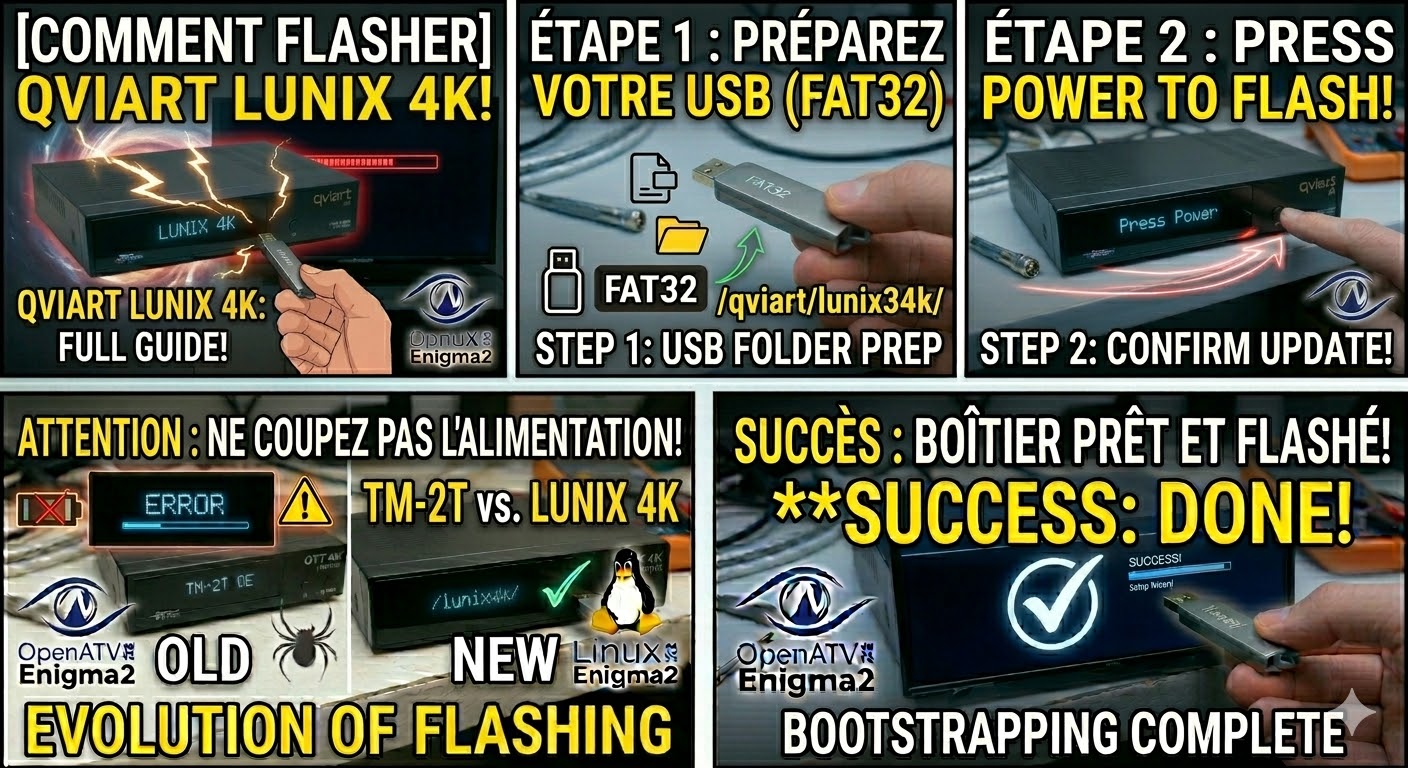
USB Drive: Use a USB 2.0 stick (8GB or less is best), formatted to FAT32.
-
Download Image: Ensure you have the firmware (OpenATV, OpenPLi, etc.) specifically for the Lunix 4K.
-
Extract Files: Unzip the folder. You should see a folder named
qviart. -
Copy to USB: Transfer the entire
qviartfolder to the root of the USB stick.-
Structure:
USB Stick -> qviart -> lunix4k -> (image files: kernel.bin, rootfs.bin, etc.).
-
The Flashing Process
-
Power Down: Turn off the receiver using the physical power switch at the rear.
-
Insert USB: Plug the USB stick into the front USB port (behind the flap).
-
Power On: Flip the rear power switch to ON.
-
Initiate Flash: * Watch the front panel VFD display.
-
When the display shows “Update?”, press the Power button on the front panel immediately.
-
-
Wait: The display will show “Flashing”. Do not turn off the power until the receiver reboots itself automatically.
-
Complete: Once the setup wizard appears on your TV screen, you can safely remove the USB stick.
Important Tips
-
Folder Name: Double-check that the subfolder is named
lunix4k(without the ‘3’). -
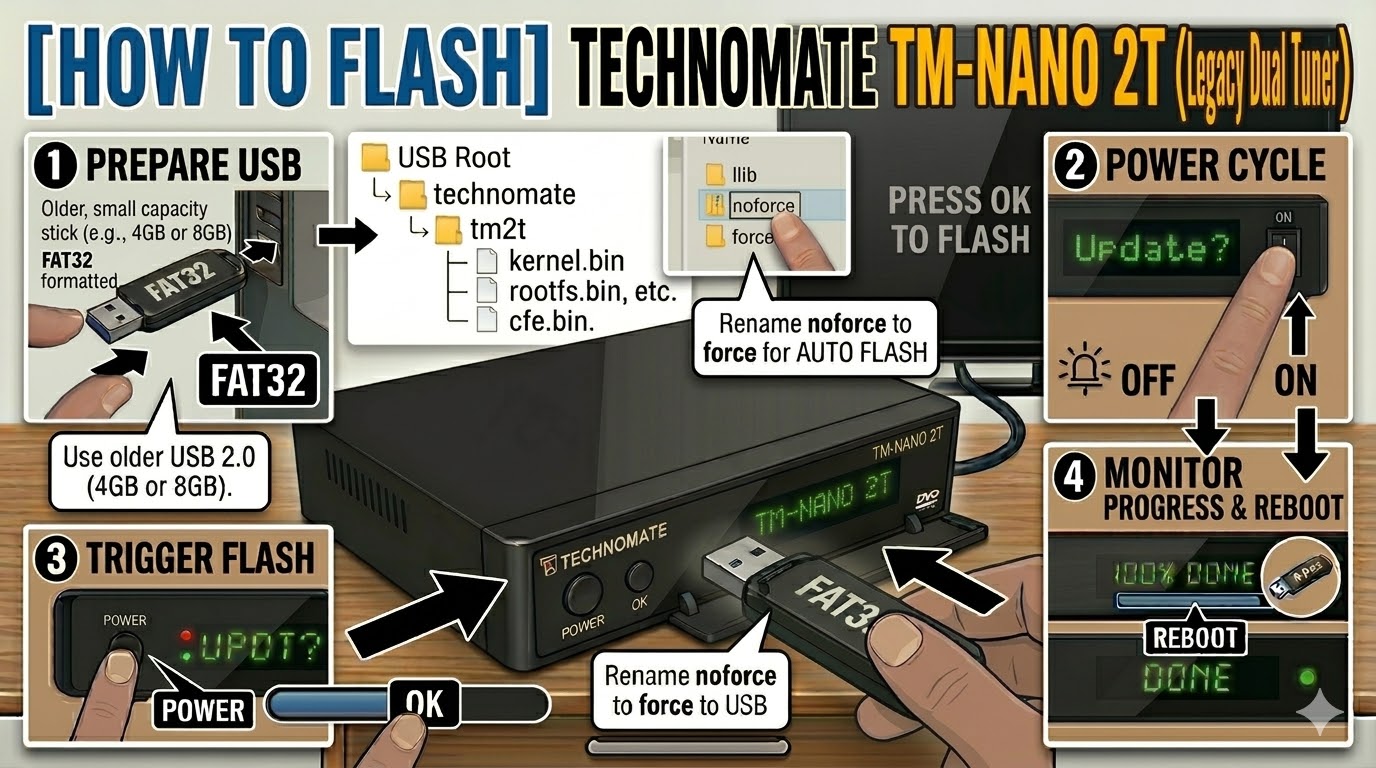
Force Method: If you can’t get the button press to work, find the file
noforcein thelunix4kfolder on your USB and rename it toforce. -
USB Port: If the front port doesn’t work, the rear ports can be used as a backup.
Would you like me to generate a set of high-quality thumbnails and a visual step-by-step guide for the Qviart Lunix 4K?