[HOW TO FLASH] how to flash NOVALER Multibox 4K

To flash the original Novaler Multibox 4K (the first version), you will use the same HiSilicon recovery method as the newer SE and PRO versions. The primary difference lies in the specific folder name required for the bootloader to identify the hardware.
1. Preparation
-
USB Stick: A high-quality USB 2.0 or 3.0 drive (8GB or smaller is recommended).
-
Format: Format the stick to FAT32.
-
Firmware: Download the image specifically for the Multibox 4K (original).
-
Recovery:
_recovery.emmc.zip(for a total reset). -
Multiboot:
_mmc.zip(for slot updates).
-
2. Folder Structure
The receiver looks for a specific directory name on the USB root.
-
Extract the downloaded firmware zip.
-
You will see a folder named
novaler. -
Copy the entire
novalerfolder to the root of your USB stick.-
Path:
USB:\novaler\multibox\ -
Contents: Inside, ensure you see
usb_update.bin,boot.img, androotfs.tar.bz2.
-
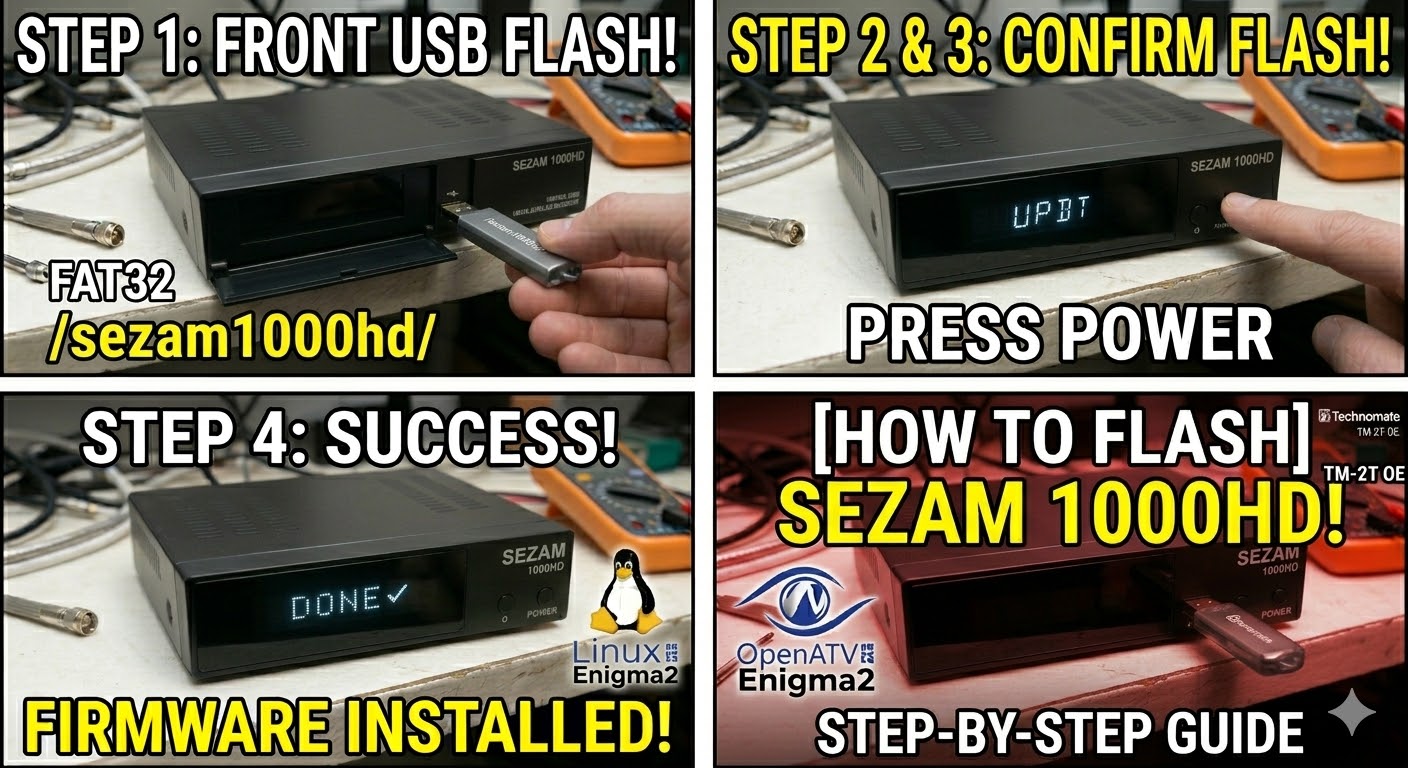
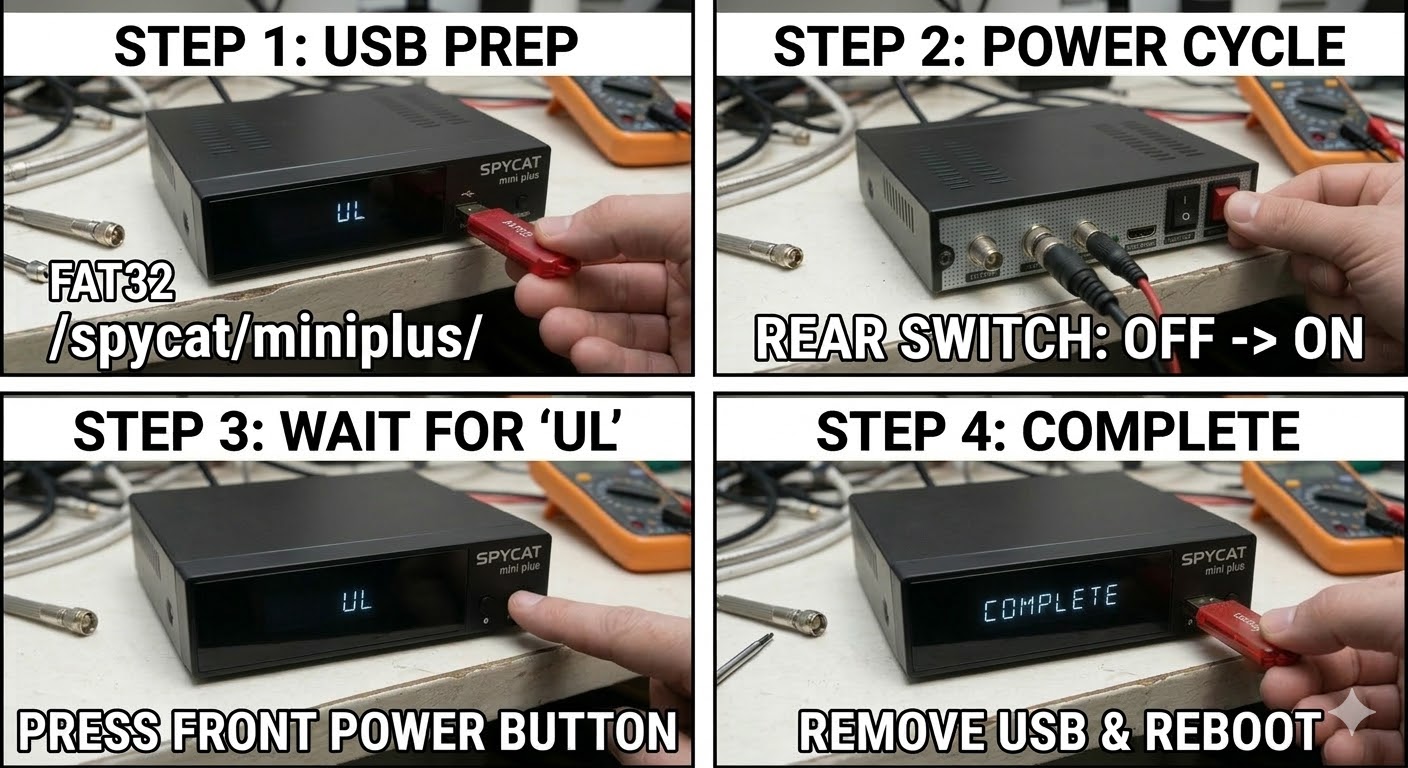
3. The Flashing Process (Recovery Menu)
-
Power Off: Turn off the receiver using the power switch at the back.
-
Insert USB: Plug the stick into the side USB 3.0 port.
-
Enter Recovery: * Press and hold the Power button on the front panel.
-
While holding it, turn the back power switch to ON.
-
Continue holding until the Novaler Recovery Menu appears on your TV screen.
-
-
Select Flash: Use the remote to choose:
-
“Flash Recovery Image”: To completely refresh the box.
-
“USB Multiboot Image Upgrade”: To install an image into a specific empty slot.
-
-
Confirm: Select the file from the USB and press OK. The display will show “UPDT”, and the box will reboot automatically when finished.
Pro-Tip for enigma2.net
When documenting the “Original” Multibox 4K for your site, remind users that while the SE and PRO are newer, the flashing logic is identical. The only change is the subfolder name: multibox (Original) vs multiboxse vs multiboxpro.