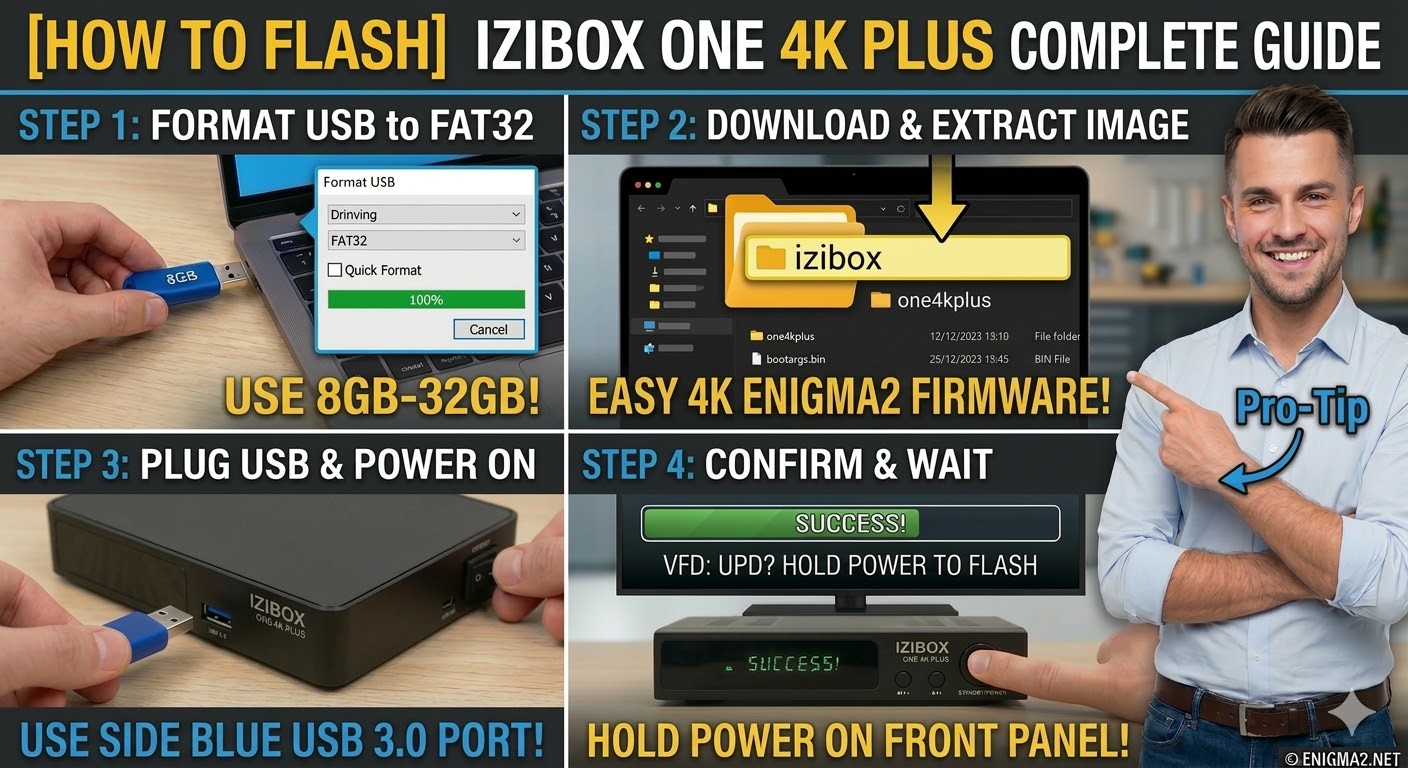
[HOW TO FLASH] how to flash IZIBOX ONE 4K Plus

To flash the IZIBOX ONE 4K Plus, you will use the procedure for modern HiSilicon-based 4K receivers. This model supports multiboot, meaning you can have multiple images installed at once, but the initial flash via USB requires a specific setup to be recognized.
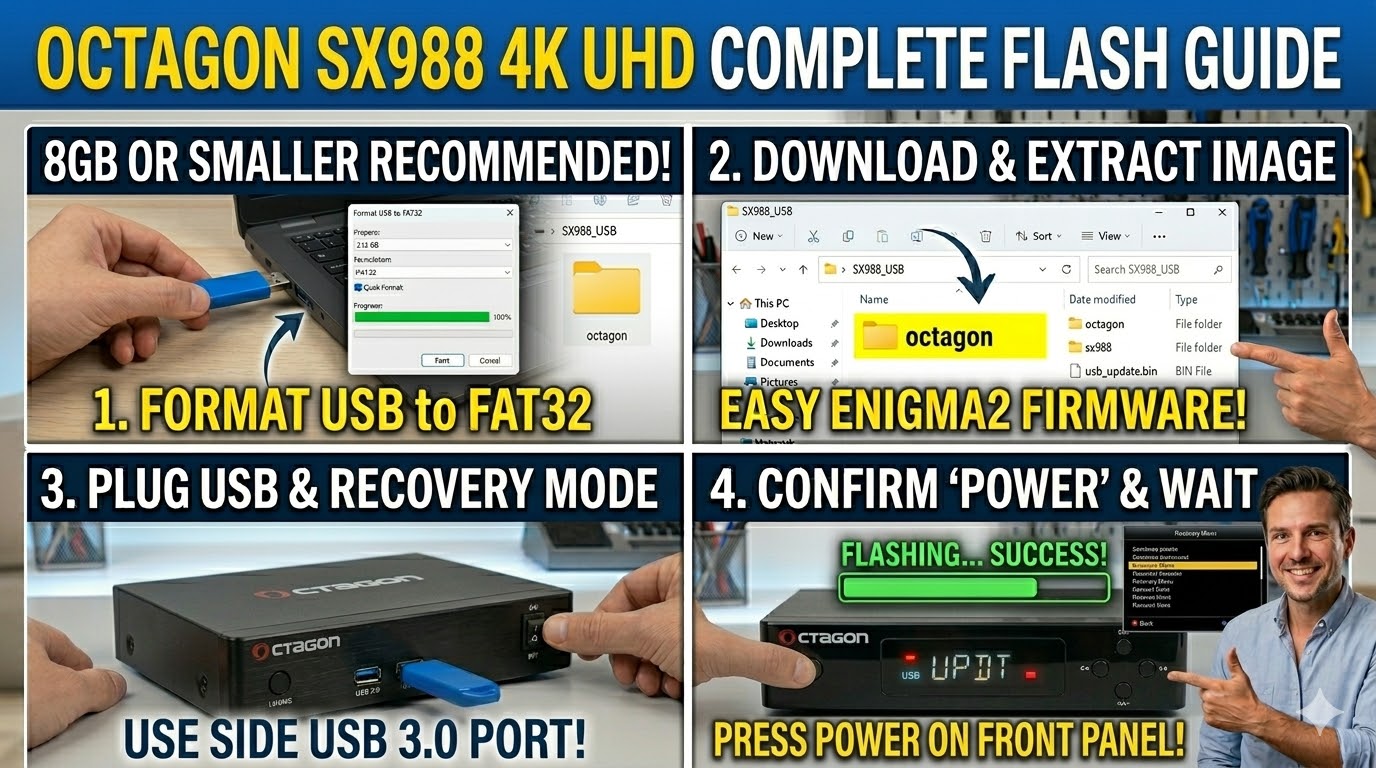
1. Preparation
-
USB Stick: A high-quality USB 2.0 or 3.0 stick. 8GB to 32GB is the ideal range.
-
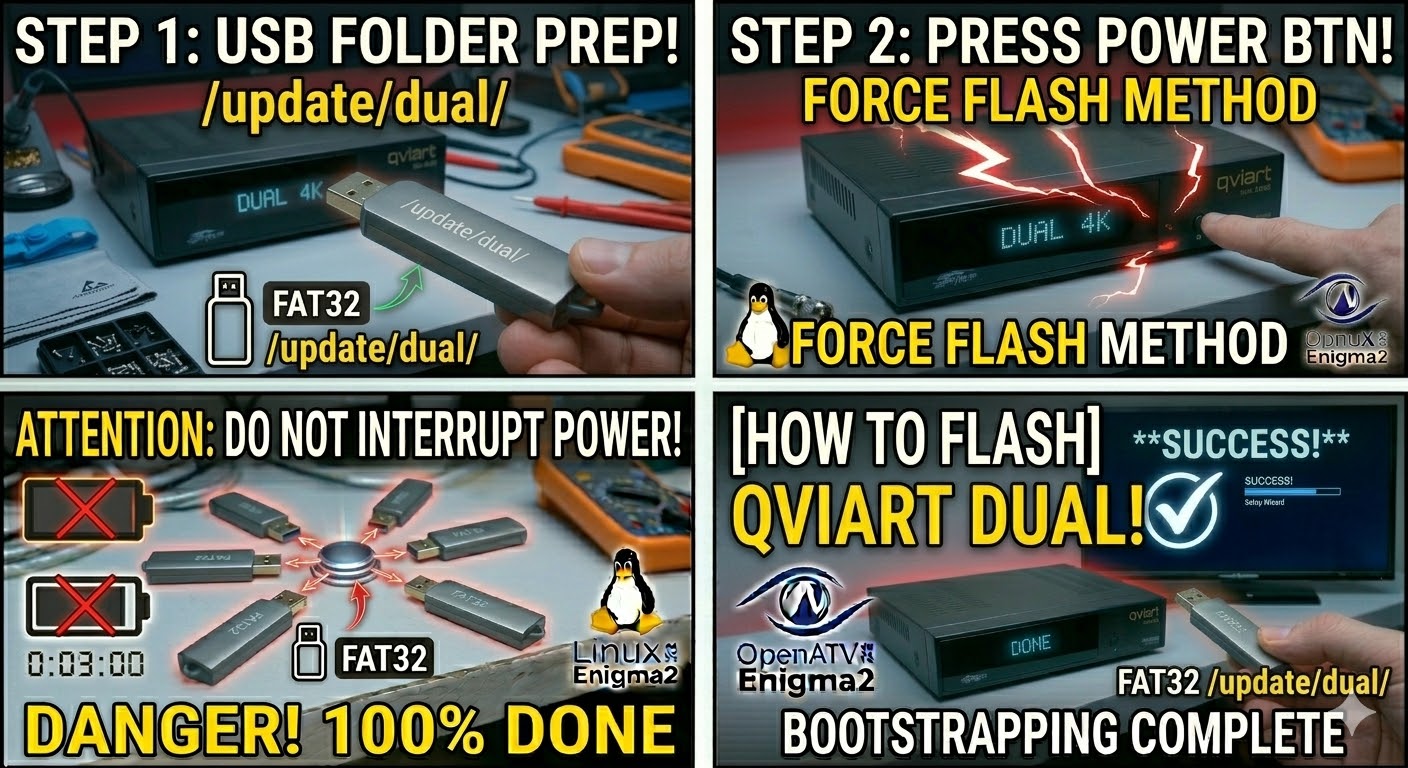
Format: The stick must be formatted to FAT32.
-
Firmware: Download the “recovery” or “USB” image specifically for the IZIBOX ONE 4K Plus (OpenATV is the standard recommendation for this hardware).
2. Folder Structure
-
Extract the downloaded firmware
.zipfile on your computer. -
You should see a folder named
izibox. -
Copy the entire
iziboxfolder to the root of your USB stick.-
Path:
USB:\izibox\one4kplus\ -
Contents: Inside the
one4kplusfolder, you will see files likebootargs.bin,fastboot.bin, andimage.flashorrootfs.tar.bz2.
-
3. The Flashing Process
-
Power Off: Turn off the receiver using the power switch at the back.
-
Insert USB: Plug the USB stick into the side USB 3.0 port (usually blue) for the most stable connection.
-
Initiate Flash:
-
Press and hold the Standby/Power button on the front panel.
-
While holding the button, turn the back power switch to ON.
-
-
Recovery Menu:
-
Continue holding the button until the Recovery Menu appears on your TV screen.
-
Use the remote to select “Flash Recovery Image” or “USB Multiboot Image Upgrade”.
-
-
Wait: The system will process the files. Do not interrupt the power.
-
Completion: The receiver will reboot automatically into the new image.
Pro-Tip for enigma2.net
The IZIBOX ONE 4K Plus is often confused with the standard “ONE 4K” (non-Plus). On your site, emphasize that the folder name must be one4kplus. If they use the folder for the standard version, the bootloader will reject it. Also, mention that if they are already in an Enigma2 image, they can often flash the new image directly through the “Flash Online/Local” menu without using the physical buttons.