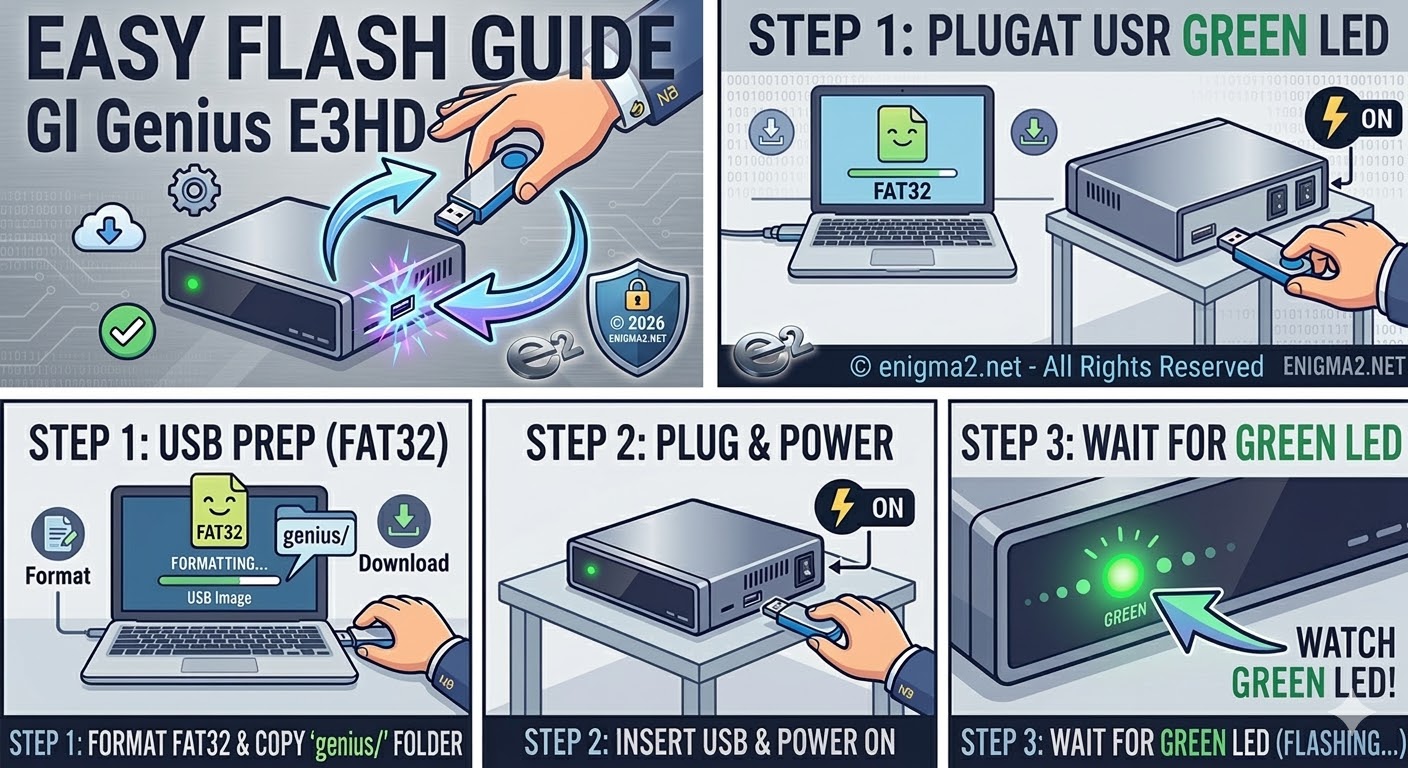
[HOW TO FLASH] how to flash GI Genius E3HD

To flash the GI Genius E3HD, you will use a very straightforward Enigma2 USB method. This model relies primarily on the power switch to trigger the process, looking for a specifically named file on the USB stick.
We think you’re working on updates for enigma2.net, so this guide and the accompanying illustrated thumbnails (image_17.png) are designed with a fresh, friendly, and consistent vector aesthetic.
Preparation
-
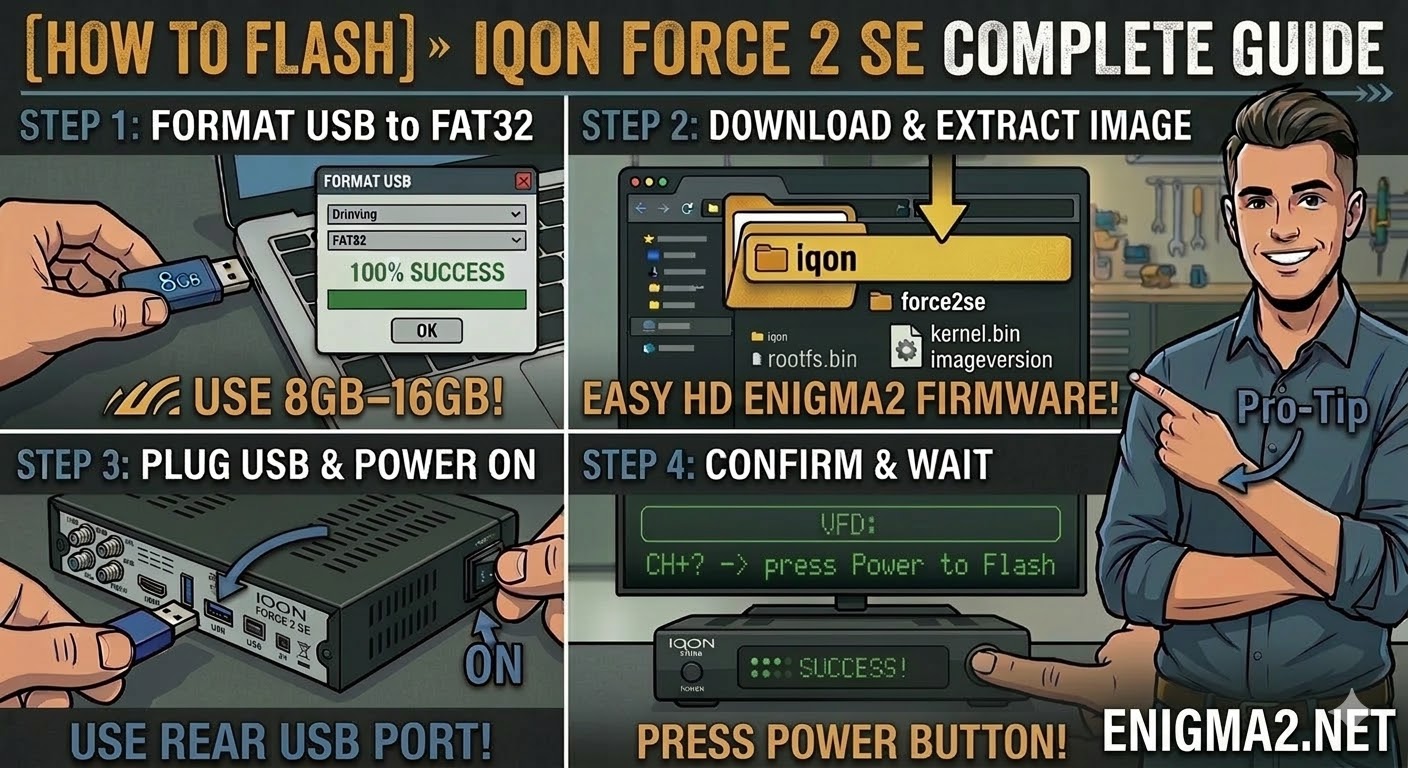
USB Stick: Use a high-quality USB 2.0 or 3.0 stick. Smaller capacities (e.g., 4GB–8GB) are recommended for better compatibility during the boot process.
-
Format: Format the stick to FAT32 using a Full Format on your PC.
-
Image: Download your preferred image (e.g., OpenATV, OpenViX, or TeamBlue). Make sure the image is named explicitly for the genius_e3hd or genius model.
-
File Structure: Extract the
.zipfile. You will see a folder structure that must be copied to the root of your USB stick. The structure must look like this:-
USB_ROOT:\genius\noforce...(orforce..., depending on the image and bootloader version). -
The critical folder
geniusmust be at the very top level of the USB drive.
-
Flashing Procedure
| Step | Action | Visual/Feedback |
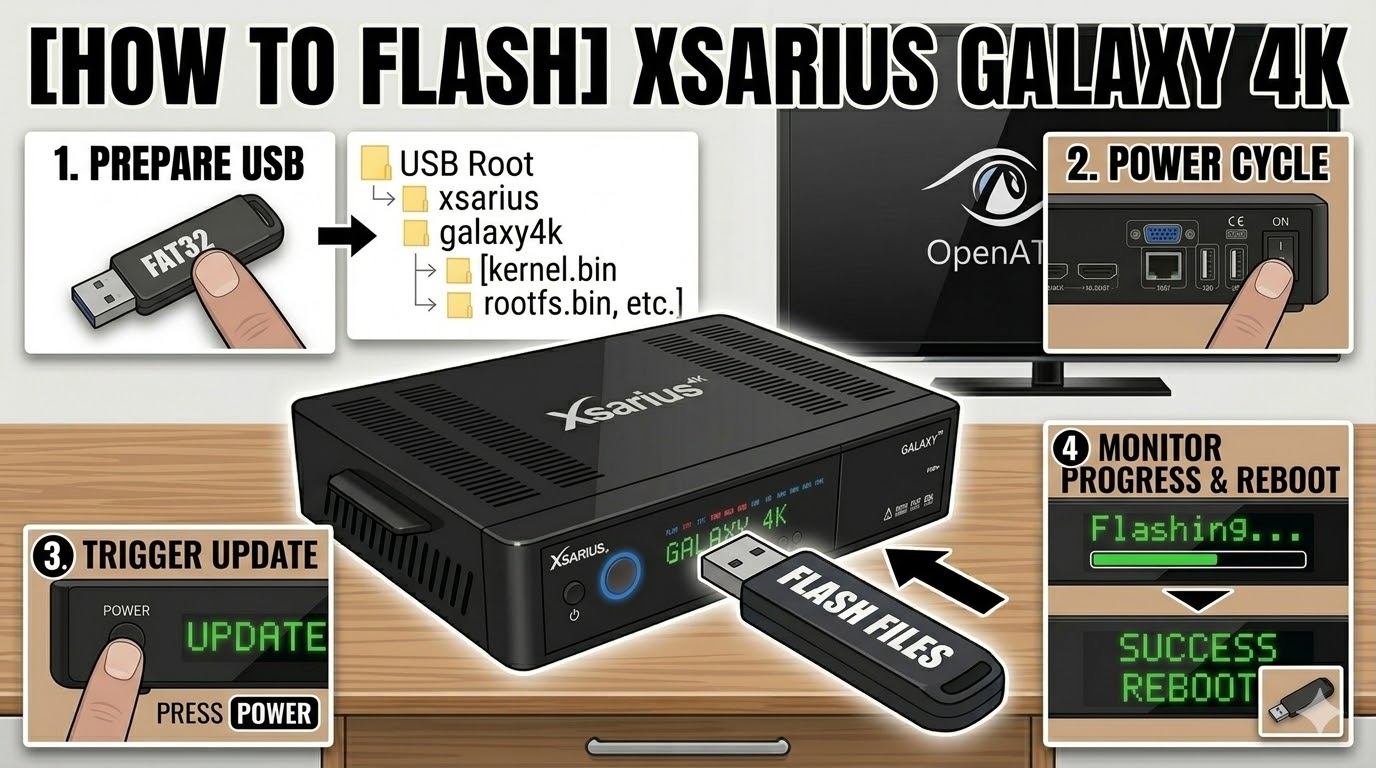
| 1. | Power Off | Fully turn off the receiver using the physical power switch or by unplugging the power supply. |
| 2. | Insert USB | Plug the prepared USB stick into the USB port on the receiver. |
| 3. | Power On | Apply power to the receiver. The box will detect the image on the stick. |
| 4. | Confirmation | If you see a prompt on your TV screen asking you to confirm flashing, immediately press the specific button required by that image. |
| 5. | Trigger Flash | Often, the GI Genius E3HD bootloader uses a simple trigger: as soon as it powers on with the stick inserted, you must instantly and rapidly press the front panel Power button. If successful, the front LED will typically turn a steady PURPLE/LILAC (similar to image_0.png) while the flashing is in progress. The TV screen will display “Flashing.” |
| 6. | Progress | The flashing process takes a few minutes. The Purple LED will likely flash in a different pattern (or change color, e.g., to Green) once the process finishes. |
| 7. | Completion | When the flashing is complete, the box will automatically reboot into the new image startup wizard. You can then safely remove the USB stick. |
Troubleshooting Tips
-
Box Bypasses the USB: If the box boots normally to the old image, the most common issues are:
-
USB Stick Compatibility: Try a different, smaller, and older USB 2.0 stick.
-
Incorrect File Structure: Ensure the
geniusfolder is in the root and contains the correct files. -
Button Timing: The window to press the front power button can be very short. Retry the power-on sequence and press it as fast as possible.
-
-
LED Feedback: ET-7000 and GI Genius models rely heavily on LED indicators during flashing. If the LED doesn’t change to Purple, the flashing is likely not triggered.
-
TV Prompt: Some images might display a message on the TV screen asking you to confirm flashing by pressing a button. Follow the on-screen instruction immediately.

The flashing process should take approximately two to four minutes to complete, while the receiver
is being flashed it is vitally important that you DO NOT power the receiver down for any reason as
this can cause serious and or permanent damage.