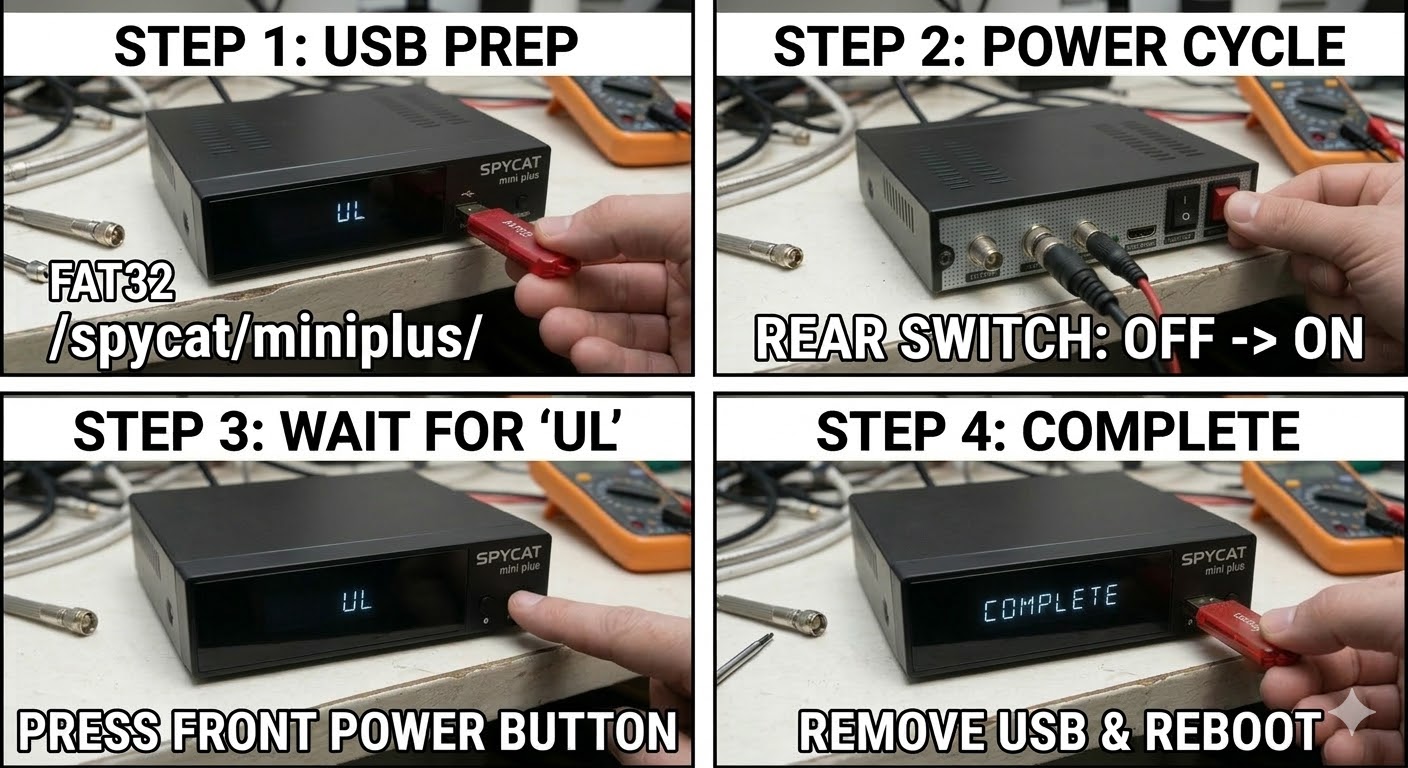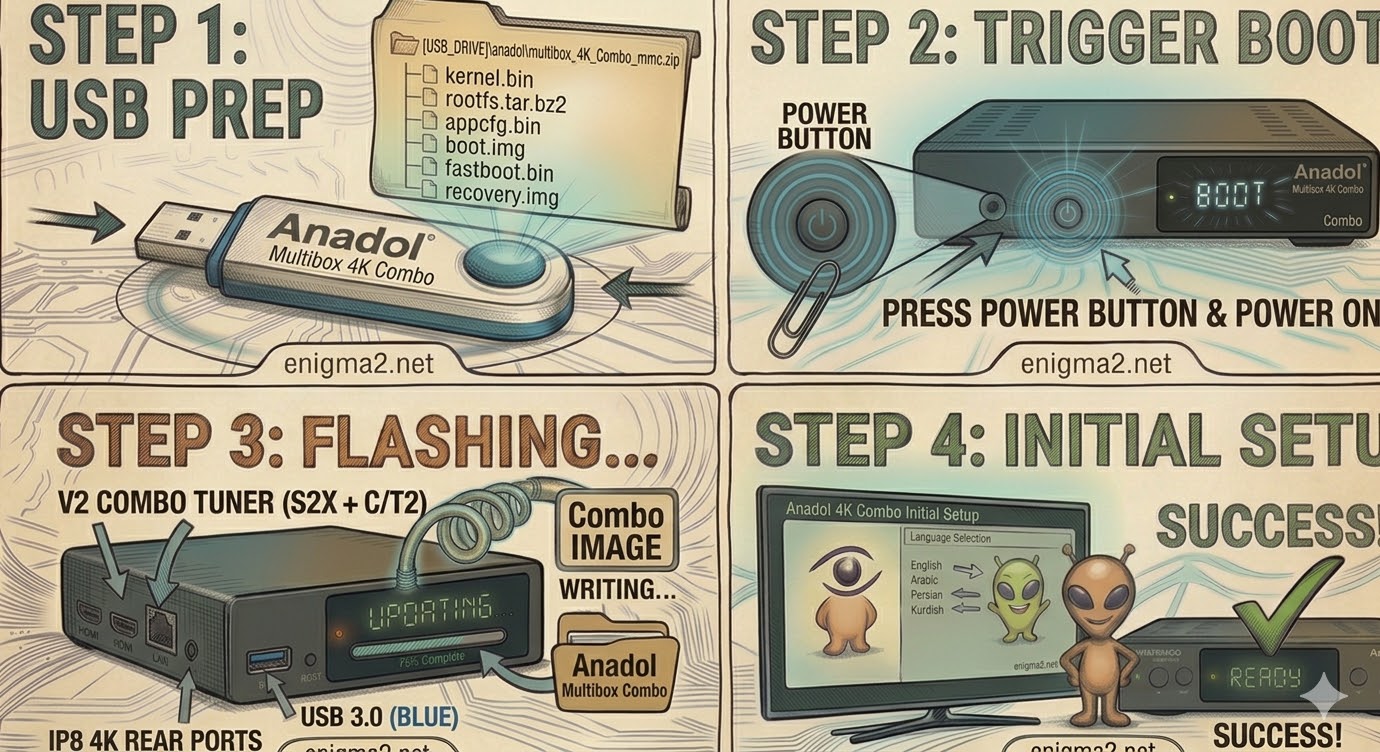
[HOW TO FLASH] how to flash PULSe 4K

To flash the PULSe 4K (the full-sized version of the Mini), you are using a high-performance HiSilicon-based receiver. Like the Mini, it uses a Recovery Menu system that allows for “Multibooting,” meaning you can install multiple images into different slots.
Preparation
-
USB Drive: Use a USB 2.0 or 3.0 stick formatted to FAT32.
-
Download Image: Ensure you have the firmware specifically for the PULSe 4K (not the Mini).
-
Extract Files: Unzip the archive. You should see a folder named
pulse4k. -
Copy to USB: Place the entire
pulse4kfolder in the root of the USB drive.-
Structure:
USB Stick -> pulse4k -> (files: imageversion, kernel.bin, rootfs.bin, etc.).
-
The Flashing Process
-
Power Down: Turn off the receiver using the physical power switch at the rear.
-
Insert USB: Plug the USB stick into the front USB port (behind the flap) or the rear port.
-
Initiate Recovery Mode:
-
Press and hold the Standby/Power button on the front panel.
-
While holding it, flip the rear power switch to ON.
-
-
Access Menu: * Keep holding the button until the Multiboot/Recovery Menu appears on your TV screen.
-
Use your remote to navigate to “Flash Recovery Image” (for a clean install) or “USB Multiboot Image Upgrade”.
-
-
Confirm Slot: Select which slot you want to flash the image into (usually Slot 1 for your main image).
-
Wait: The screen will show a progress bar. Do not turn off the power during this process.
-
Complete: Once finished, select “Boot” from the menu or allow it to reboot automatically.
Quick Tips
-
Front vs. Rear: While both ports work, the front USB port is generally more reliable for initial bootloader recognition.
-
Slot Management: Because this box has 4 slots, you can keep your old stable image in Slot 1 and test new ones in Slot 2.

The flashing process should take approximately two to four minutes to complete, while the receiver
is being flashed it is vitally important that you DO NOT power the receiver down for any reason as
this can cause serious and or permanent damage.