[ANDROID] Enigma2 Viewer for FireTV 1.0.4
Enigma2 Viewer for FireTV
| Channel browsing | All bouquets & services fetched via OpenWebif REST API |
| EPG guide | Full multi-channel grid EPG with D-pad navigation |
| Live streaming | HLS/TS over HTTP via Enigma2’s built-in stream server (port 8001) |
| Now/Next overlay | Shows current & next programme on every channel row |
| OSD | On-screen display with channel name, programme, time and progress bar |
| HTTP Basic Auth | Optional username/password for password-protected receivers |
| Settings | In-app settings screen to change receiver IP / port / credentials |
| **Multi-device** | Configure multiple Enigma2 receivers; switch with one button on the main screen |
| **Recordings** | Browse, search and play back recordings stored on the receiver |
| **Playlists** | Create and manage recording playlists; reorder entries, play sequentially with auto-advance |
| **Video folder** | Add video files from `/media/hdd/video` on the receiver directly into a playlist |
USER GUIDE
# Enigma2 FireTV – User Guide
## Table of Contents
1. [First-Time Setup](#1-first-time-setup)
2. [Main Screen](#2-main-screen)
3. [Watching Live TV](#3-watching-live-tv)
4. [OSD & Playback Controls](#4-osd–playback-controls)
5. [EPG Guide](#5-epg-guide)
6. [Recordings](#6-recordings)
7. [Playlists](#7-playlists)
8. [Multiple Devices](#8-multiple-devices)
9. [Settings](#9-settings)
10. [Remote Control Reference](#10-remote-control-reference)
—
## 1. First-Time Setup
When you launch the app for the first time you will be taken to the **Setup** screen.
| Field | Description |
|—|—|
| Device Name | A friendly label (e.g. “Living Room Vu+”) |
| Host / IP Address | Local IP of your Enigma2 receiver (e.g. `192.168.1.100`) |
| Port | HTTP port of OpenWebif — default is **80** |
| HTTPS | Enable only if your receiver is configured for HTTPS |
| Username / Password | Leave blank if your receiver has no login |
Tap **Save** (or press OK) when done. The app will connect and load your channel list.
> **Tip:** Make sure OpenWebif is installed and enabled on your receiver and that the receiver is on the same Wi-Fi network as your Fire TV.
—
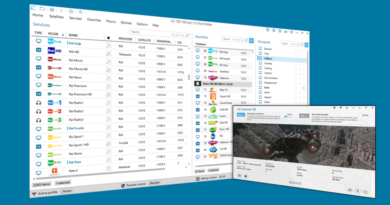
## 2. Main Screen
The main screen is split into two panels:
– **Left panel** — bouquet (channel group) list
– **Right panel** — channel list for the selected bouquet
### Toolbar buttons (top-right)
| Button | Action |
|—|—|
| Switch Device | Switch between configured receivers |
| EPG | Open the full EPG grid |
| Recordings | Browse recordings stored on the receiver |
| Playlists | Open your saved playlists |
| Settings | Change receiver settings |
Use the **D-pad** to move between bouquets and channels. Press **OK / Select** on a channel to start playing it.
—
## 3. Watching Live TV
Pressing OK on a channel immediately starts playback in full-screen. The stream is delivered directly from the receiver over HTTP (port 8001).
– The **OSD** (on-screen display) appears automatically when playback starts, then fades out.
– Press **OK / Select** or **Play/Pause** at any time to show the OSD again.
– Press **Back** to stop playback and return to the channel list.
—
## 4. OSD & Playback Controls
### Live TV OSD
Shows:
– Channel name and logo
– Current programme title and next programme
– Event progress bar
### Recordings OSD
Shows:
– Recording title
– Seek bar with current position and total duration
– Playlist position indicator (e.g. **2 / 5**) when playing a queue
### Seek controls (recordings only)
| Button | Action |
|—|—|
| D-pad Right | Seek forward |
| D-pad Left | Seek backward |
| OK | Confirm seek position |
### Playlist playback
When playing a playlist the player automatically advances to the next entry when the current one ends. The OSD shows your position in the queue (e.g. **3 / 7**). There is no manual skip button — use the Back button to exit and then tap a different entry in the playlist to jump to it.
—
## 5. EPG Guide
Open the EPG by pressing the **EPG** button in the toolbar.
– The grid shows all channels with their current and upcoming programmes.
– The time ruler runs across the top.
– The current time is highlighted with a vertical marker.
| Button | Action |
|—|—|
| D-pad Up/Down | Move between channels |
| D-pad Left/Right | Scroll backwards/forwards in time |
| OK / Select | Show programme details / tune to channel |
| Back | Close EPG and return to channel list |
—
## 6. Recordings
Open **Recordings** from the main screen toolbar.
The screen is split into:
– **Left panel** — list of all recordings on the receiver, sorted newest first
– **Right panel** — details of the focused recording (title, channel, date, duration, description)
### Playing a recording
Press **OK** on any recording to start playback.
### Adding a recording to a playlist
**Long-press** (hold OK for ~1 second) any recording. A dialog appears:
– Tap an existing playlist to add the recording to it.
– Tap **Create new playlist…** to make a new playlist and add the recording in one step.
### Refreshing the list
The list loads automatically when you open the screen. Press the **Refresh** button in the toolbar to reload from the receiver.
—
## 7. Playlists
### Opening Playlists
Tap **Playlists** in the main screen toolbar.
### Creating a playlist
1. Tap **New Playlist**.
2. Enter a name and press **Create**.
### Adding content to a playlist
**From Recordings:**
– Go to **Recordings**, long-press any recording, and pick a playlist.
**From the video folder (`/media/hdd/video`):**
1. Open a playlist (tap it in the Playlist Manager).
2. Tap **Add Video Files**.
3. The app fetches all video files from `/media/hdd/video` on the receiver.
4. Tap any file to add it to the playlist. A confirmation toast appears.
5. Press **Back** to return to the playlist — your additions are saved immediately.
### Managing playlist entries
Inside a playlist detail screen:
| Control | Action |
|—|—|
| Tap an entry | Play from that entry (queue continues to the end) |
| ▲ button | Move entry up |
| ▼ button | Move entry down |
| ✕ button | Remove entry from playlist |
| ▶ Play All | Play from the beginning |
| Add Video Files | Browse `/media/hdd/video` and add files |
### Renaming or deleting a playlist
From the **Playlist Manager**, long-press any playlist to get options for **Rename** or **Delete**.
—
## 8. Multiple Devices
You can configure as many Enigma2 receivers as you like.
### Adding a new device
1. Tap **Switch Device** on the main screen.
2. Tap **Add Device**.
3. Fill in the device details and tap **Save**.
### Switching devices
1. Tap **Switch Device**.
2. Tap the receiver you want to use. The app reconnects immediately.
### Editing or deleting a device
From the **Switch Device** screen, long-press any device entry for **Edit** or **Delete** options.
> **Note:** You cannot delete the last configured device. The most recently used device is reconnected automatically on next launch.
—
## 9. Settings
Open **Settings** from the main screen toolbar.
| Setting | Description |
|—|—|
| Host | IP address or hostname of the active receiver |
| Port | OpenWebif HTTP port (default 80) |
| HTTPS | Use HTTPS instead of HTTP |
| Username | HTTP Basic Auth username (leave blank if none) |
| Password | HTTP Basic Auth password (leave blank if none) |
| Hidden Bouquets | Choose bouquets to hide from the channel list |
Changes take effect immediately — the app reinitialises the API connection after saving.
—
## 10. Remote Control Reference
| Button | Action |
|—|—|
| D-pad Up / Down | Navigate lists, channel rows, EPG rows |
| D-pad Left / Right | Navigate EPG timeline; seek in recordings |
| OK / Select | Confirm selection; show/hide OSD during playback |
| Back | Go back; exit playback |
| Play / Pause | Toggle pause; show OSD |
| Fast-forward | Seek forward in recordings |
| Rewind | Seek backward in recordings |
| Menu | (Not used) |
—
*For build and installation instructions see [README.md](README.md).*
![]()