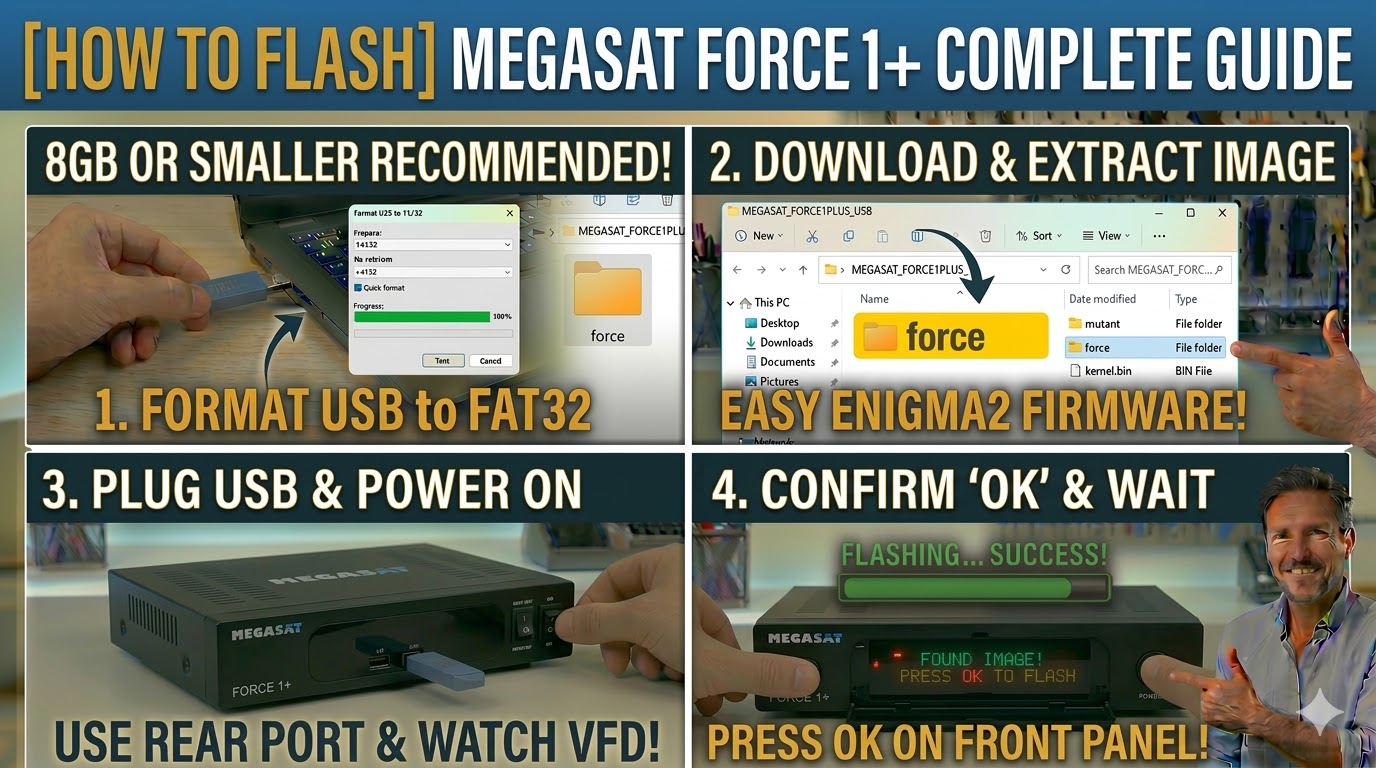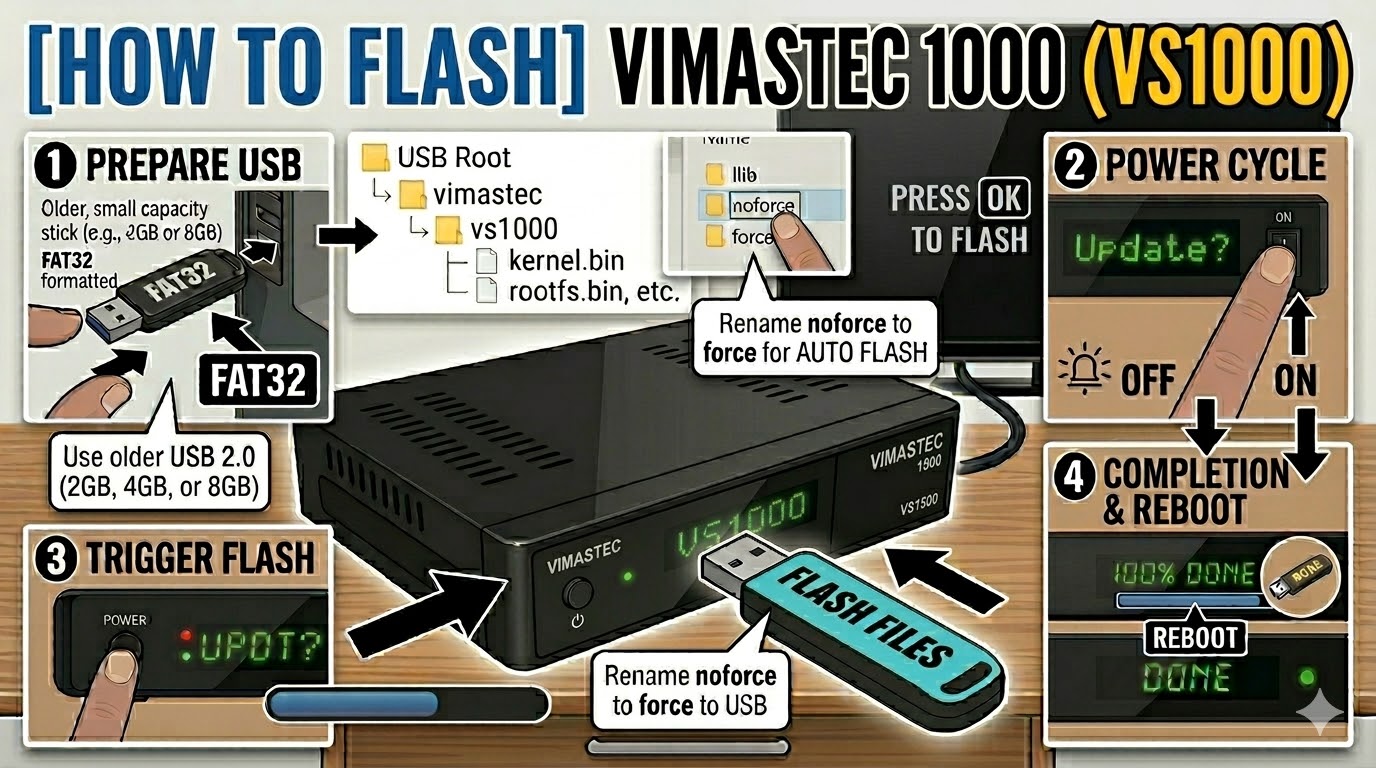
[HOW TO FLASH] how to flash vimastec 1000
The Vimastec 1000 (VS1000) is the compact version of the VS1500, but it uses the same Broadcom-based flashing logic. Because it’s an older HD-ready receiver, the “picky USB” rule is even more important here.
Preparation
-
USB Drive: Use a FAT32 formatted USB stick. For the VS1000, try to find an old 2GB or 4GB USB 2.0 drive. Many users find that modern 16GB+ drives simply won’t be recognized by the bootloader.
-
The Files: Extract your image (e.g., OpenATV). You must have a folder named
vimastecand a subfolder namedvs1000. -
Root Directory: Copy the
vimastecfolder to the root of your USB stick.-
Structure:
USB Drive -> vimastec -> vs1000 -> (bin/image files)
-
Flashing Steps
-
Power Down: Turn off the receiver using the physical power switch at the back.
-
Insert USB: Plug the USB stick into the rear USB port.
-
Power On: Turn the back switch to ON.
-
The Trigger: * Watch the front panel LED.
-
When the LED starts to blink rapidly or changes color, immediately press the Power Button on the front of the receiver.
-
-
Flashing Process: The LED will continue to blink or change patterns while the image is written. This takes about 3–5 minutes.
-
Completion: The receiver will automatically reboot.
-
Finalize: Remove the USB stick as soon as you see the boot logo on the TV screen.
Troubleshooting
-
“No USB” Issue: If the box boots directly to your old image, ensure the folder name is exactly
vs1000. If it still fails, try renaming the folder toatemio5x00(some early VS1000 batches used Atemio-branded bootloaders). -
Automatic Flash: If your front button is unresponsive, find the file
noforceinside thevs1000folder and rename it toforce. The receiver will then flash automatically upon power-up.

The flashing process should take approximately two to four minutes to complete, while the receiver
is being flashed it is vitally important that you DO NOT power the receiver down for any reason as
this can cause serious and or permanent damage.