[TUTO] How to setup picon ZZZ on OpenATV 8.0 image
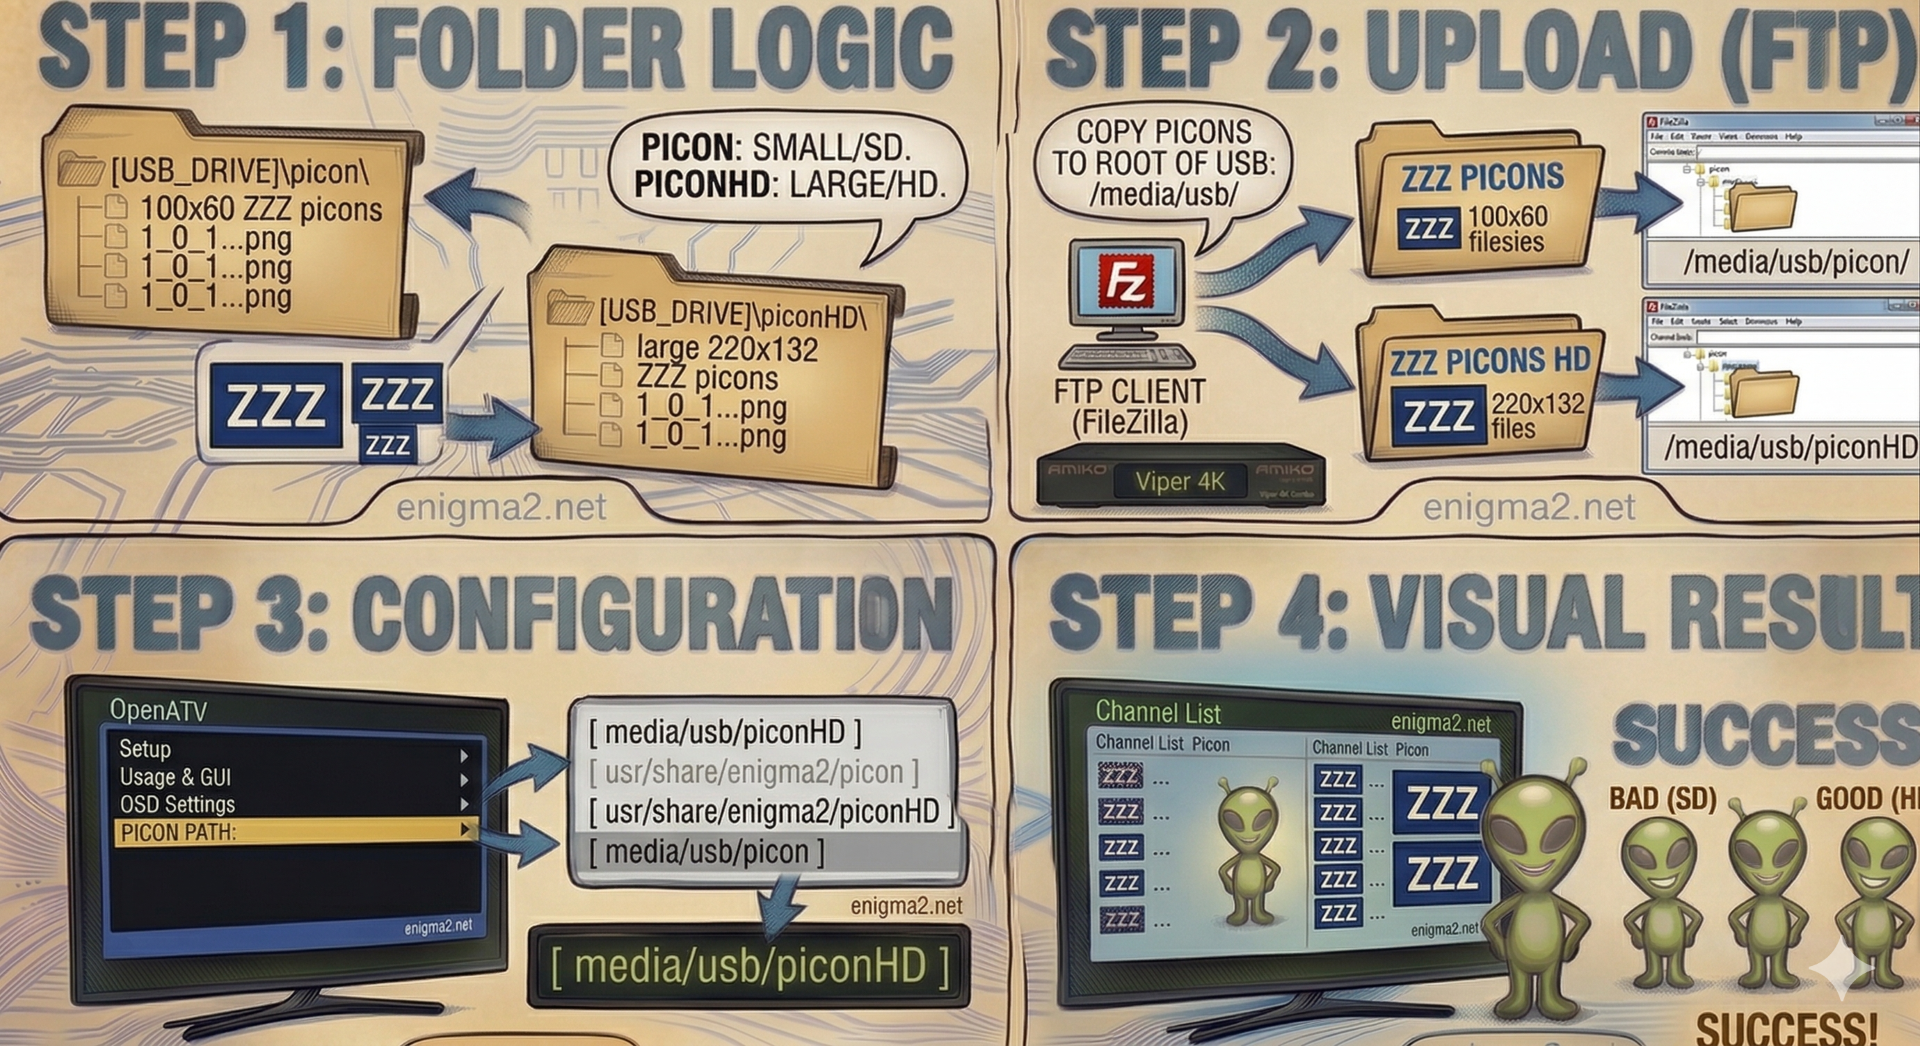
Step 1: Choose Your Storage Location
The ZZZ Picons are high-quality and take up significant space. Do not save them to internal Flash memory on older boxes.
-
Recommended: Use a USB stick or an SD card mounted as
/media/usb/. -
Create Folder: Create a folder named exactly
picon(lowercase) in the root of your drive.-
Path:
/media/usb/picon/
-
Step 2: Transfer the Picons
-
Download: Get the latest ZZZ Picon pack (usually a
.zipor.tar.gzfile).link:https://www.enigma2.net/category/enigma2/picons/ -
Extract: Unzip them on your PC. You will see hundreds of
.pngfiles named after Service Reference IDs (e.g.,1_0_19_...png). -
Upload: Use an FTP client (like FileZilla) to copy all these
.pngfiles into thepiconfolder you created in Step 1.
Step 3: OpenATV Configuration
Once the files are uploaded, you need to tell OpenATV where to look for them:
-
Open Settings: Press Menu > Setup > Usage & GUI > Channel Selection Settings.
-
Enable Picons: Ensure “Show picons in channel list” is set to Yes.
-
Picon Path: Usually, OpenATV auto-detects the
/media/usb/picon/path. If they don’t appear, go to Menu > Setup > Usage & GUI > OSD Settings and verify the picon path there. -
Save: Press the Green button (OK) and restart the GUI.