[HOW TO FLASH] how to flash Xsarius galaxy 4k

The Xsarius Galaxy 4K is a high-end Enigma2 receiver with a built-in display. The flashing process is very similar to the Revo 4K but relies on the front panel’s VFD to confirm the update.
Preparation
-
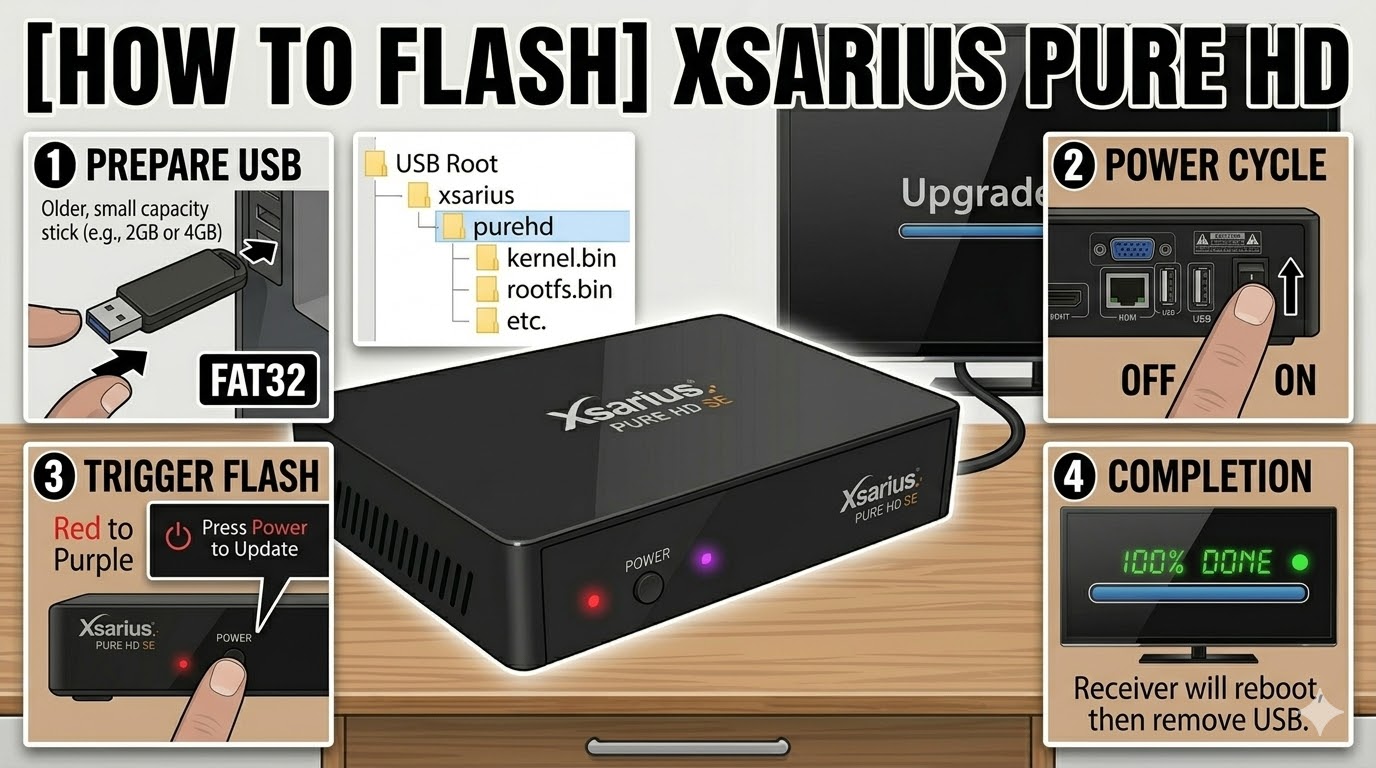
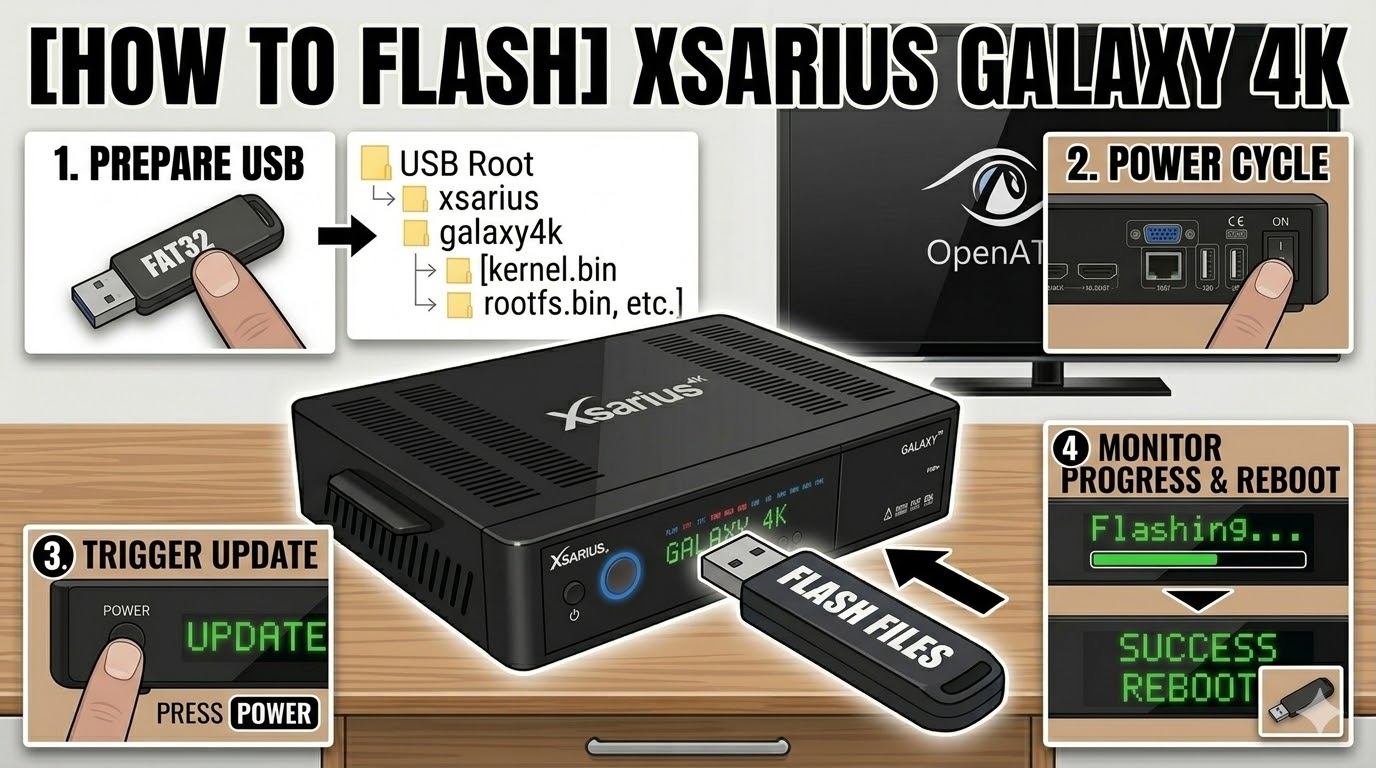
USB Drive: Use a FAT32 formatted USB stick. For 4K models, a 4GB or 8GB USB 2.0 stick is the “gold standard” for reliability.
-
The Files: Extract your image (OpenATV, Egami, etc.). You must see a folder named
xsariuscontaining a subfolder namedgalaxy4k. -
Correct Path: Copy the
xsariusfolder to the root of the USB.-
Path:
USB -> xsarius -> galaxy4k -> (image files)
-
Flashing Steps
-
Power Down: Turn off the receiver using the physical power switch at the back.
-
Insert USB: Plug the USB drive into the rear USB port.
-
Power On: Flip the rear switch to ON.
-
The Trigger: * Watch the front panel display (VFD).
-
When it shows “UPDATE” or “Press OK”, immediately press the Power Button (or OK button if prompted) on the front panel.
-
-
Flashing Process: The display will show “Flashing” or a progress indicator. This usually takes about 2–4 minutes.
-
Completion: Once the display says “Success” or “Done”, the box will reboot.
-
Finalize: Unplug the USB stick as soon as the reboot begins to ensure it doesn’t try to flash again.
Quick Tips
-
If it won’t flash: Double-check that the internal folder is named
galaxy4k. Some older images might use a generic name that doesn’t trigger the bootloader. -
Automatic Mode: If the front button isn’t responding, go into the
galaxy4kfolder on your PC, find the filenoforce, and rename it toforce. This will make the receiver flash automatically upon power-on.