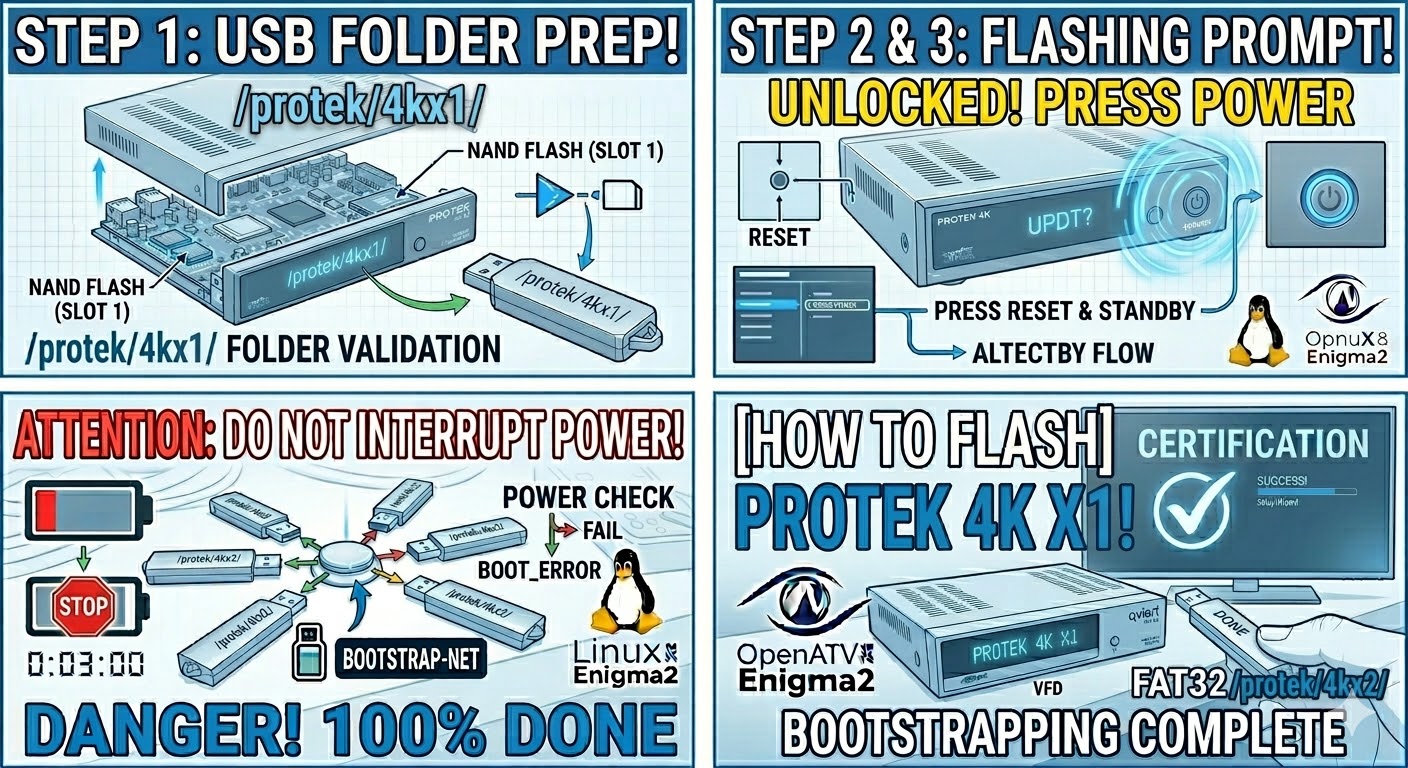
[HOW TO FLASH] how to flash Protek 4K X1

To flash the Protek 4K X1, the process is nearly identical to the X2, but you must use the specific folder designation for the X1 hardware. The Broadcom bootloader is programmed to look for a very specific path.
Preparation
-
USB Drive: Use a USB 2.0 stick (8GB or less is ideal), formatted to FAT32.
-
Download Image: Ensure you have the firmware (OpenATV, OpenHDF, etc.) specifically for the Protek 4K X1.
-
Extract Files: Unzip the folder on your PC. You will see a folder named
protek. -
Copy to USB: Transfer the entire
protekfolder to the root of the USB drive.-
Structure:
USB Stick -> protek -> 4kx1 -> (image files: kernel.bin, rootfs.bin, etc.).
-
The Flashing Process
-
Power Down: Turn off the receiver using the physical power switch at the back.
-
Insert USB: Plug the USB stick into one of the USB ports.
-
Power On: Flip the rear power switch to ON.
-
Initiate Flash:
-
Watch the front panel LED or the TV screen.
-
When the prompt “Update?” or “Press Power” appears, immediately press the Standby/Power button on the front panel.
-
-
Wait: The LED will blink during the process. Do not interrupt the power supply until the receiver reboots itself.
-
Complete: Once the setup wizard appears on the screen, the flash is successful and you can remove the USB stick.
Important Notes
-
Folder Specificity: The subfolder must be
4kx1. If it is named4kx2or anything else, the X1 will ignore the files. -
Force Method: If the front button is not responding, open the
4kx1folder on your USB, find the filenoforce, and rename it toforce. This will bypass the button press and start the flash automatically. -
Sensitivity: If the box boots to the old image, try the other USB port or a different USB stick.