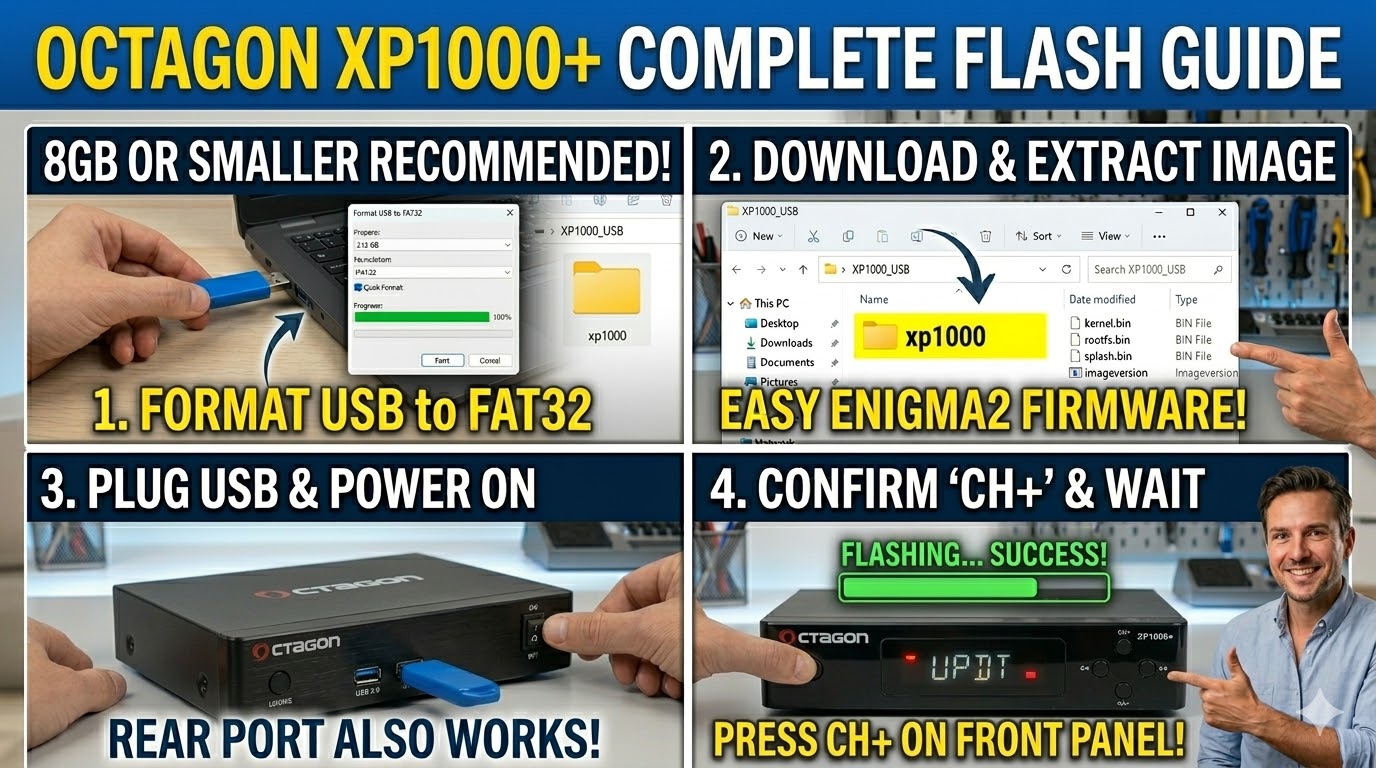
[HOW TO FLASH] how to flash Octagon XP1000 +
To flash the Octagon XP1000+, you will follow the standard Enigma2 USB method. The most important detail for this specific model is the folder name and the button-press sequence.
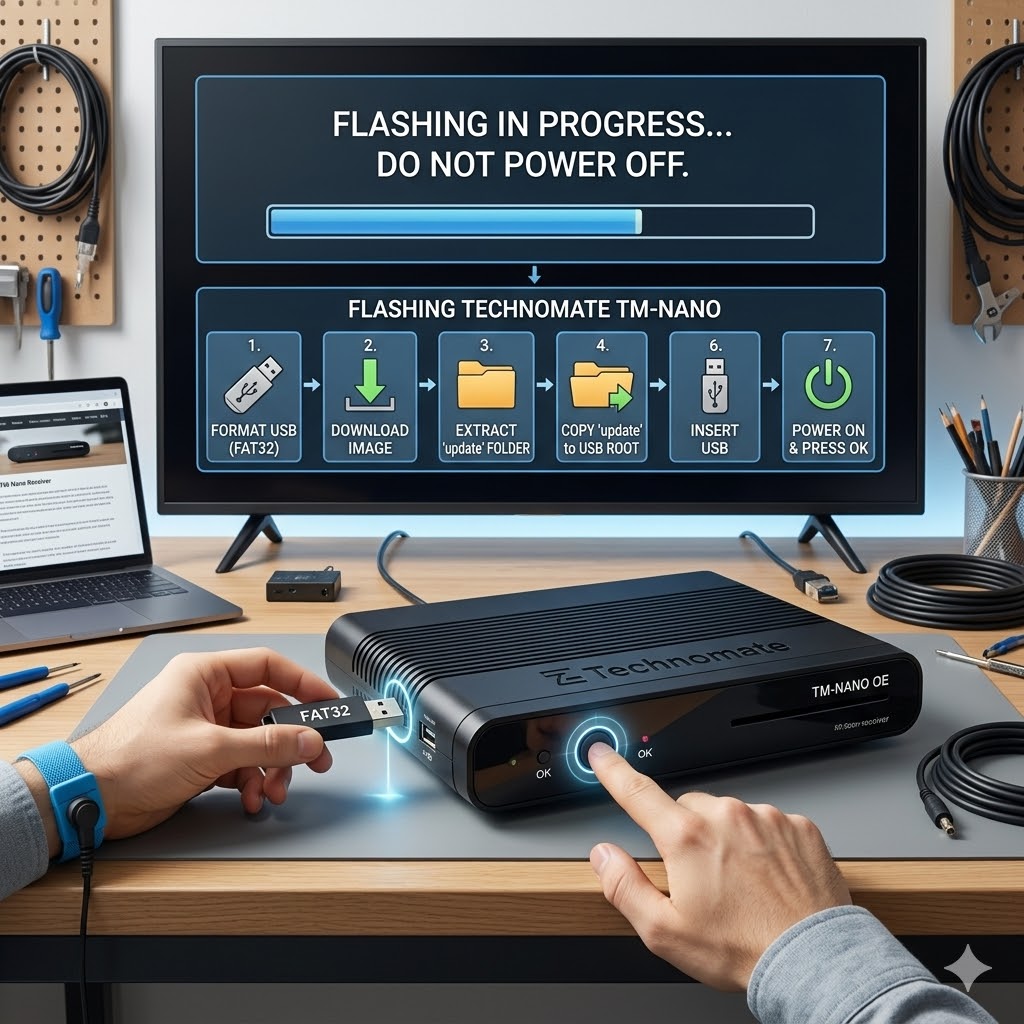
1. Preparation
-
USB Drive: Use a USB stick (max 8GB is safest).
-
Format: Format it to FAT32.
-
Firmware: Download your preferred image (OpenATV, OpenPLi, etc.).
2. Folder Structure
The Octagon XP1000+ requires a specific path to trigger the bootloader:
-
Extract the firmware
.zipfile. -
You will find a folder named
xp1000. -
Copy the entire
xp1000folder to the root of your USB stick.-
Path:
USB:\xp1000\ -
Contents: Inside, you should see files like
kernel.bin,rootfs.bin, andimageversion.
-
3. The Flashing Process
-
Power Off: Turn off the receiver using the power switch at the back.
-
Insert USB: Plug the USB stick into the rear or front USB port.
-
Power On: Turn the back switch to ON.
-
Confirm Flash: * Watch the front panel. When the LED starts flashing or a prompt appears, press the CH+ (Channel Up) button on the front panel of the receiver.
-
On some versions, you may need to press the Power button on the front panel instead.
-
-
Wait: The LED will usually change color (often flashing purple or red/blue) during the process. It takes about 2–3 minutes.
-
Reboot: The receiver will reboot automatically when finished. You can then remove the USB stick.
Master Guide Tip
If you are adding this to your site, enigma2.net, note that the XP1000+ is nearly identical in procedure to the Max Digital XP1000, but the folder name xp1000 remains the universal key for this hardware family.