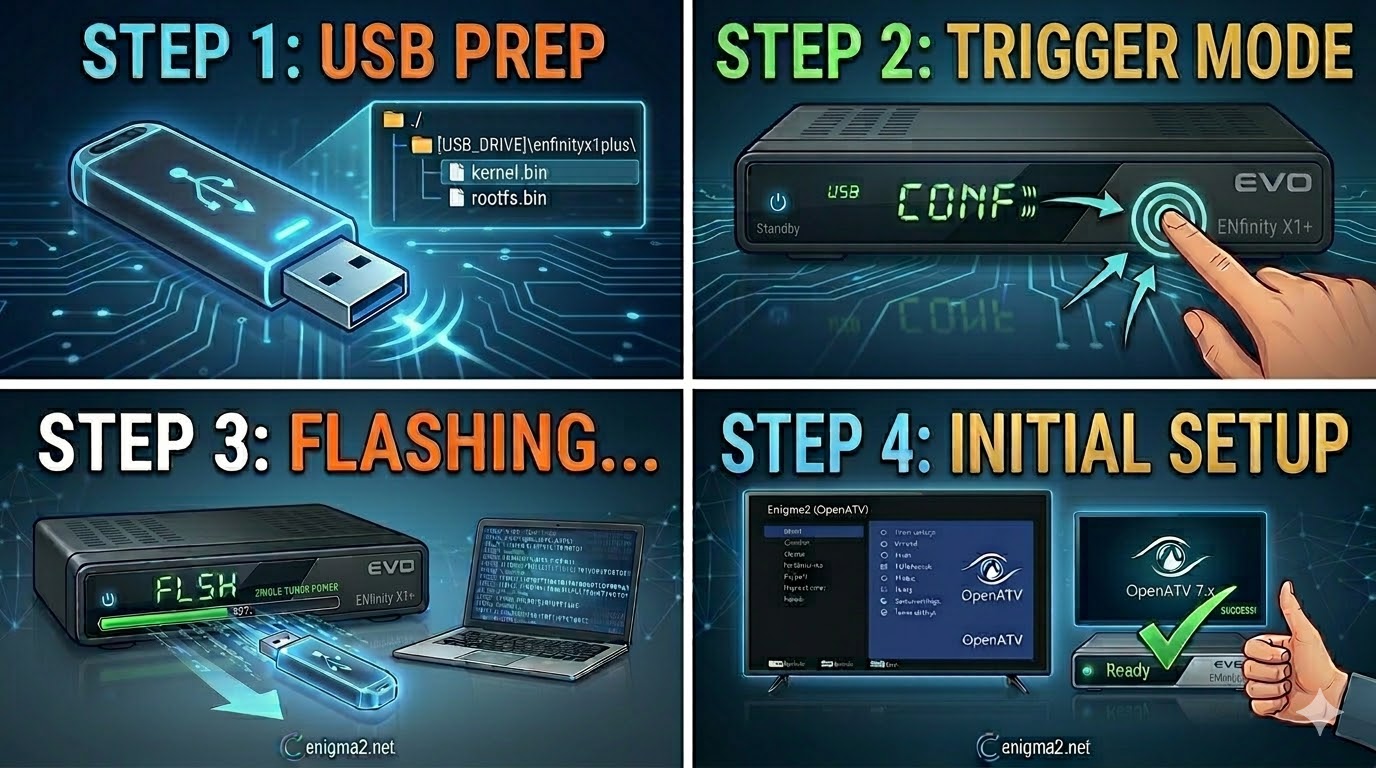
[HOW TO FLASH] how to flash EVO ENfinity X1 +

The EVO ENfinity X1+ is the single-tuner sibling of the X2+, and while the hardware is slightly different, the flashing logic remains very similar. To get your receiver updated for enigma2.net, follow these specific steps:
1. Prepare the USB Drive
-
Format: Use a USB 2.0 stick (max 8GB is best) formatted to FAT32.
-
The Folder Path: Extract your Enigma2 image (e.g., OpenATV). You must ensure the folder structure is exactly:
-
USB_ROOT/enfinityx1plus/
-
-
Check the Files: Inside that folder, you should have
kernel.binandrootfs.bin. -
The ‘Force’ Trick: Look for a file named
noforce. If you rename it toforce, the receiver will start flashing automatically upon power-up without needing a button press.
2. The Flashing Procedure
-
Power Down: Turn off the X1+ using the rear power switch.
-
Insert USB: Plug the stick into the rear USB port.
-
Boot & Trigger:
-
Turn the power switch to ON.
-
If you used
force: The front LED will begin to flash or change color immediately. -
If you used
noforce: Watch the front panel. When it displays “USB” or “CONF”, press the Power/Standby button on the front of the receiver.
-
-
Wait: The process takes about 3–4 minutes. The LED will blink during the write process.
-
Finish: The receiver will reboot into the new image. You can then safely remove the USB.

The flashing process should take approximately two to four minutes to complete, while the receiver
is being flashed it is vitally important that you DO NOT power the receiver down for any reason as
this can cause serious and or permanent damage.