[HOW TO FLASH] how to flash Edision Optimuss OS1 Plus

Flashing the Edision Optimuss OS1 Plus (Step-by-Step)
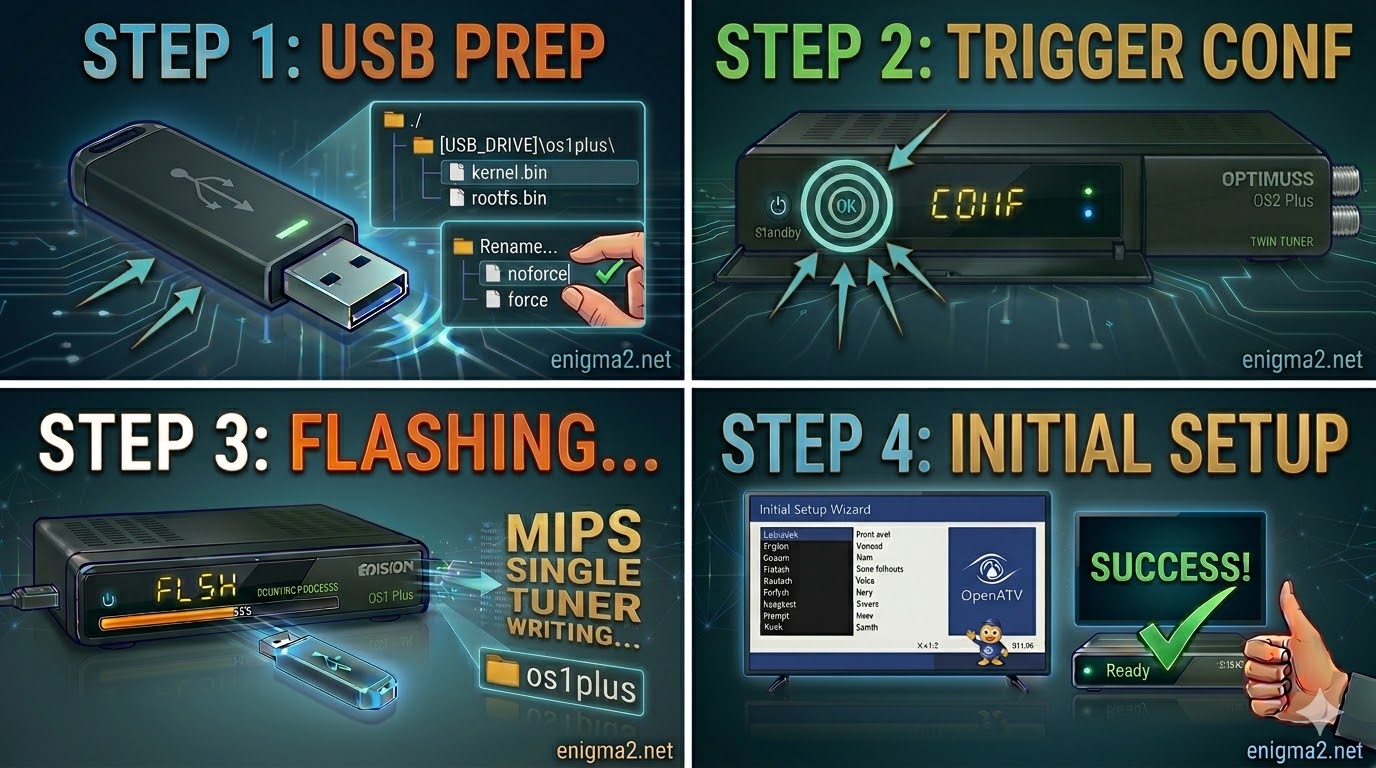
The Edision Optimuss OS1 Plus is a high-performance single-tuner MIPS receiver. For a successful installation, it is critical that the Enigma2 image files are placed into a specific folder named os1plus.
Phase 1: Prepare the USB Drive
-
USB Formatting: Obtain a high-quality USB 2.0 stick (FAT32 formatted). For MIPS bootloaders, a 4GB or 8GB stick is recommended to ensure it is detected.
-
Download and Extract: Download your chosen Enigma2 image (e.g., OpenATV, OpenPLi, OpenViX, etc.) to your computer.
-
The Specific Folder: The downloaded ZIP file must be extracted directly to the root of your USB drive, creating this structure:
-
USB_ROOT/os1plus/
-
-
Verify the Files: Open the
os1plusfolder on your USB stick. It must contain these three essential files:-
kernel.bin -
rootfs.bin -
imageversion
-
Important Note for Automation: If the os1plus folder contains a file named noforce, rename it to force. This small change allows the receiver to start flashing automatically without needing manual confirmation, which is highly recommended for this model.
Phase 2: The Flashing Procedure
Once the USB drive is prepared, follow these steps to rewrite the firmware:
-
Complete Power Down: Turn off the receiver using the physical power switch located at the rear of the unit.
-
Insert USB: Ensure no other USB devices are connected. Open the front drop-down flap and plug your prepared flash drive into the front USB port.
-
Initiate the Flash (The Trigger):
-
Turn the rear power switch to ON.
-
If you used the
forcehack: The front VFD display will change immediately (sometimes displaying “FLSH” or progress indicators) and the flashing process will begin. -
If you used
noforce: Watch the VFD display. When it displays “USB” or “CONF” (meaning confirm), quickly press the OK button on the front panel (behind the flap) or on your Remote Control.
-
-
The Waiting Period: The VFD display will keep you updated on the progress. The flash will take approximately 3–5 minutes.
-
DO NOT POWER OFF or remove the USB drive while the VFD indicates that writing is in progress. Doing so can brick the receiver.
-
-
Completion and Reboot: The receiver will reboot automatically once the flashing is complete. You can safely remove the USB stick when the first-time installation wizard (e.g., language selection) appears on your TV screen.

The flashing process should take approximately two to four minutes to complete, while the receiver
is being flashed it is vitally important that you DO NOT power the receiver down for any reason as
this can cause serious and or permanent damage.


