[HOW TO FLASH] how to flash beyonwiz V2
The Beyonwiz V2 is a compact, powerful ARM-based Enigma2 receiver. While it’s newer and faster, the flashing logic remains identical to the U4/T-series, with the critical change being the folder name on your USB drive.
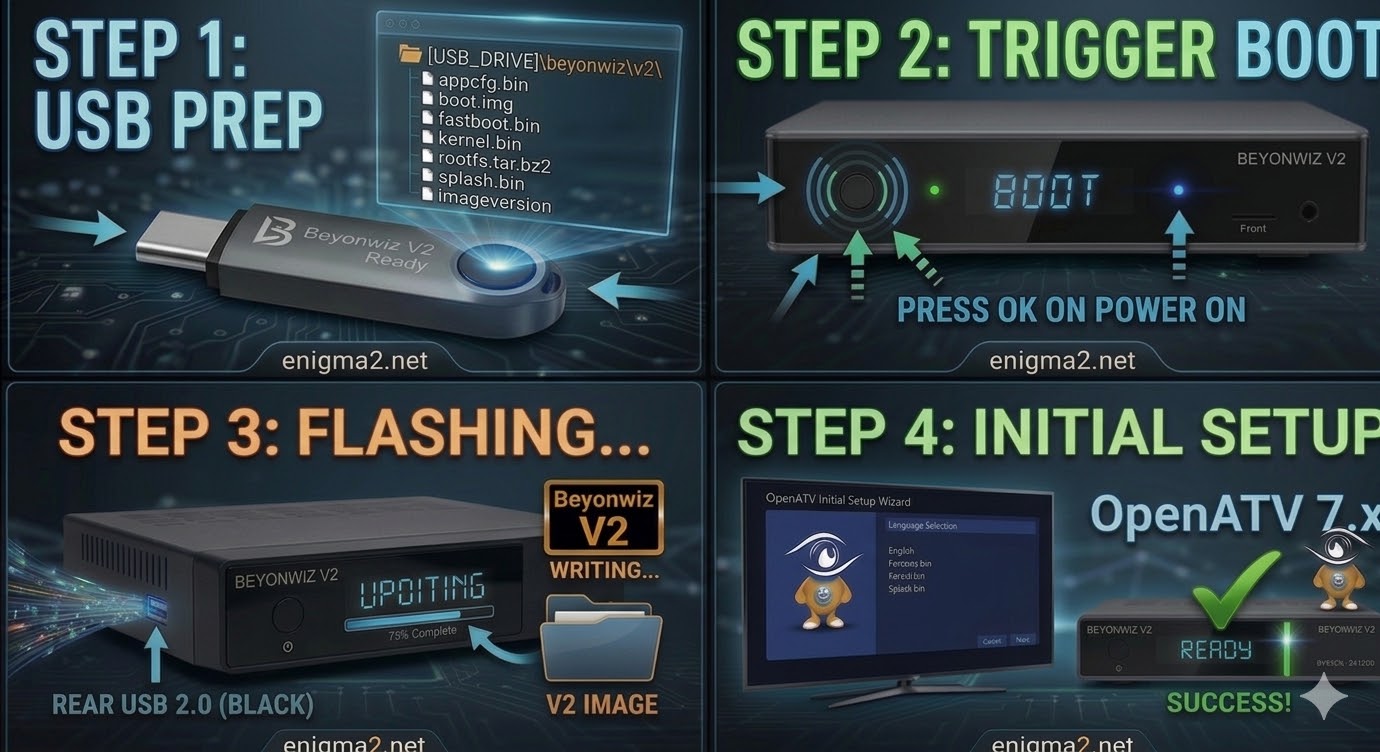
Step 1: USB Drive Preparation
-
Format: The USB stick must be FAT32. (Use a small, high-quality drive for best results).
-
Folder Structure: When you extract your chosen image (e.g., OpenATV), you will see a folder named
beyonwiz. -
Target Path: Inside that
beyonwizfolder, there must be a subfolder namedv2.-
Path check:
USB_DRIVE:\beyonwiz\v2\ -
Ensure files like
kernel.bin,rootfs.tar.bz2, andimageversionare inside thev2folder.
-
Step 2: The Flashing Procedure
-
Full Power Down: Turn off the V2 using the physical power switch on the back panel.
-
Insert USB: Plug your prepared USB drive into the side or rear USB port.
-
Boot & Trigger:
-
Switch the rear power toggle to ON.
-
Immediately watch the front panel display (VFD).
-
When the display shows “Update?” or “Press OK,” quickly press the Front Panel OK Button (not on the remote).
-
-
Wait for Progress: The display will cycle through “Reading,” “Writing,” and “Flashing.” The V2 is very fast due to its ARM architecture, usually finishing in under 2 minutes.
-
Reboot: Once the front panel indicates “Finished” or “Ready,” the box will automatically reboot. Remove the USB drive immediately to prevent it from entering the update loop again.

The flashing process should take approximately two to four minutes to complete, while the receiver
is being flashed it is vitally important that you DO NOT power the receiver down for any reason as
this can cause serious and or permanent damage.