[HOW TO FLASH] how to flash beyonwiz U4
The Beyonwiz U4 represents a significant hardware jump (moving to an ARM-based processor), but the flashing logic remains consistent with the Enigma2 standard you use for your site guides.
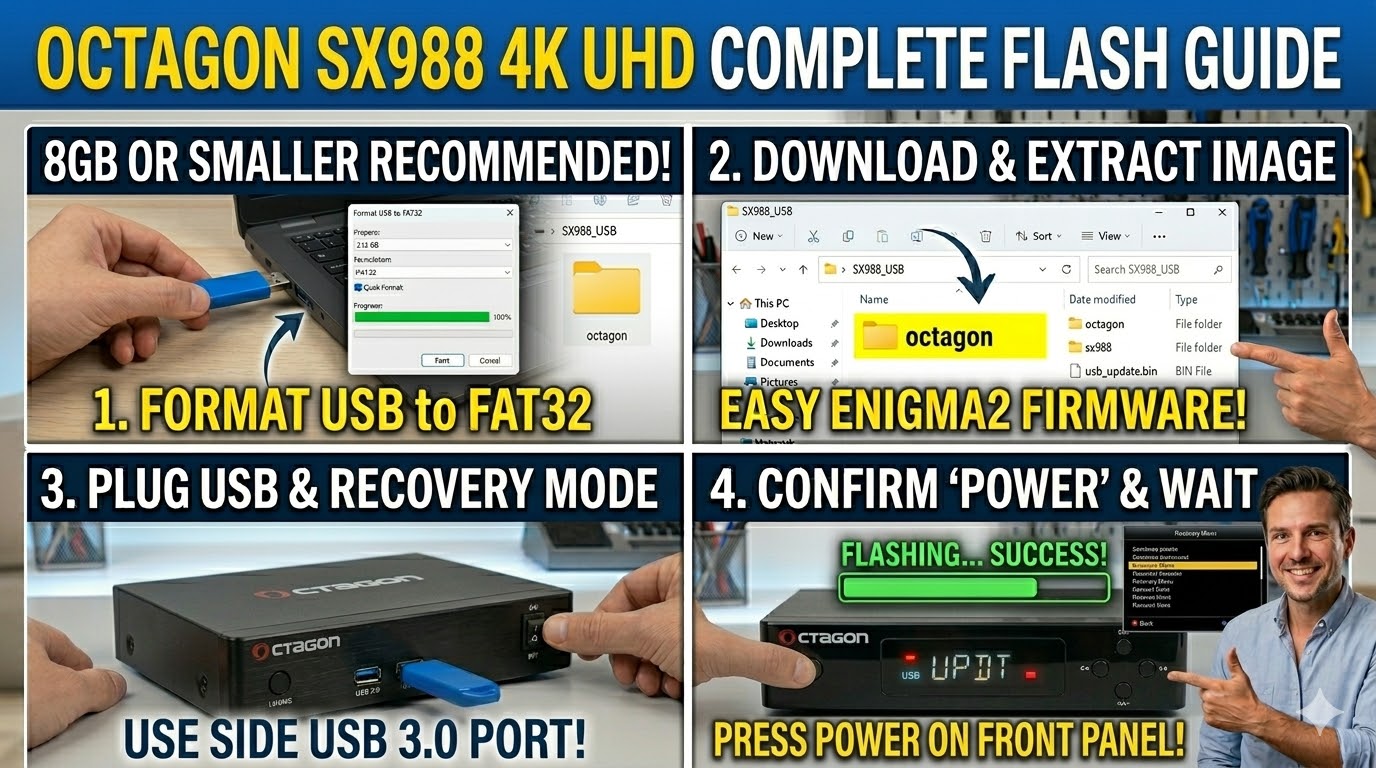
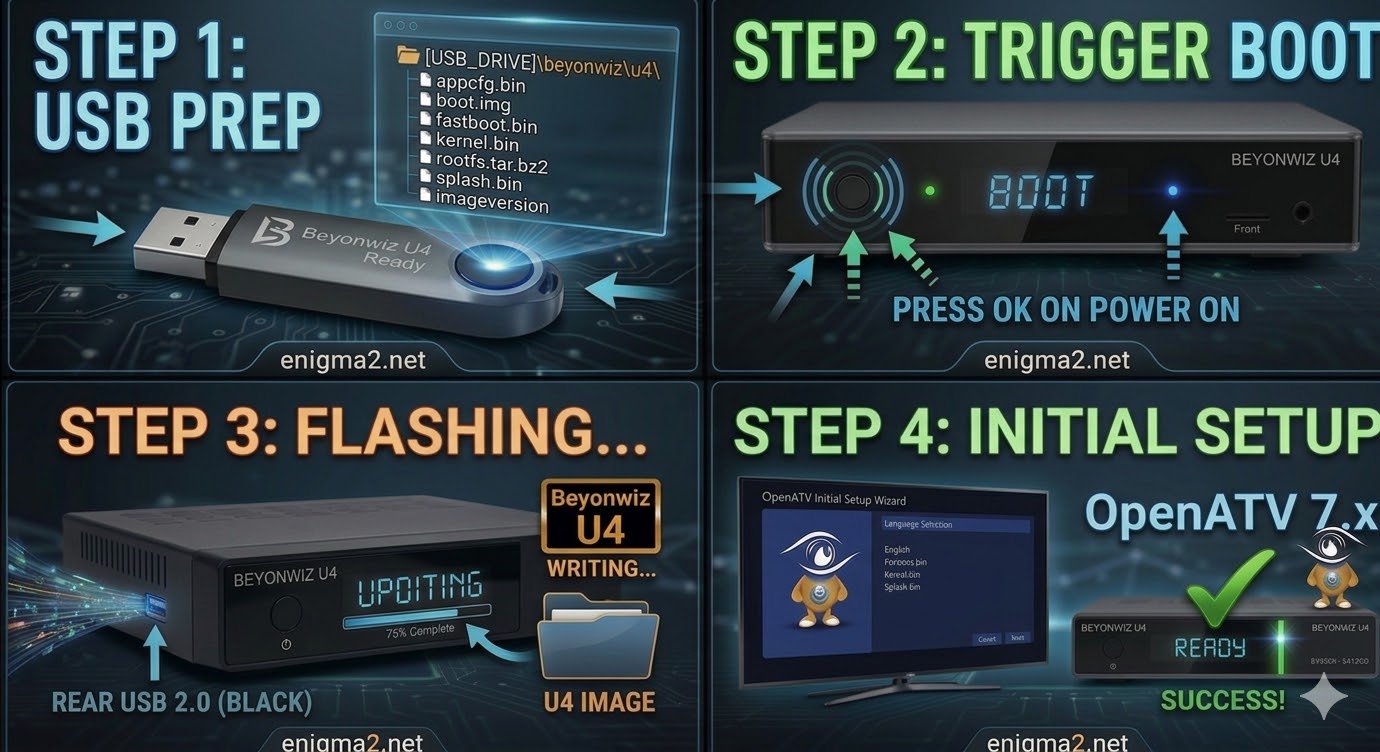
Step 1: USB Preparation
-
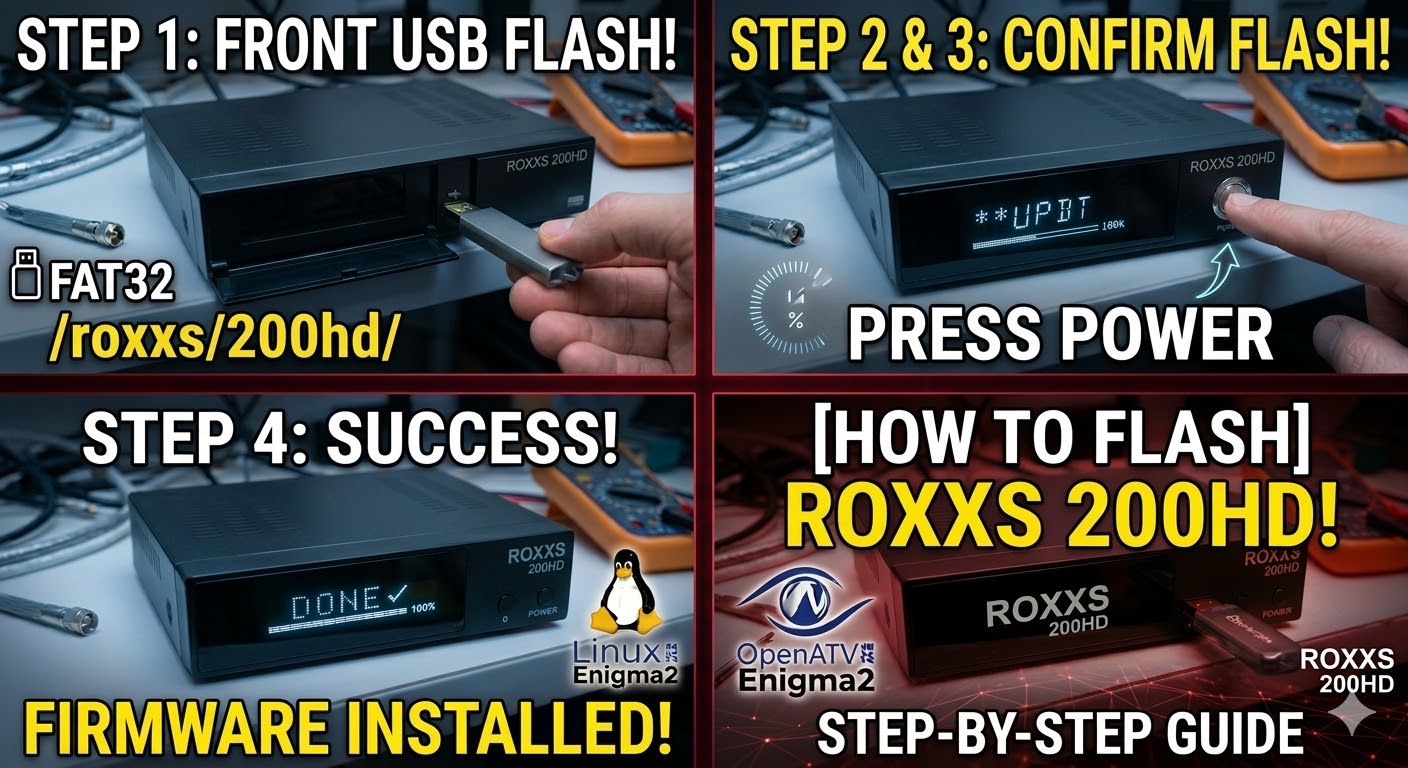
Format: Use a FAT32 formatted USB drive (8GB or smaller is highly recommended for compatibility).
-
Folder Structure: Unzip your firmware (e.g., OpenATV 7.x). You will find a folder named
beyonwiz. -
Specific Path: Ensure the subfolder is named
u4.-
Path check:
USB_DRIVE:\beyonwiz\u4\ -
This folder must contain files like
kernel.bin,rootfs.tar.bz2, andimageversion.
-
Step 2: The Flashing Procedure
-
Power Down: Turn off the U4 using the deep standby mode or the physical power switch at the rear.
-
Insert Media: Plug the USB drive into the front USB port (located behind the drop-down flap).
-
Boot & Trigger:
-
Switch the power back ON.
-
Watch the front panel VFD display. When it shows “Update?” or “Press OK,” immediately press the OK button on the front of the unit.
-
-
Progress: The display will change to “Flashing” or “Updating.” The U4 is faster than the T-series, but still wait about 2–3 minutes.
-
Reboot: Once the display says “Completed” or “Ready,” the box will reboot. Remove the USB drive during the reboot to prevent a loop.

The flashing process should take approximately two to four minutes to complete, while the receiver
is being flashed it is vitally important that you DO NOT power the receiver down for any reason as
this can cause serious and or permanent damage.