[HOW TO FLASH] how to flash beyonwiz T4

Flashing the Beyonwiz T4 is very similar to the T3, but the internal folder structure on your USB drive must reflect the T4 hardware to be recognized.
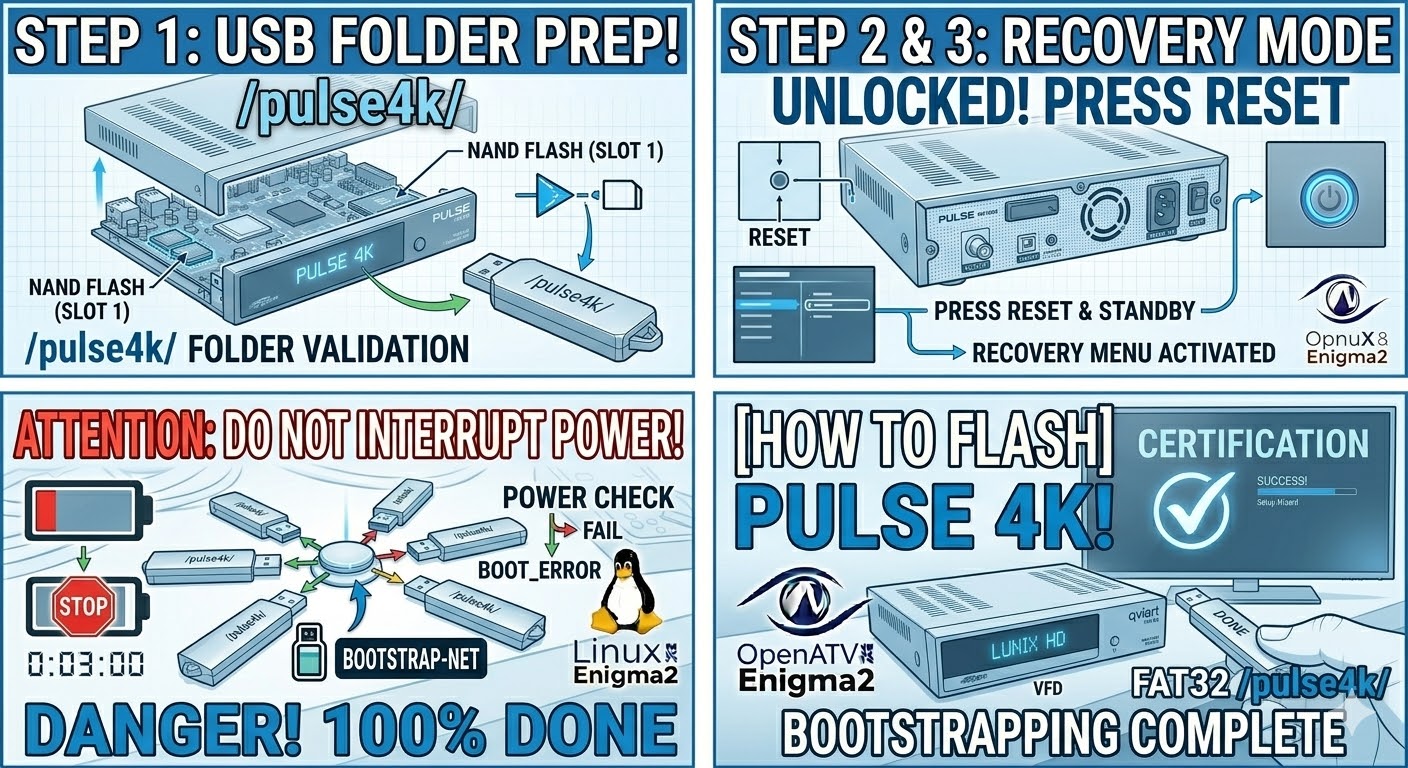
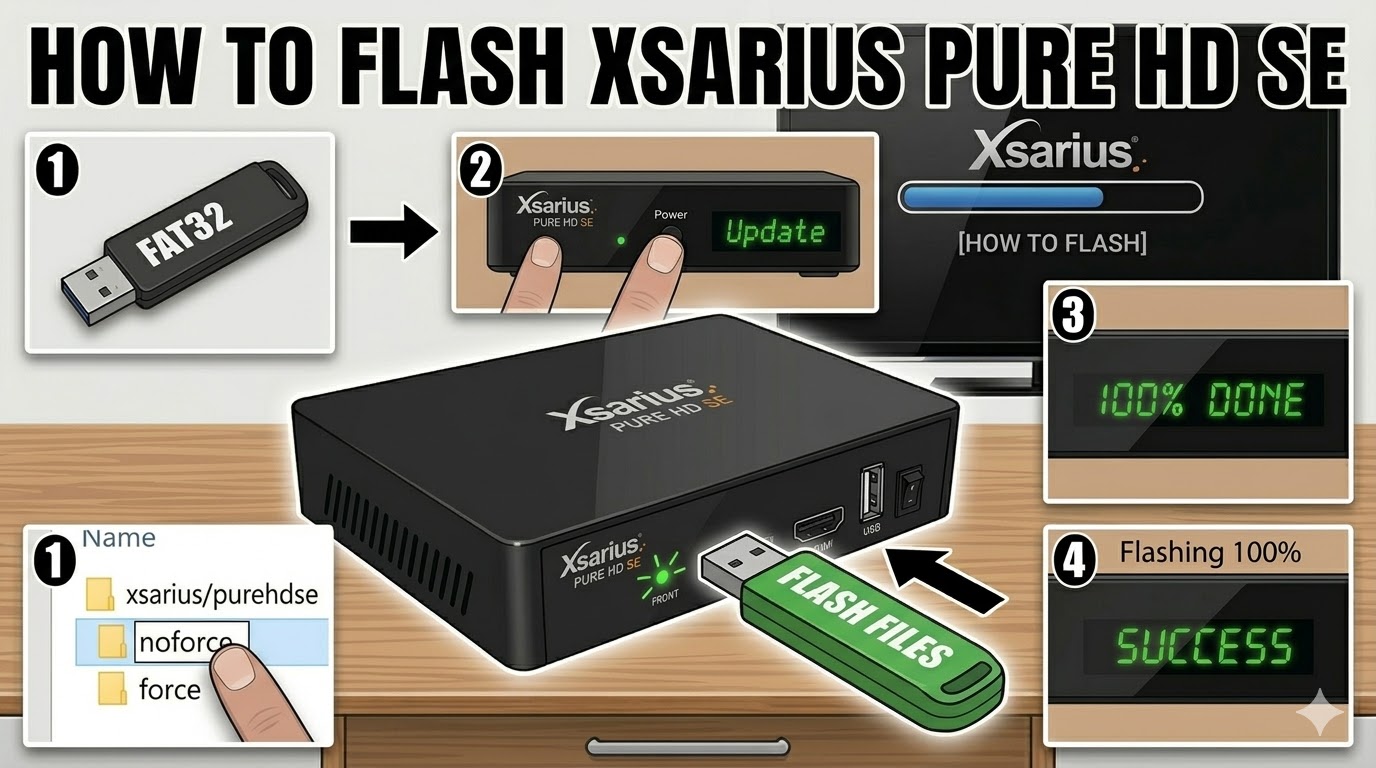
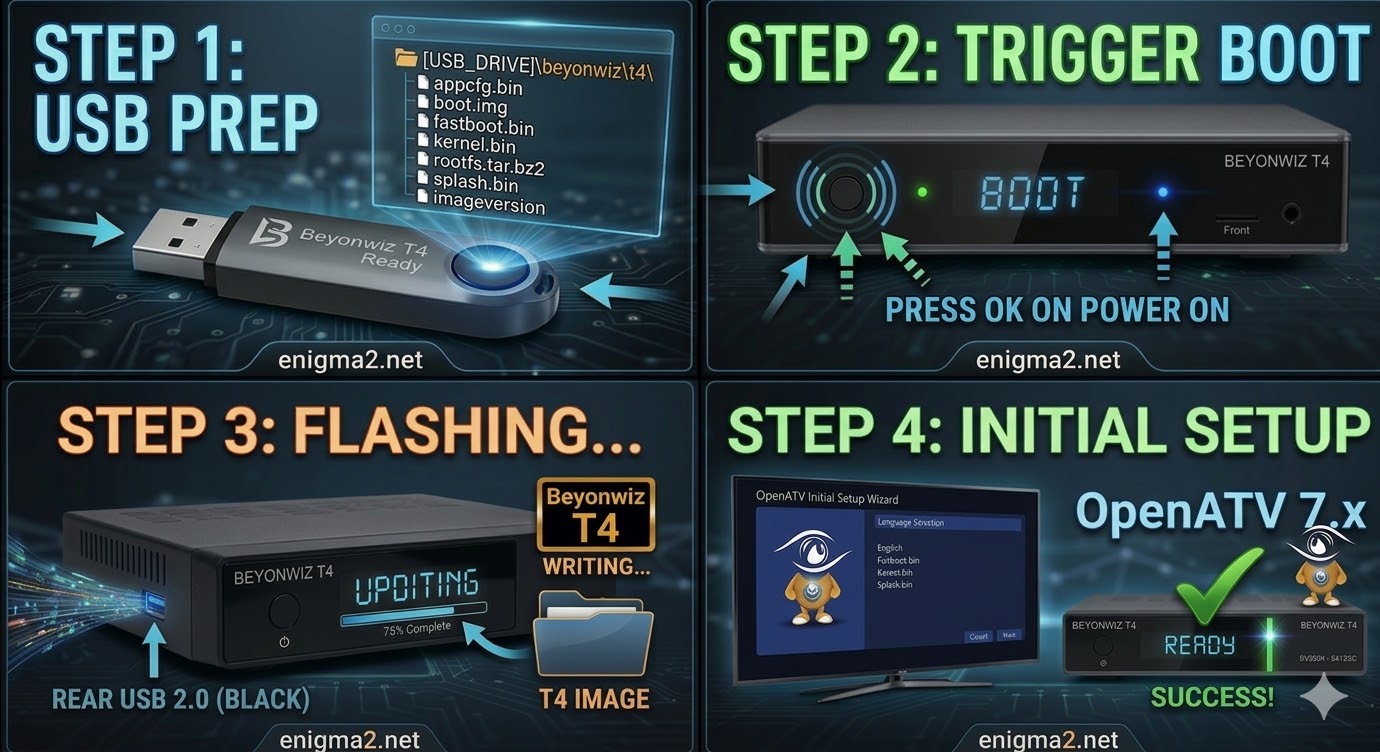
Step 1: Prepare the USB Drive
-
Format: Ensure your USB stick (8GB or smaller is best) is formatted to FAT32.
-
File Structure: When you unzip your firmware (like OpenATV), you will see a folder named
beyonwiz. Inside that, there should be a subfolder namedt4. -
Copy: Drag the entire
beyonwizfolder to the root of the USB drive.-
Correct Path:
USB_DRIVE:\beyonwiz\t4\(containing files likekernel.bin,rootfs.bin, etc.)
-
Step 2: The Flashing Process
-
Power Off: Turn off the power using the switch at the back of the T4.
-
Insert USB: Plug the USB drive into the front USB port (behind the flap).
-
Power On & Trigger:
-
Flip the rear power switch to ON.
-
Immediately look at the front panel display.
-
When you see the message “Update?” or “Press OK,” press the OK button on the front panel of the receiver (not the remote).
-
-
Wait: The display will show the flashing progress. It usually takes 2–4 minutes. Do not interrupt the power.
-
Finish: Once the display says “Completed” or the box reboots, remove the USB stick so it doesn’t try to flash again on the next boot.

The flashing process should take approximately two to four minutes to complete, while the receiver
is being flashed it is vitally important that you DO NOT power the receiver down for any reason as
this can cause serious and or permanent damage.