[HOW TO FLASH] how to flash AXAS HIS4K Combo

The AXAS HIS4K Combo (the non-Plus version) is another HiSilicon-powered beast. The flashing process is nearly identical to the Combo+, but you must ensure the folder naming on your USB matches the hardware ID exactly, or the bootloader will ignore the files.
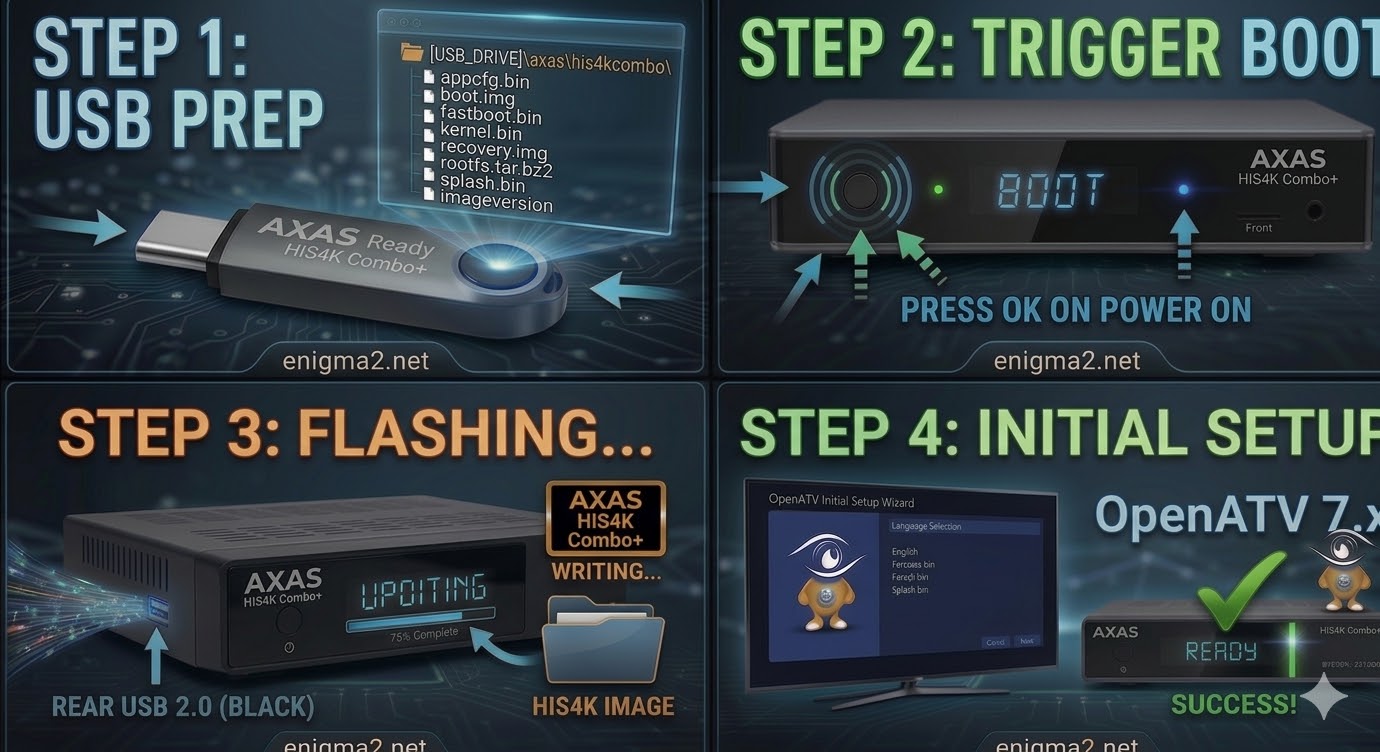
Step 1: USB Preparation
-
Format: The USB drive must be FAT32. (A smaller USB 2.0 drive is often more reliable for HiSilicon boxes).
-
Folder Structure: Unzip your image (e.g., OpenATV). You should see an
axasfolder. -
Target Path: Inside the
axasfolder, the subfolder must be namedhis4k.-
Path check:
USB_DRIVE:\axas\his4k\ -
Files: Ensure it contains
appcfg.bin,boot.img,fastboot.bin,kernel.bin,recovery.img, androotfs.tar.bz2.
-
Step 2: The Flashing Procedure
-
Full Power Off: Flip the physical power switch at the back of the AXAS to OFF.
-
Insert USB: Plug the drive into the side USB port (the Blue USB 3.0 port is generally preferred).
-
Boot & Trigger:
-
Switch the rear power toggle to ON.
-
Immediately press and hold the Power Button on the front panel.
-
Once the front display shows “UPDT” or “FLSH,” release the button.
-
-
The Process: The box will begin the update. You will see progress on the front panel and likely a progress bar on your TV screen via HDMI.
-
Completion: After about 3–5 minutes, the box will automatically reboot into the First Install Wizard. Remove the USB drive during this reboot.

The flashing process should take approximately two to four minutes to complete, while the receiver
is being flashed it is vitally important that you DO NOT power the receiver down for any reason as
this can cause serious and or permanent damage.