[HOW TO FLASH] how to flash Atemio AM 6000
The Atemio AM 6000 HD (also branded as the Atemio 6000) follows the same strict logic as the 6100 and 6200. It is a Broadcom-based Linux receiver that requires a specific folder structure to bypass the internal flash and initiate a clean install.
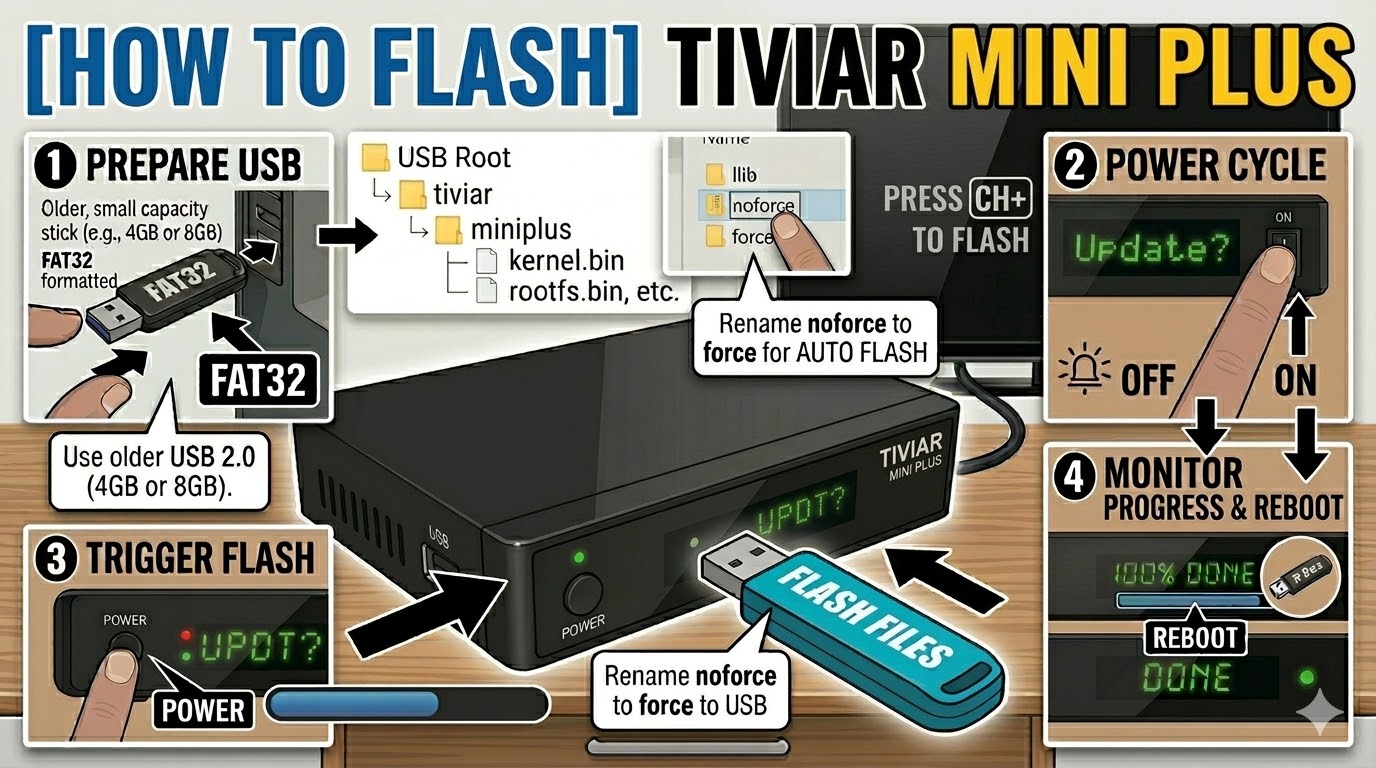
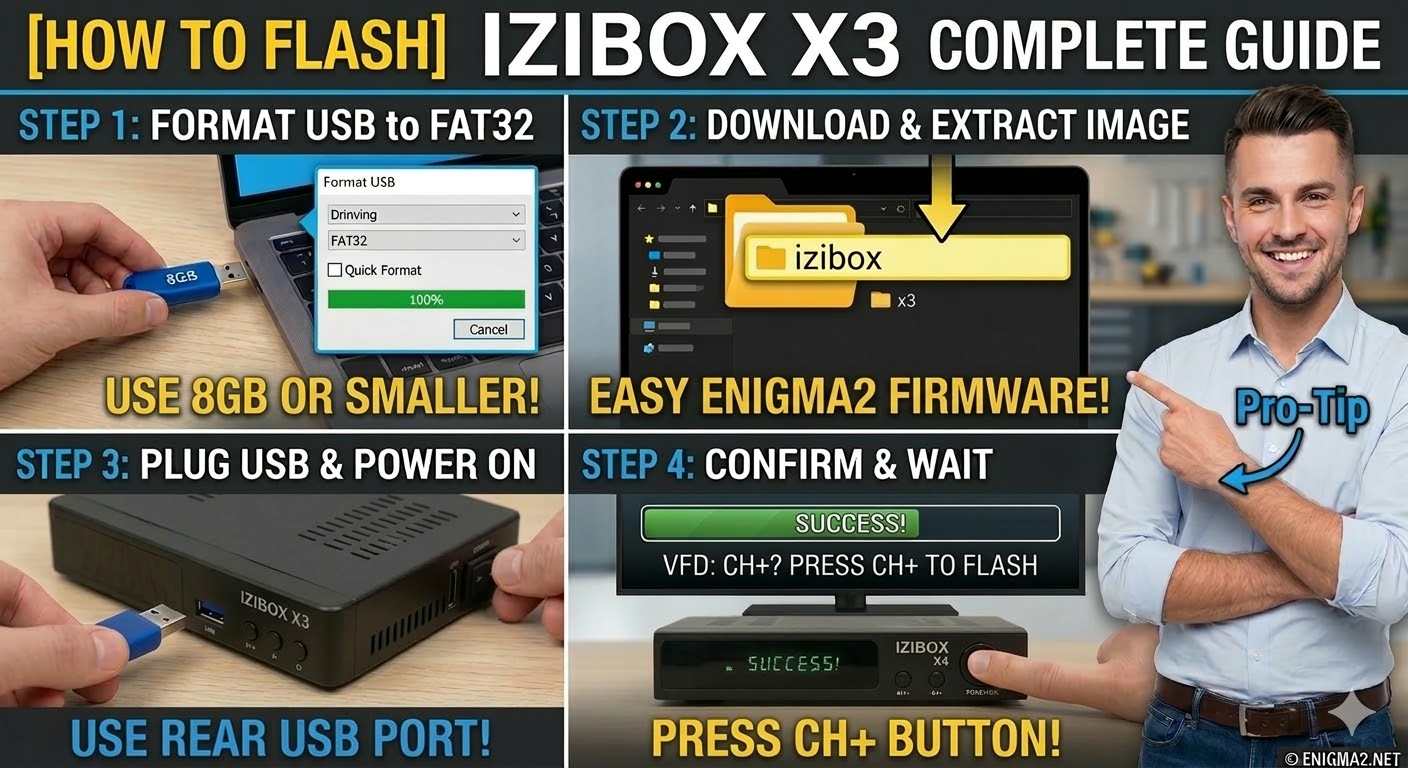
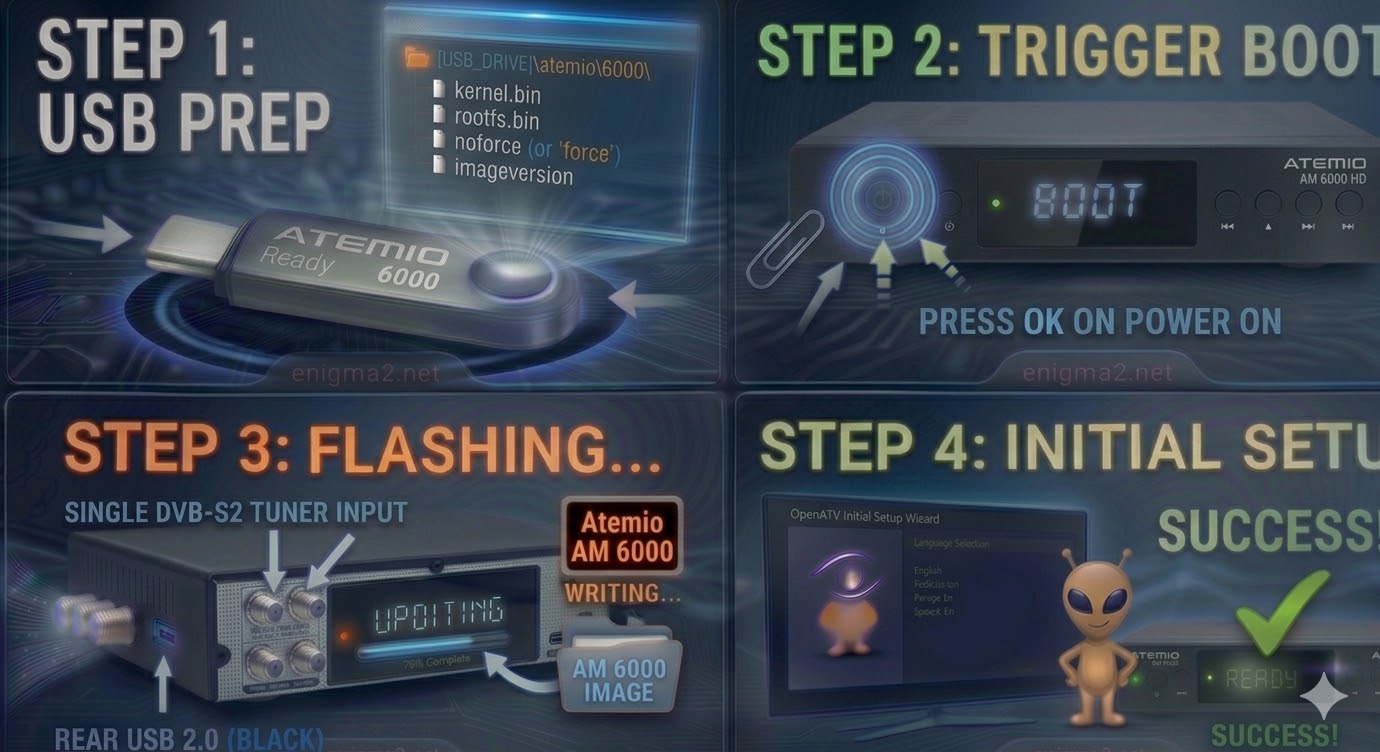
Step 1: USB Preparation
-
Format: The USB stick must be formatted to FAT32. Use a high-quality USB 2.0 drive (ideally 8GB or smaller) for maximum compatibility.
-
Folder Structure: When you extract your Enigma2 image (OpenATV, OpenHDF, etc.), you will get a folder named
atemio. -
Target Path: Inside the
atemiofolder, ensure the subfolder is named6000.-
Path check:
USB_DRIVE:\atemio\6000\ -
Files: You should see
kernel.bin,rootfs.bin, andimageversioninside that folder.
-
Step 2: The Flashing Procedure
-
Full Power Off: Shut down the receiver and flip the physical power switch at the back to OFF.
-
Insert USB: Plug the prepared USB stick into the rear USB port.
-
Boot & Trigger:
-
Switch the rear power toggle to ON.
-
Keep your eyes on the front panel display.
-
As soon as it shows “Found Image” or “Press OK,” quickly press the Power button on the front panel.
-
-
Wait for Progress: The display will cycle through “Flashing” and “Updating.” This usually takes 3–5 minutes. Do not turn off the power.
-
Finish: When the display shows “Completed” or “Success,” the box will reboot. Remove the USB drive immediately so it doesn’t try to flash again on the next boot.

The flashing process should take approximately two to four minutes to complete, while the receiver
is being flashed it is vitally important that you DO NOT power the receiver down for any reason as
this can cause serious and or permanent damage.