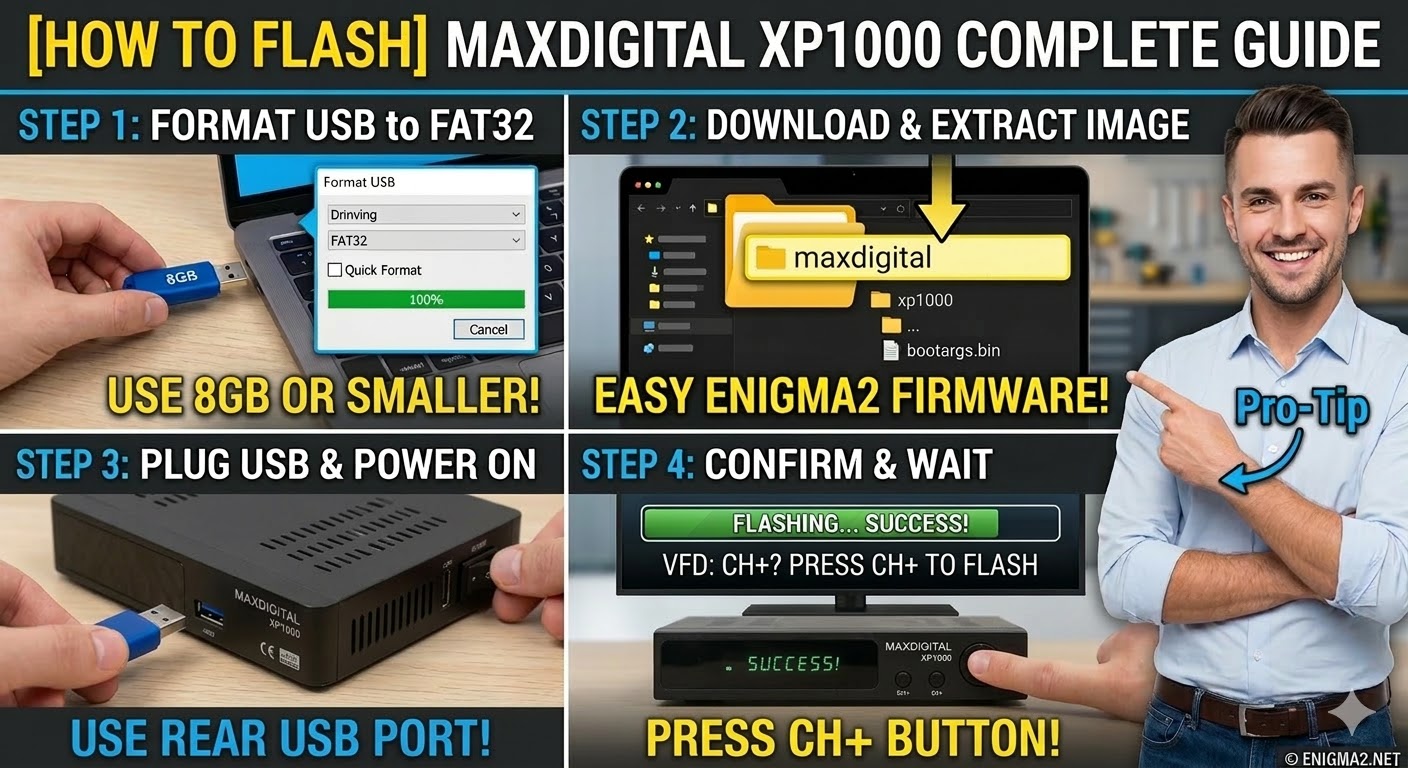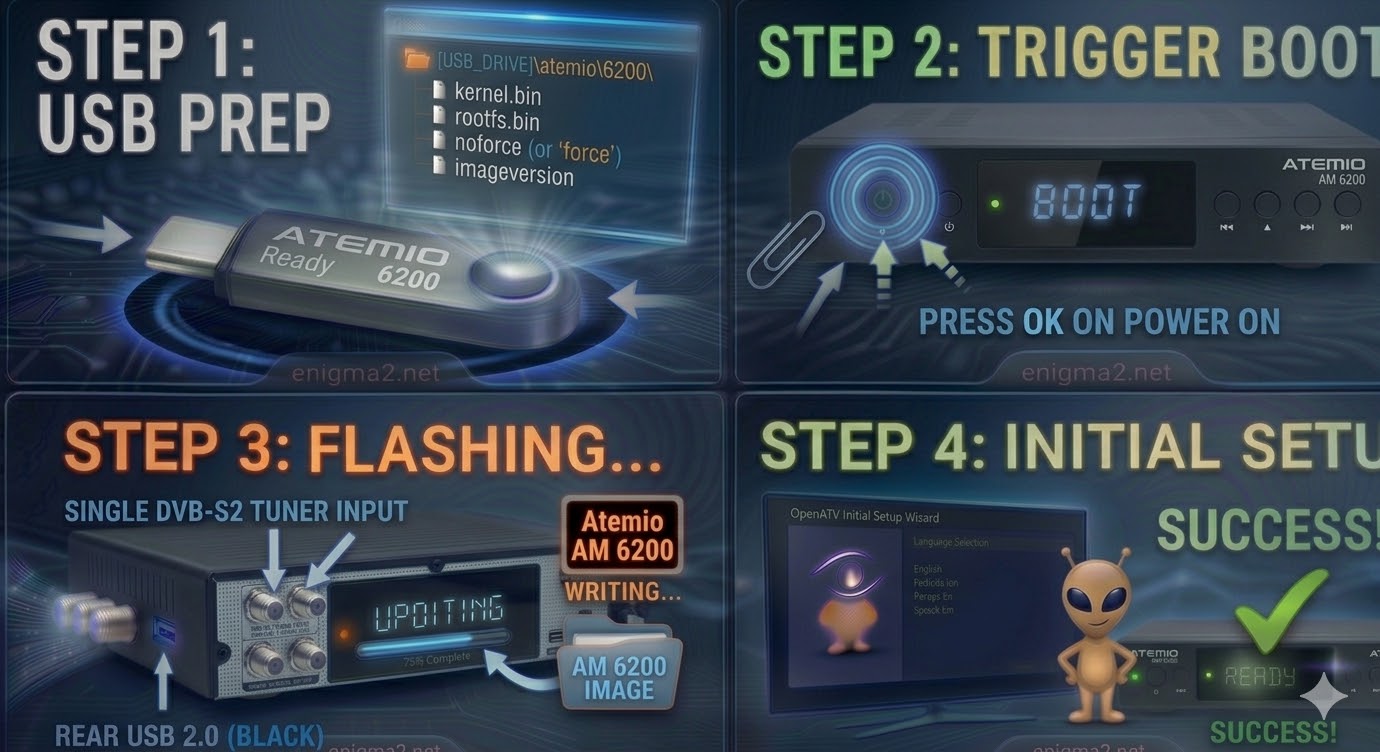
[HOW TO FLASH] how to flash Atemio AM 6200

The Atemio AM 6200 (also known as the Atemio 6200 HD) is a compact Broadcom-based receiver. Like most Atemio hardware, it is very strict about the folder structure on the USB drive to trigger the bootloader.
Step 1: USB Preparation
-
Format: The USB drive must be formatted to FAT32. (Use a small USB 2.0 stick, 8GB or less, for the best compatibility).
-
Folder Structure: When you unzip your image (e.g., OpenATV or OpenHDF), you will see a folder named
atemio. -
Target Path: Inside the
atemiofolder, there must be a subfolder named6200.-
Path check:
USB_DRIVE:\atemio\6200\ -
Files: Ensure it contains
kernel.bin,rootfs.bin, andimageversion.
-
Step 2: The Flashing Procedure
-
Full Power Off: Switch off the receiver using the physical power switch at the back.
-
Insert USB: Plug the drive into the rear USB port (on this model, the rear port is often more stable for flashing than the side port).
-
Boot & Trigger:
-
Switch the rear power toggle to ON.
-
Immediately watch the front panel display. When it shows “Found Image” or “Press OK,” quickly press the Power/OK button on the front panel.
-
-
Wait for Progress: The display will show “Flashing” or “Updating.” This process usually takes 2–4 minutes. Do not interrupt the power.
-
Reboot: Once the display says “Completed” or “Success,” the box will reboot. Remove the USB drive during the reboot to avoid starting the process again.

The flashing process should take approximately two to four minutes to complete, while the receiver
is being flashed it is vitally important that you DO NOT power the receiver down for any reason as
this can cause serious and or permanent damage.