[HOW TO FLASH] how to flash AXAS HIS4K Combo +

The AXAS HIS4K Combo+ is a powerful HiSilicon-based receiver. Because it uses the HiSilicon chipset, the flashing process and file structure are slightly different from the standard MIPS or ARM Beyonwiz models you’ve been working with.
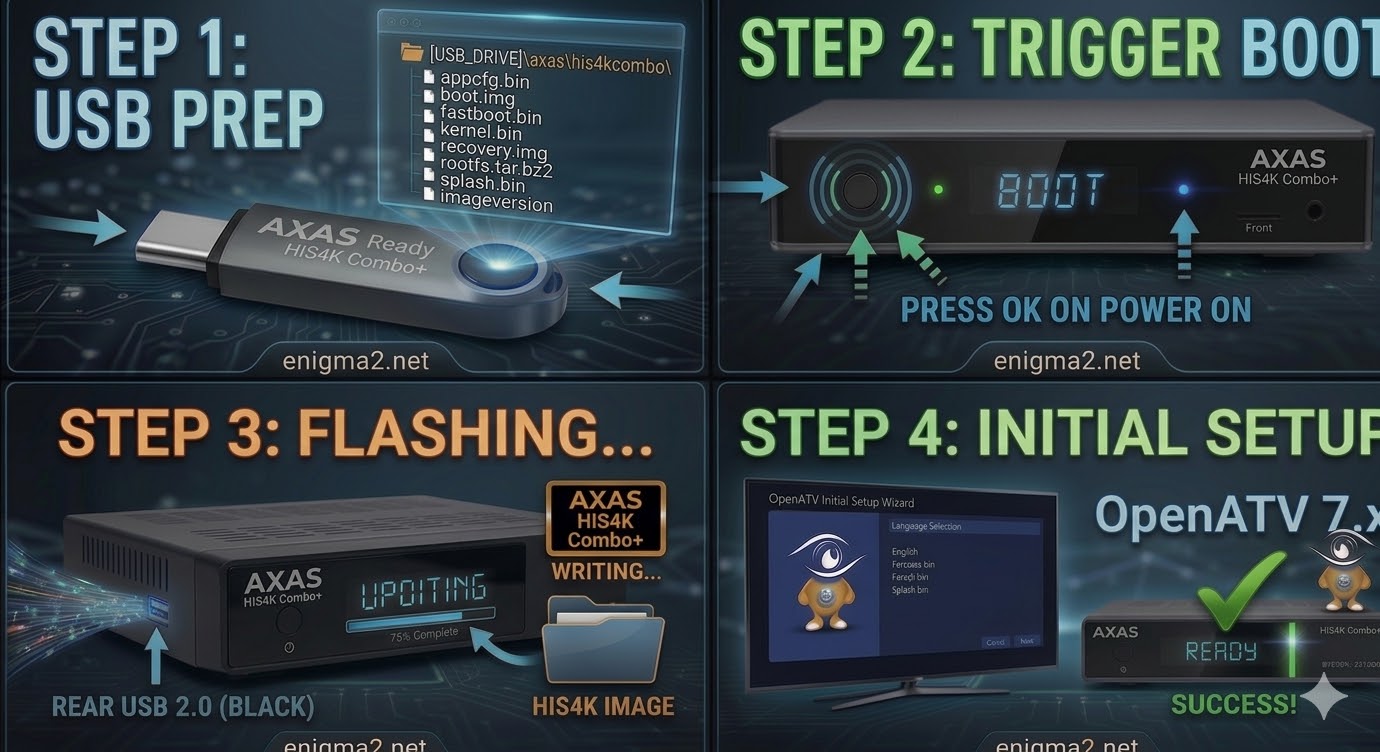
Step 1: USB Preparation
-
Format: The USB stick must be FAT32. (HiSilicon boxes can be very sensitive; try a USB 2.0 drive if possible).
-
Folder Structure: When you unzip your image (e.g., OpenATV), you will see a folder named
axas. -
Target Path: Inside the
axasfolder, there must be a subfolder namedhis4kcombo.-
Path check:
USB_DRIVE:\axas\his4kcombo\ -
Crucial Files: You should see
appcfg.bin,boot.img,fastboot.bin,kernel.bin,recovery.img, androotfs.tar.bz2.
-
Step 2: The Flashing Procedure
-
Power Down: Turn off the AXAS using the physical power switch at the back.
-
Insert USB: Plug the USB drive into the side USB port (usually the blue USB 3.0 port works best on this model).
-
Boot & Trigger:
-
Switch the rear power toggle to ON.
-
Immediately press and hold the Power Button on the front panel (or the Reset button if your specific revision uses one).
-
Watch the front display. When it shows “UPDT” or “Flsh,” release the button.
-
-
Wait for Progress: The box will now begin flashing. You will see progress on the front display or your TV screen. This takes about 3–5 minutes.
-
Reboot: Once the process is finished, the receiver will reboot automatically. Remove the USB drive during the reboot.

The flashing process should take approximately two to four minutes to complete, while the receiver
is being flashed it is vitally important that you DO NOT power the receiver down for any reason as
this can cause serious and or permanent damage.