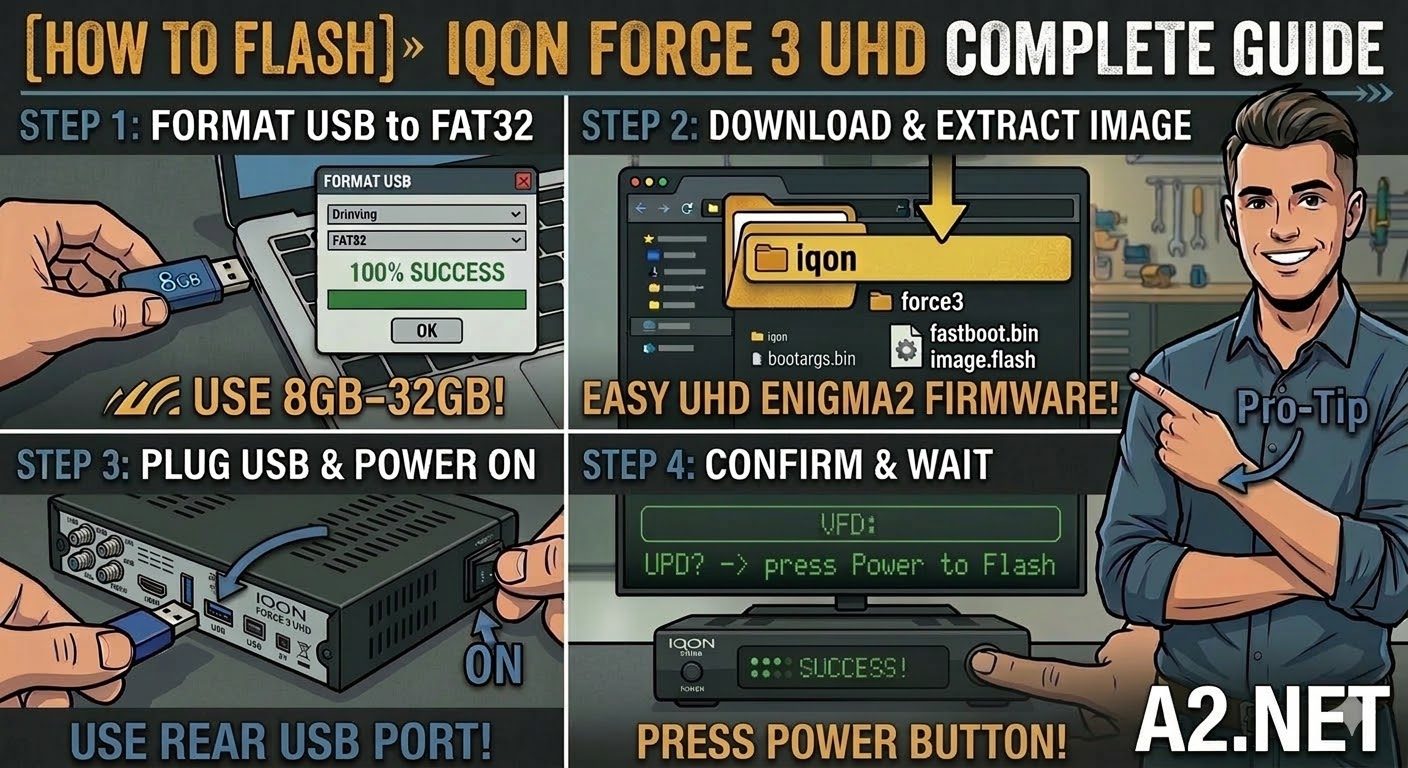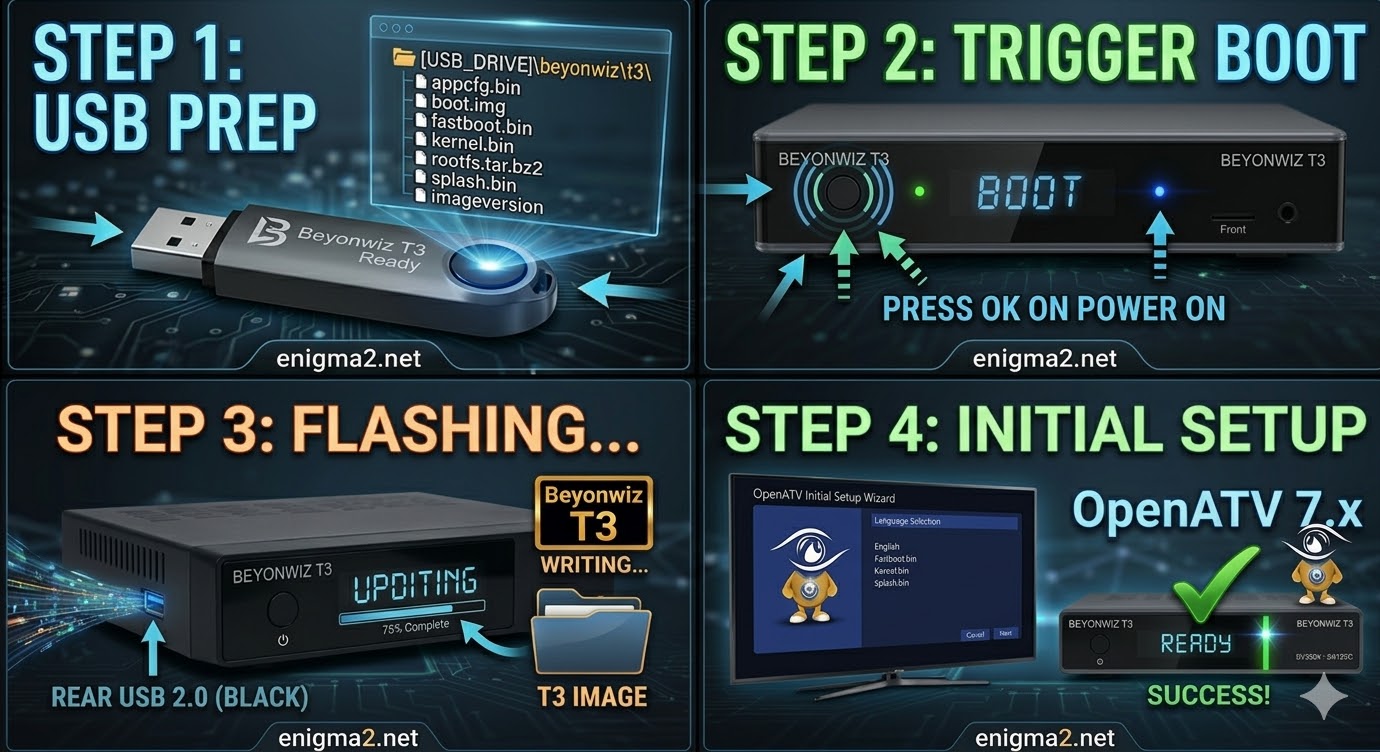
[HOW TO FLASH] how to flash beyonwiz T3

Flashing the Beyonwiz T3 (Step-by-Step)
1. Prepare the USB Drive
-
Format: Use a high-quality USB 2.0 stick (FAT32 formatted). Avoid USB 3.0/3.1 drives, as they often cause “No USB found” errors on older Broadcom bootloaders. A 4GB or 8GB stick is the most reliable choice.
-
The Folder Path: Extract the Enigma2 image (OpenATV, etc.). The root of your USB drive must contain this exact folder structure:
-
USB_ROOT/beyonwiz/t3/
-
-
Verify Files: Open the
t3folder. It must contain:-
kernel.bin -
rootfs.bin -
imageversion
-
-
Force Update: If you want the flash to start automatically upon power-up, rename the
noforcefile inside thet3folder toforce.
2. The Flashing Procedure
-
Power Off: Turn off the receiver using the physical power switch at the rear of the unit.
-
Insert USB: Open the front drop-down flap and plug the USB stick into the front USB port.
-
The Trigger:
-
Turn the power switch to ON.
-
If using
force: The front VFD display will immediately show “FLSH” or a progress bar. -
If using
noforce: Watch the front VFD. When prompted with “CONF” or “USB”, press the OK button on the front panel (behind the flap) or on your Remote Control.
-
-
Wait: The process takes about 3–5 minutes. Do not power off or remove the USB while the VFD indicates that writing is in progress.
-
Finish: The receiver will reboot automatically. You can remove the USB stick once the “Language Selection” setup wizard appears on your TV screen.