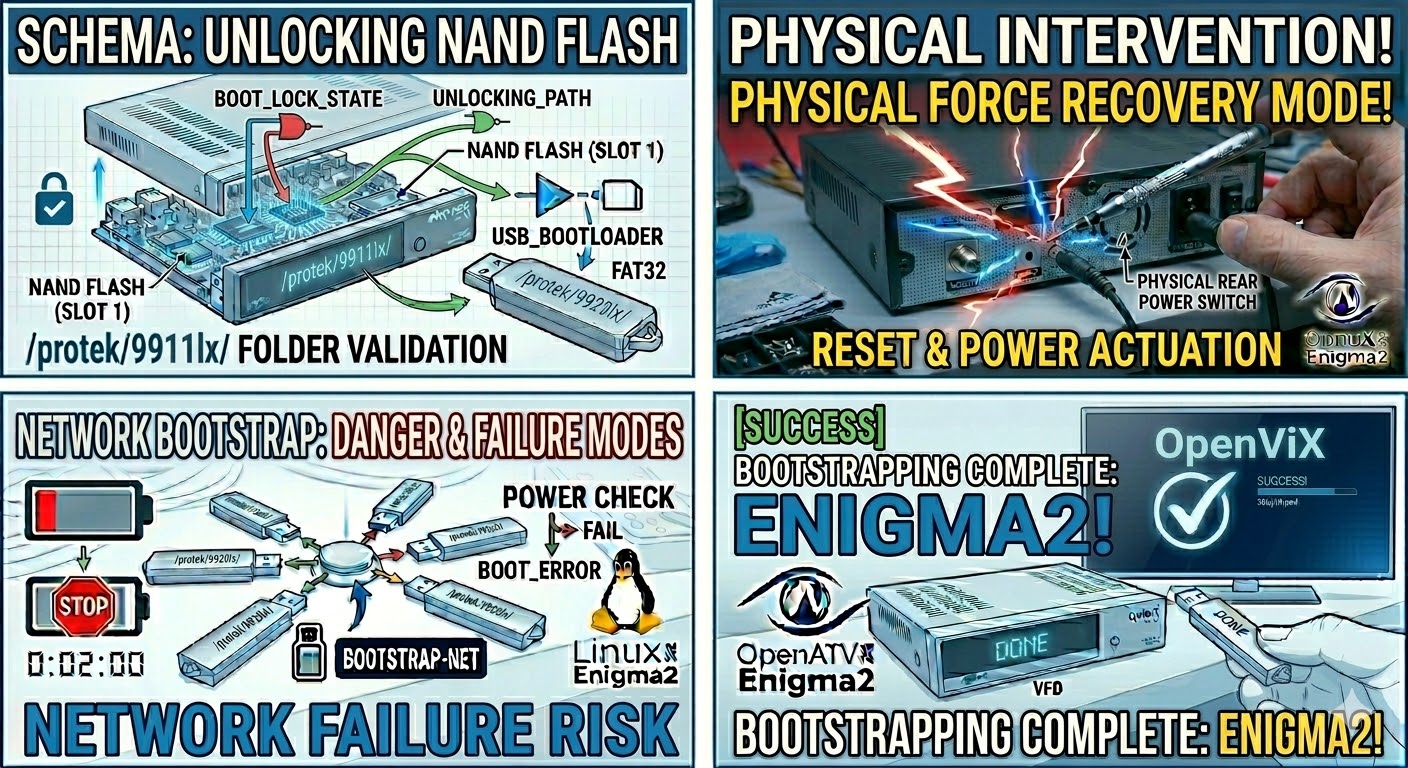
[HOW TO FLASH] how to flash Odin MARAM9
To flash your Odin Mara M9 (sometimes referred to as the MARAM9), you will follow a process very similar to other Enigma2 receivers. This device uses a specific folder structure to trigger the flash sequence.
1. Preparation
-
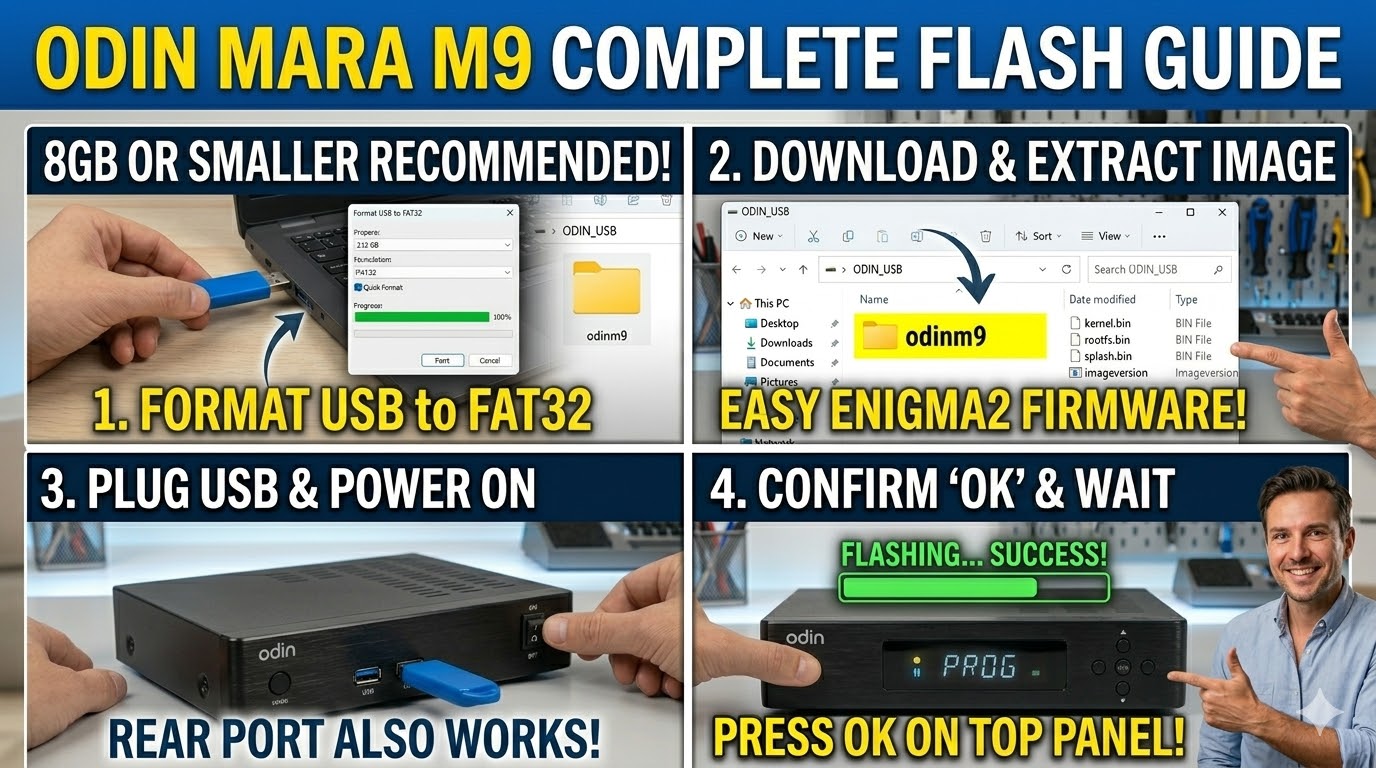
USB Drive: Use a USB stick, ideally 8GB or smaller.
-
Format: Format the drive to FAT32.
-
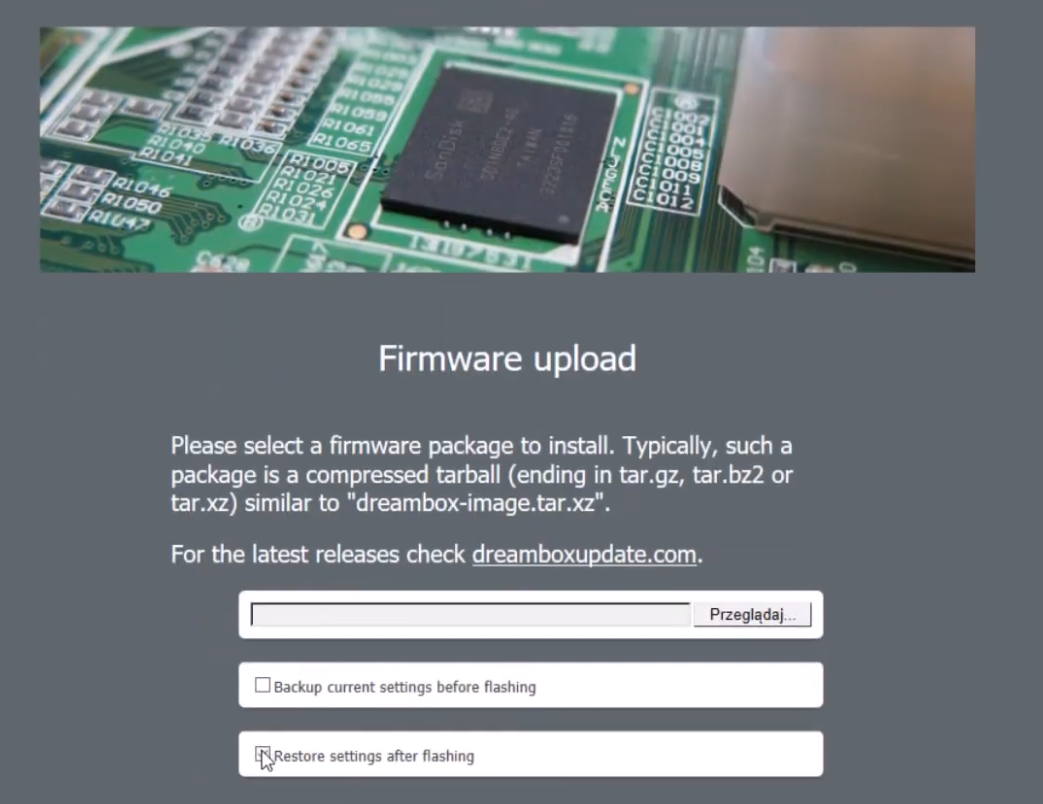
Firmware: Download the image (e.g., OpenViX, OpenATV).
2. Folder Structure
The Odin Mara M9 requires a specific folder name to be recognized at boot.
-
Extract the firmware
.zipfile on your computer. -
You should see a folder named
odinm9. -
Copy the entire
odinm9folder to the root of your USB stick.-
Correct:
USB_Drive:\odinm9\ -
Inside that folder: You should see files like
kernel.bin,rootfs.bin, andimageversion.
-
3. The Flashing Process
-
Power Off: Turn off the receiver using the rocker switch at the back.
-
Unplug Other Devices: Remove any other USB devices (like Wi-Fi dongles or hard drives) to prevent interference.
-
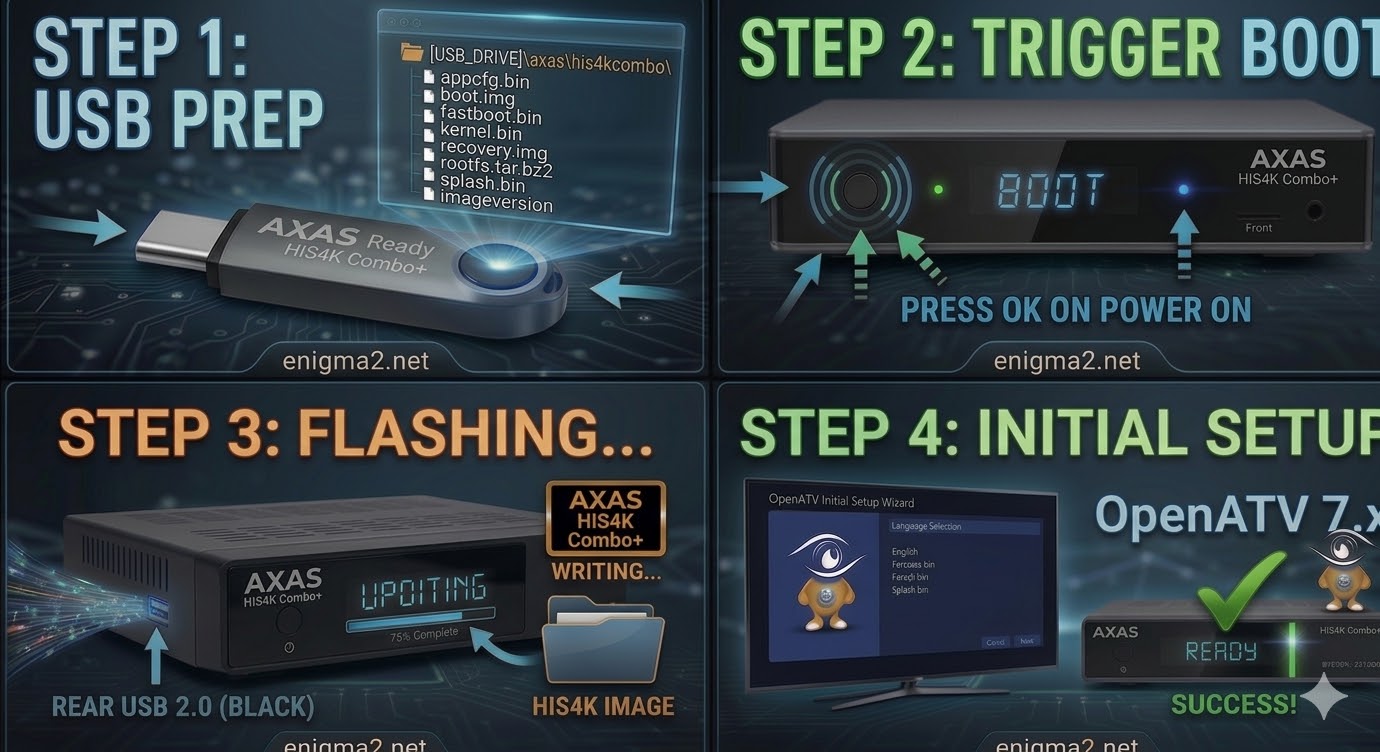
Insert USB: Plug your prepared USB stick into one of the receiver’s USB ports.
-
Power On: Flip the back switch to ON.
-
Initiate Flash: Watch the front panel display. When prompted (usually it will ask to confirm), press the OK button located on the top or front panel of the receiver to start the process.
-
Wait: The flashing process typically takes 2–4 minutes.
-
Critical: Do not turn off the power during this time.
-
-
Auto-Reboot: Once the flash is successful, the receiver will reboot itself automatically. You can then remove the USB stick and follow the startup wizard on your TV.
Comparison Note
Be careful not to confuse this with “Odin” for Samsung phones. Since you are working with satellite receivers like the Optibox E3, this USB + Folder Method is the correct one for your Odin hardware.

The flashing process should take approximately two to four minutes to complete, while the receiver
is being flashed it is vitally important that you DO NOT power the receiver down for any reason as
this can cause serious and or permanent damage.