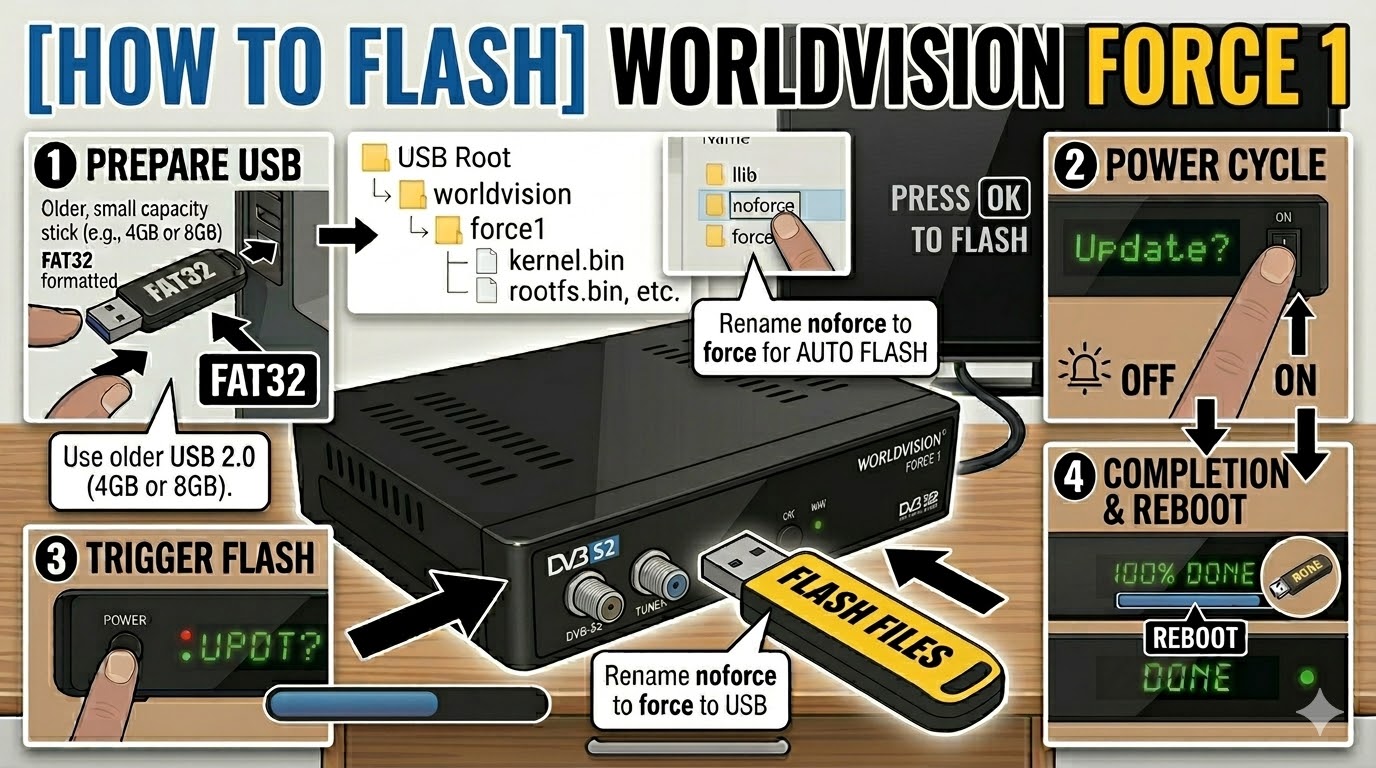
[HOW TO FLASH] how to flash vizyon vita
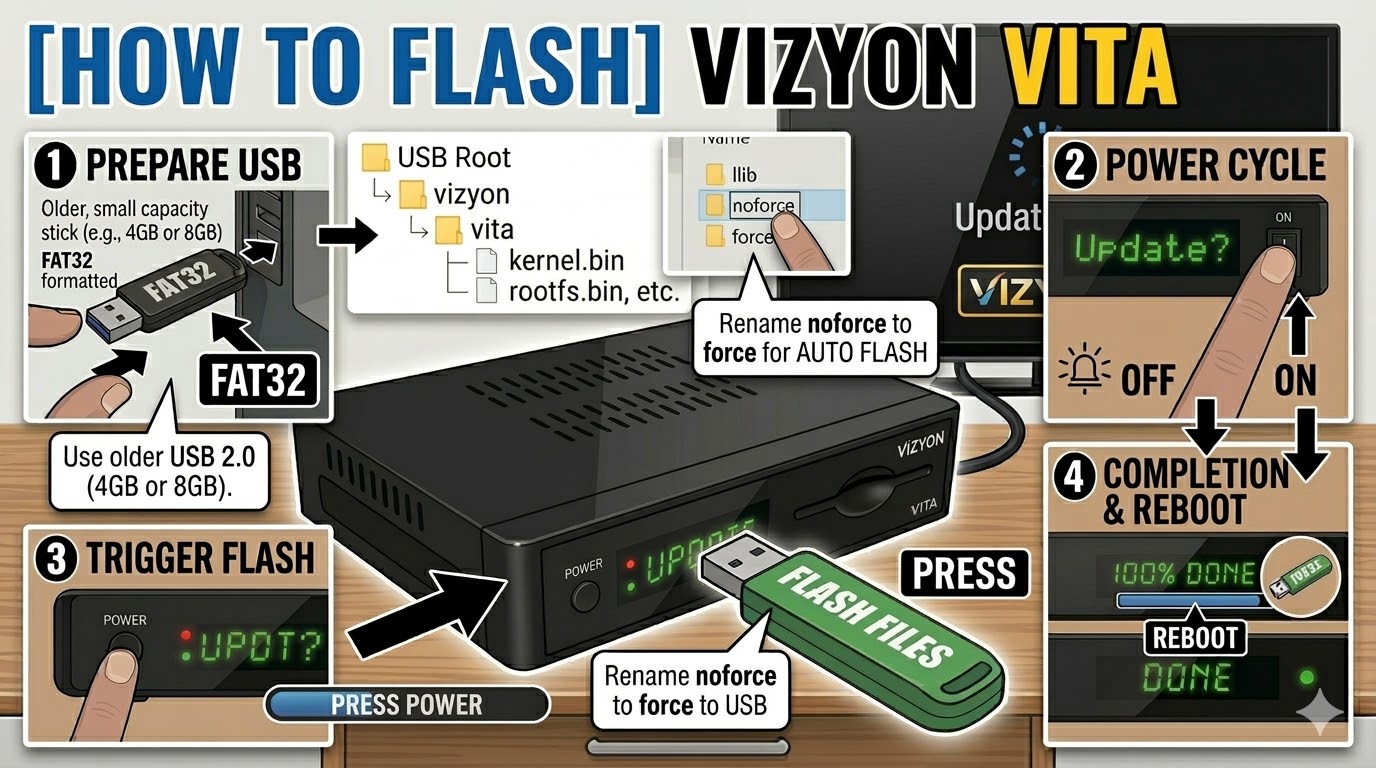
The Vizyon Vita (and its sibling, the Vizyon Vita 4K) is an Enigma2-based receiver. While it is more modern than some older Linux boxes, the flashing process remains consistent with the “USB root folder” method.
Preparation
-
USB Drive: Use a FAT32 formatted USB stick. For the Vita models, a 4GB or 8GB USB 2.0 drive is highly recommended for the best compatibility.
-
The Files: Extract your image zip file (e.g., OpenATV, PurE2). You should see a folder named
vizyonand inside it, a subfolder namedvita(orvita4kif you have the 4K model). -
Path: Copy the
vizyonfolder to the root of your USB drive.-
Structure:
USB Stick -> vizyon -> vita -> (bin/image files)
-
Flashing Steps
-
Power Down: Turn off the receiver using the physical power switch at the back.
-
Insert USB: Plug the USB stick into the side or rear USB port.
-
Power On: Turn the back switch to ON.
-
The Trigger: * Watch the front panel LED or the TV screen.
-
When the front panel shows “UPDT” or a prompt appears on the TV, immediately press the Power Button on the front panel of the receiver.
-
-
Monitoring: The LED will blink or the screen will show a progress bar. This typically takes 3–5 minutes.
-
Completion: The box will automatically reboot once the flash is successful.
-
Finalize: Remove the USB stick as soon as the box starts to reboot to prevent it from entering the update cycle again.
Important Tips
-
The “Force” Method: If the front button is unresponsive, go into the
vitafolder on your USB, find the file namednoforce, and rename it toforce. This will trigger an automatic flash upon power-up without needing a button press. -
Rear Port: If the side port doesn’t recognize the stick, try the rear port; it is often directly connected to the main bus and more reliable for bootloader tasks.