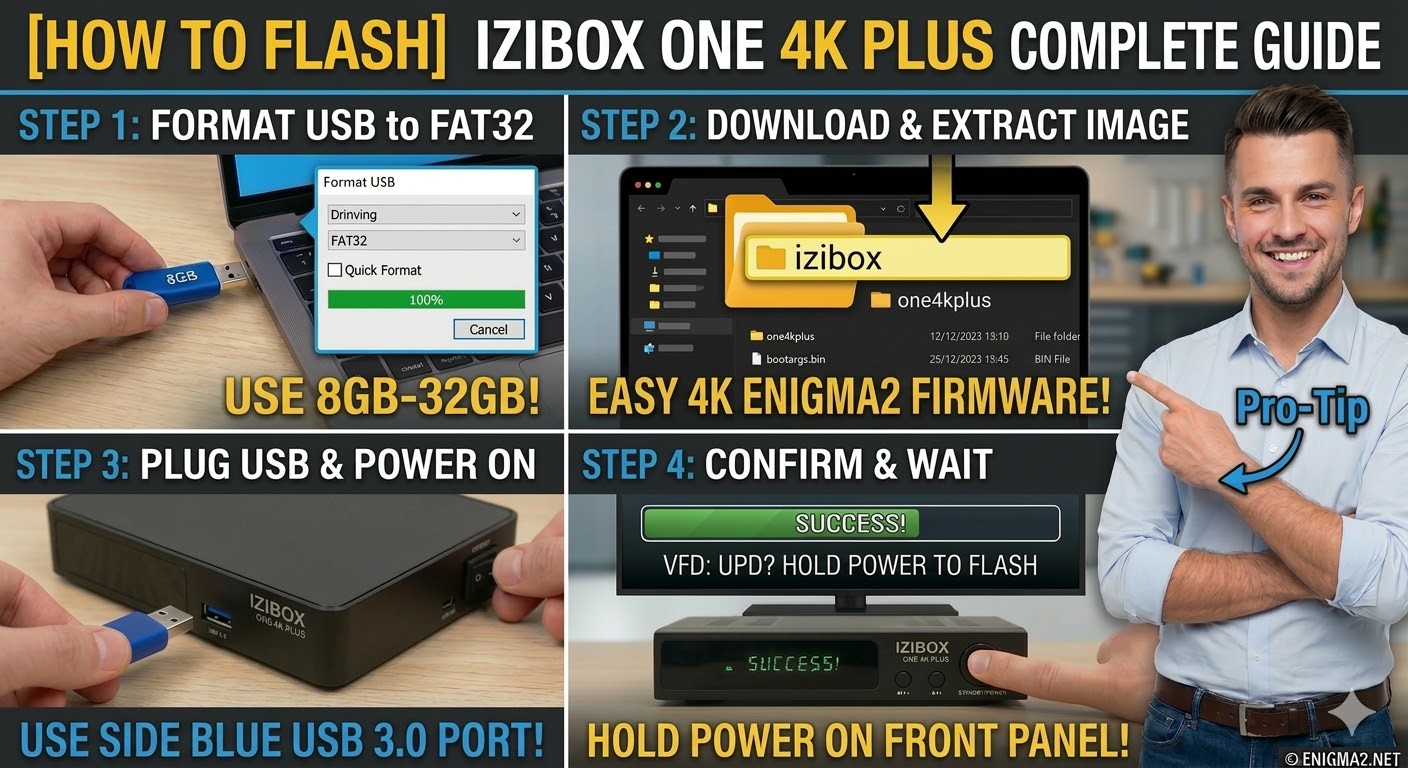
[HOW TO FLASH] how to flash IZIBOX ONE 4K
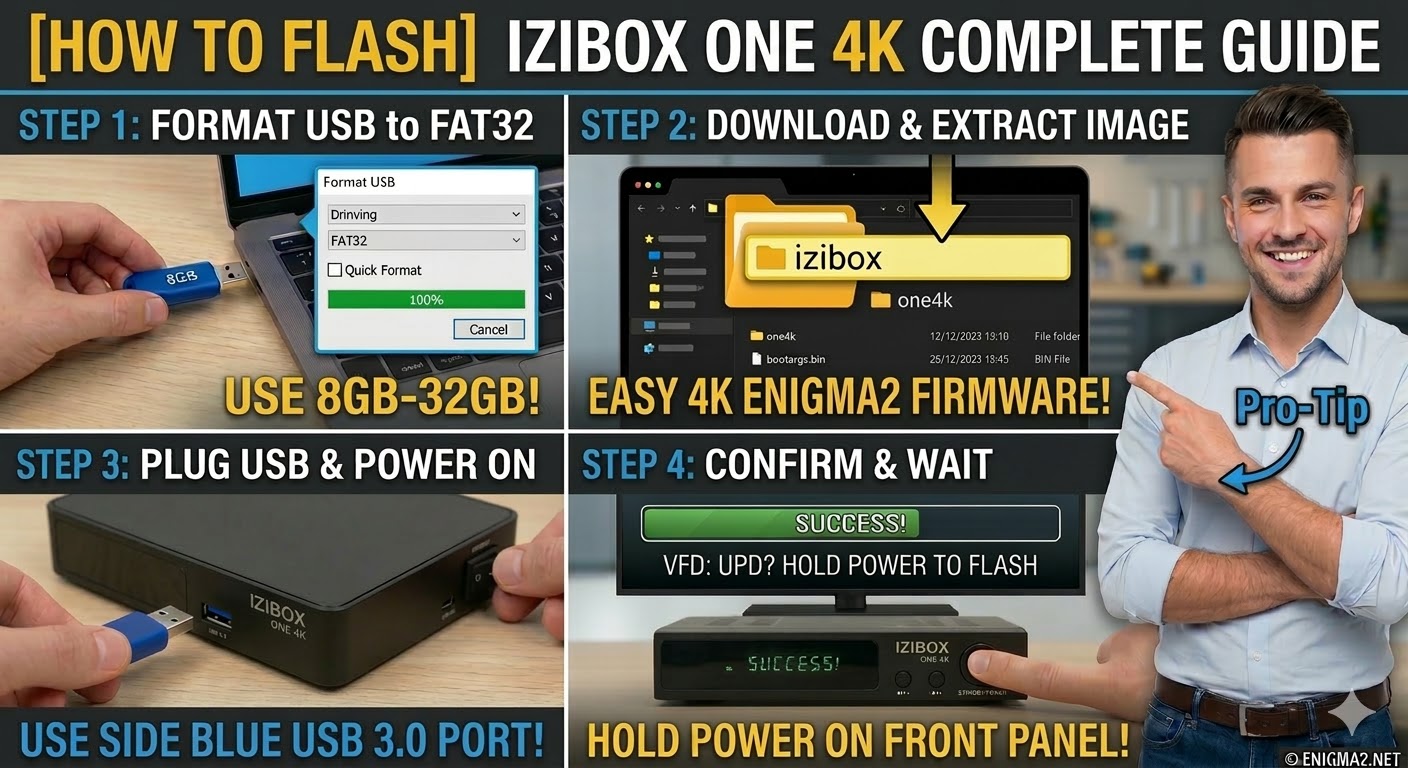
To flash the standard IZIBOX ONE 4K (non-Plus version), the procedure is nearly identical to the Plus model, but you must ensure the subfolder name on your USB stick matches the specific hardware.
1. Preparation
-
USB Stick: A high-quality USB 2.0 or 3.0 stick. 8GB to 32GB is the most reliable range for the HiSilicon bootloader.
-
Format: The stick must be formatted to FAT32.
-
Firmware: Download the “recovery” or “USB” image specifically for the IZIBOX ONE 4K.
2. Folder Structure
The bootloader identifies the update via the izibox directory and the specific one4k subfolder.
-
Extract the downloaded firmware
.zipfile on your computer. -
You will see a folder named
izibox. -
Copy the entire
iziboxfolder to the root of your USB stick.-
Path:
USB:\izibox\one4k\ -
Contents: Inside the
one4ksubfolder, you should see files likebootargs.bin,fastboot.bin, andimage.flash.
-
3. The Flashing Process
-
Power Off: Turn off the receiver using the power switch at the back.
-
Insert USB: Plug the USB stick into the side USB 3.0 port (the blue one).
-
Initiate Flash:
-
Press and hold the Standby/Power button on the front panel.
-
While holding the button, turn the back power switch to ON.
-
-
Recovery Menu:
-
Continue holding the button until the Recovery Menu appears on your TV screen.
-
Use the remote to select “Flash Recovery Image” or “USB Multiboot Image Upgrade”.
-
-
Wait: The receiver will process the files and install the image to a multiboot slot.
-
Completion: The box will reboot automatically into the new image.
Pro-Tip for enigma2.net
The critical difference for your readers is the subfolder name: one4k for this model versus one4kplus for the Plus version. If a user tries to flash this box using the Plus folder, the bootloader will simply ignore the USB stick. Remind them to check the logo on the top or front of the box to confirm which version they have.