[HOW TO FLASH] how to flash AXAS E4HD ULTRA
The AXAS E4HD Ultra is a high-performance 4K receiver that uses the Broadcom (BCM) chipset, making it more similar to the Beyonwiz V2 or U4 in its flashing style compared to the HiSilicon “HIS” series we just covered.
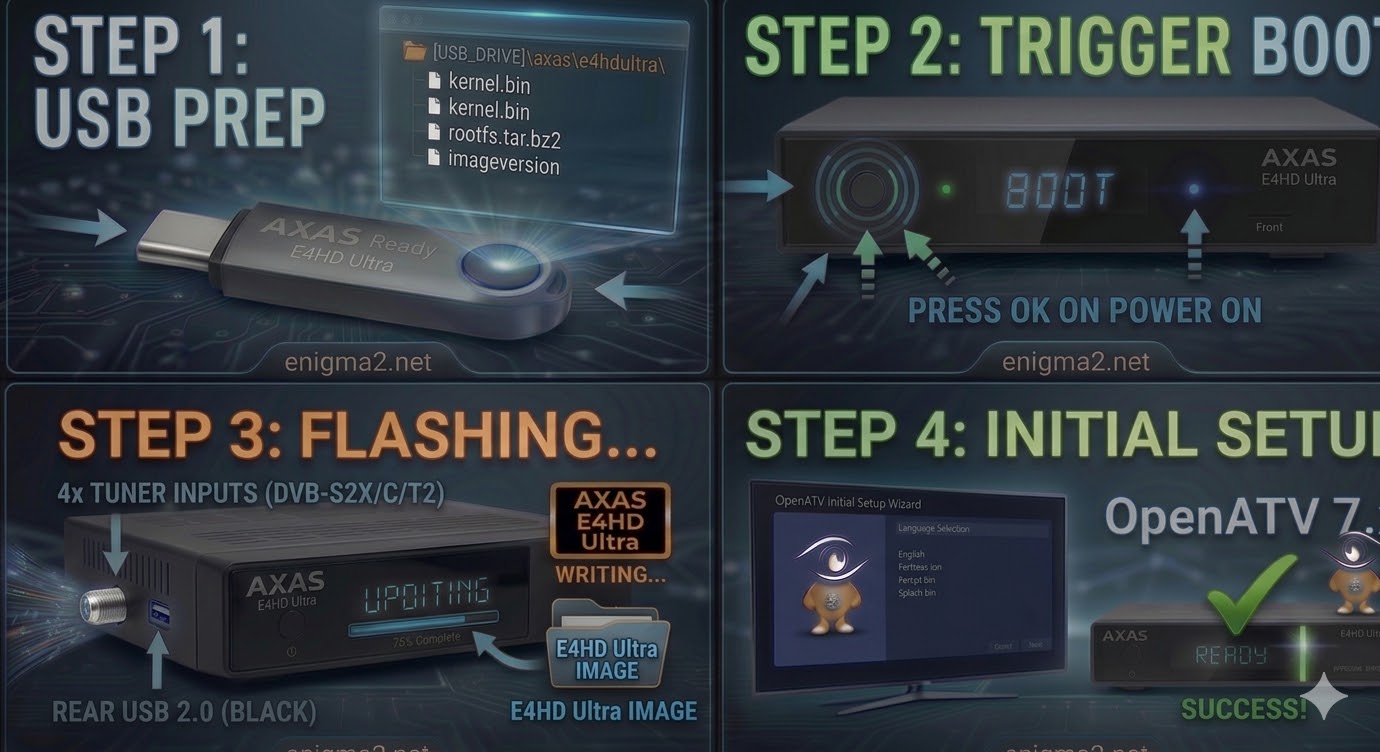
Step 1: USB Preparation
-
Format: The USB stick must be FAT32. (8GB or smaller is recommended).
-
Folder Structure: When you unzip the image (e.g., OpenATV 7.x), look for a folder named
axas. -
Target Path: Inside the
axasfolder, there must be a subfolder namede4hdultra.-
Path check:
USB_DRIVE:\axas\e4hdultra\ -
Files: You should see
kernel.bin,rootfs.tar.bz2, andimageversion.
-
Step 2: The Flashing Procedure
-
Power Down: Turn off the AXAS E4HD Ultra using the physical power switch at the back.
-
Insert USB: Plug the drive into the front USB port (located behind the flap).
-
Power On & Trigger:
-
Switch the rear power toggle to ON.
-
Watch the front panel display. When it shows “Update?”, quickly press the Power Button (or OK button) on the front panel.
-
-
Flashing: The display will change to “Flashing” or “Updating.” This usually takes 2–3 minutes.
-
Reboot: Once the front panel indicates “Completed” or “Ready,” the box will automatically reboot. Remove the USB drive during the reboot to prevent the flash cycle from repeating.

The flashing process should take approximately two to four minutes to complete, while the receiver
is being flashed it is vitally important that you DO NOT power the receiver down for any reason as
this can cause serious and or permanent damage.