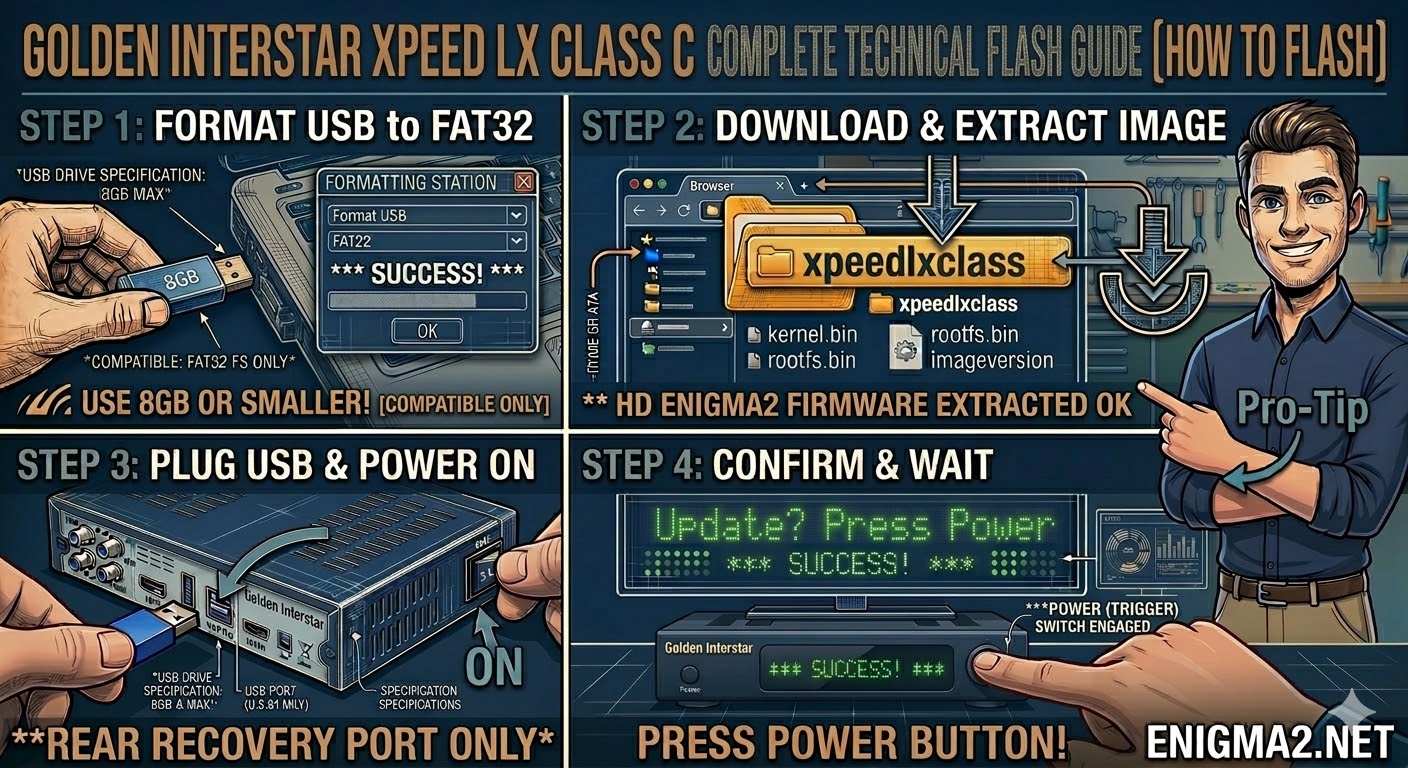
[HOW TO FLASH] how to flash Golden Interstar XPEED LX CLASS C
To flash the Golden Interstar XPEED LX CLASS C, you will follow the same Broadcom procedure as the S2 model. This version is designed for cable (DVB-C) or terrestrial (DVB-T2) signals, but the bootloader uses the exact same folder structure as the rest of the LX Class series.
1. Preparation
-
USB Stick: Use a USB 2.0 stick (up to 8GB is highly recommended).
-
Format: The stick must be formatted to FAT32.
-
Firmware: Download the image specifically for the LX Class C.
2. Folder Structure
The bootloader identifies the update via the xpeedlxclass directory.
-
Extract the downloaded firmware
.zipfile on your computer. -
You should see a folder named
xpeedlxclass. -
Copy the entire
xpeedlxclassfolder to the root of your USB stick.-
Path:
USB:\xpeedlxclass\ -
Contents: Inside the folder, you should see
kernel.bin,rootfs.bin, andimageversion.
-
3. The Flashing Process
-
Power Off: Turn off the receiver using the power switch at the back (or unplug the power cable).
-
Insert USB: Plug the USB stick into the rear USB port.
-
Power On: Turn the power back ON.
-
Initiate Flash:
-
Watch the front panel LED or the TV screen.
-
When the receiver detects the update, it will prompt you (usually “USB” or “Update”).
-
Quickly press the Power button on the front panel to confirm.
-
-
Wait: The LED will indicate that flashing is in progress. Do not interrupt the power.
-
Completion: The receiver will reboot automatically into the new image.

The flashing process should take approximately two to four minutes to complete, while the receiver
is being flashed it is vitally important that you DO NOT power the receiver down for any reason as
this can cause serious and or permanent damage.