[HOW TO FLASH] how to flash PULSe 4K MINI
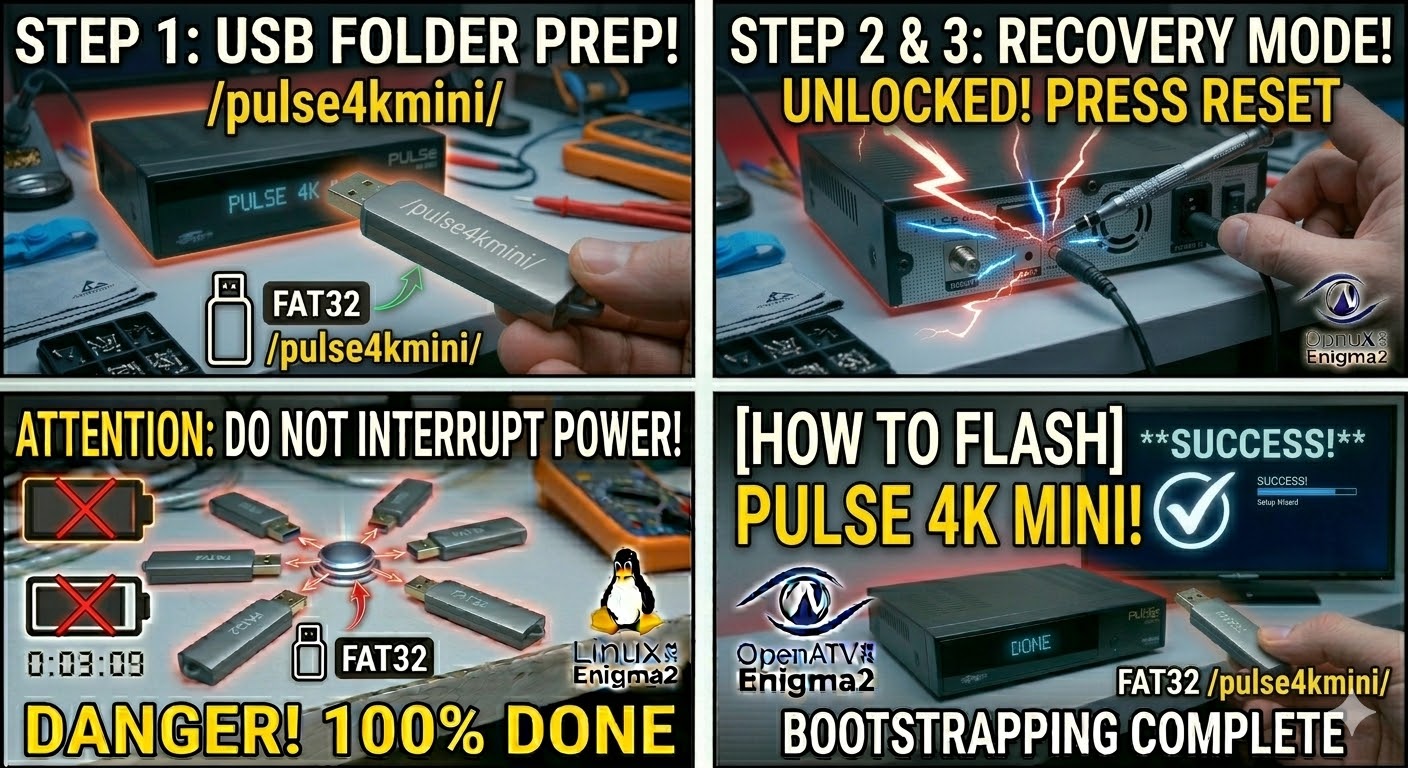
To flash the PULSe 4K MINI, you are working with a powerful HiSilicon-based receiver. The process is very modern and typically uses a recovery menu, but the initial USB setup is the most important part.
Preparation
-
USB Drive: Use a USB 2.0 or 3.0 stick formatted to FAT32.
-
Download Image: Ensure you have the firmware specifically for the PULSe 4K MINI (e.g., OpenATV, OpenHDF, or EGAMI).
-
Extract Files: Unzip the archive. You should see a folder named
pulse4kmini. -
Copy to USB: Place the entire
pulse4kminifolder in the root of the USB drive.-
Structure:
USB Stick -> pulse4kmini -> (files: imageversion, kernel.bin, rootfs.bin, etc.).
-
The Flashing Process
-
Power Down: Turn off the receiver using the power switch at the rear or unplug the power adapter.
-
Insert USB: Plug the USB stick into the side or rear USB port.
-
Initiate Flash: * Press and hold the Standby/Power button on the front panel (or on some versions, the Reset button on the back).
-
While holding the button, turn the power back ON.
-
-
Recovery Menu:
-
Keep holding the button until the Multiboot/Recovery Menu appears on your TV screen.
-
Use the remote to select “Flash Recovery Image” or “USB Multiboot Image Upgrade”.
-
-
Select Image: Select the image file found on your USB and confirm with OK.
-
Wait: The screen will show the flashing progress. Do not touch the power until it reaches 100%.
-
Complete: The box will reboot. Once the setup wizard appears, you can remove the USB stick.
Quick Tips
-
Multiboot: The PULSe 4K MINI supports multiple images. From the recovery menu, you can choose which “Slot” to flash the image into without deleting your old one.
-
USB Detection: If the recovery menu doesn’t see the USB, try the other USB port. HiSilicon chips can sometimes be picky about which port is used for boot-level flashing.