[HOW TO FLASH] how to flash SPYCAT mini
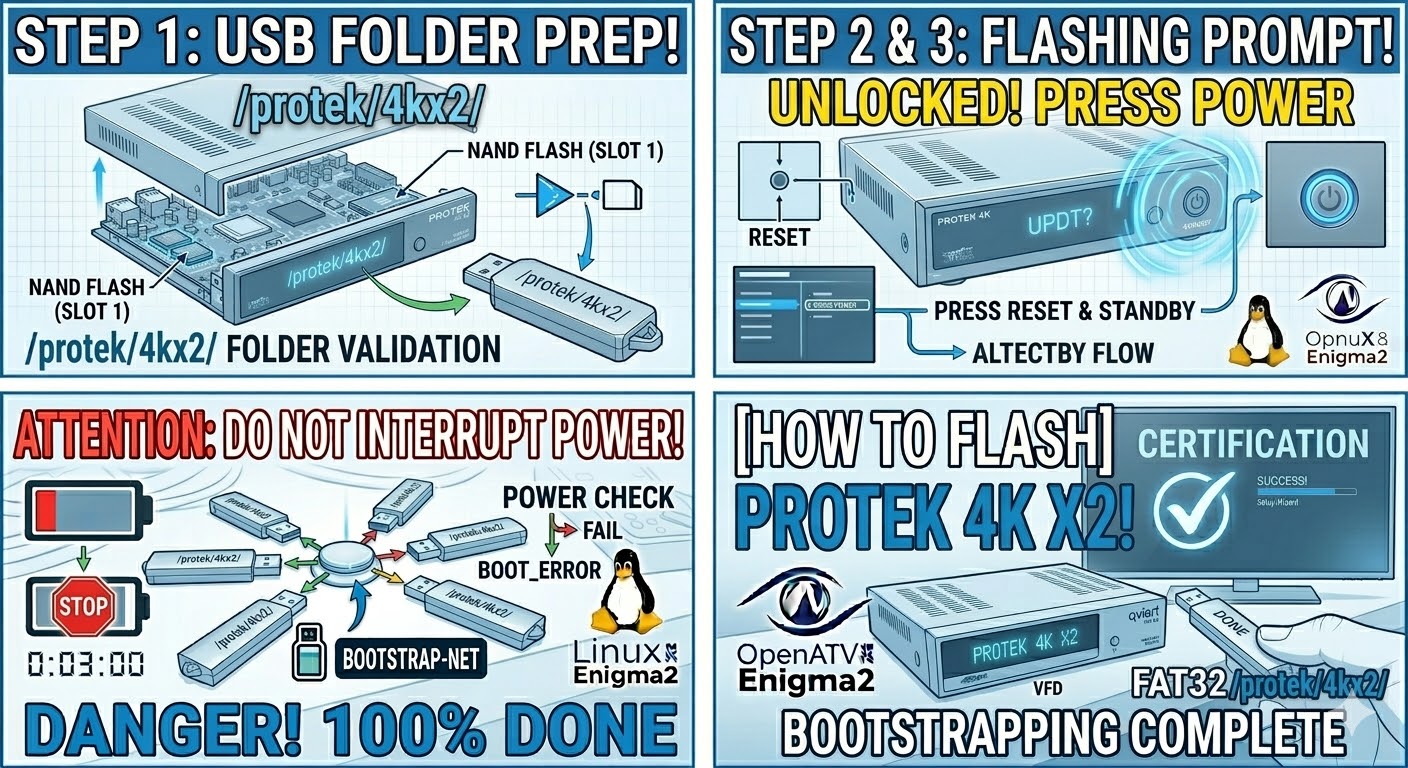
To flash the original SPYCAT Mini, you need to ensure the folder structure is precise, as this model looks for a specific subfolder to initiate the bootloader update.
Preparation
-
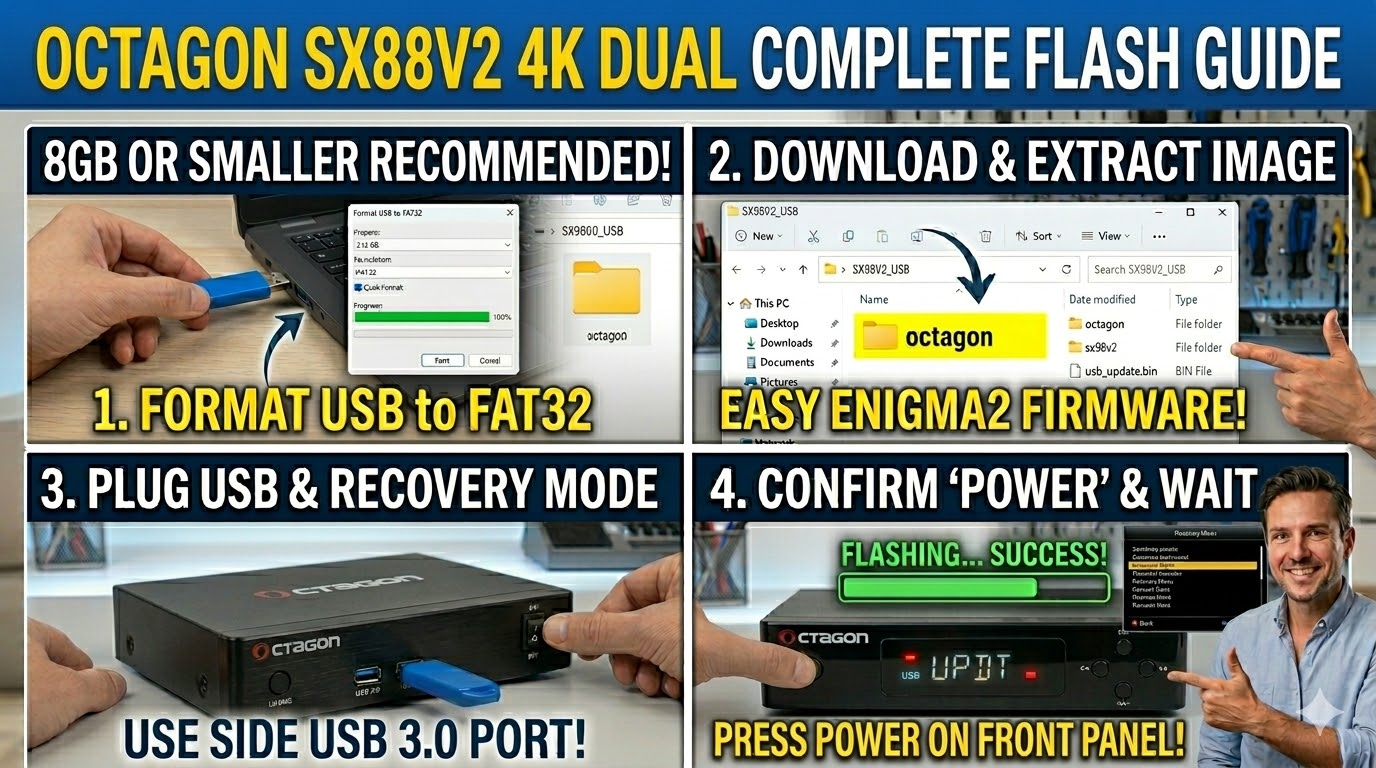
USB Drive: Use a FAT32 formatted USB stick. This model is older and highly prefers USB 2.0 (8GB or less).
-
The Files: Extract your image zip (e.g., OpenATV, OpenViX). You must see a folder named
spycat. -
Root Path: Copy the
spycatfolder to the root of your USB drive.-
Structure:
USB Root > spycat > mini > (files: kernel.bin, rootfs.bin, etc.) -
Note: Ensure the subfolder is named
miniand notminiplusorminiv2.
-
Flashing Steps
-
Power Down: Turn off the receiver using the physical rocker switch at the back.
-
Insert USB: Plug the USB stick into the rear USB port.
-
Power On: Flip the rear power switch to ON.
-
The Trigger: * Watch your TV screen.
-
When a prompt appears saying “Image upgrade found! Press OK to flash”, immediately press the OK Button on your Remote Control.
-
-
Flashing Process: A progress bar will appear on the TV. This typically takes 3 to 5 minutes. Do not turn off the power during this process.
-
Completion: The receiver will reboot automatically once the flash is finished.
-
Finalize: Remove the USB stick as soon as the box starts to reboot to avoid the “Found Update” prompt appearing again.
Quick Troubleshooting
-
Box ignores USB: If it boots to the old image, the USB drive is likely too modern or the folder structure is incorrect. Double-check that it is
spycat/mini/. -
No TV Display: Ensure your TV is on the correct HDMI source before powering on the Spycat, as the “Press OK” window only lasts for a few seconds.

The flashing process should take approximately two to four minutes to complete, while the receiver
is being flashed it is vitally important that you DO NOT power the receiver down for any reason as
this can cause serious and or permanent damage.