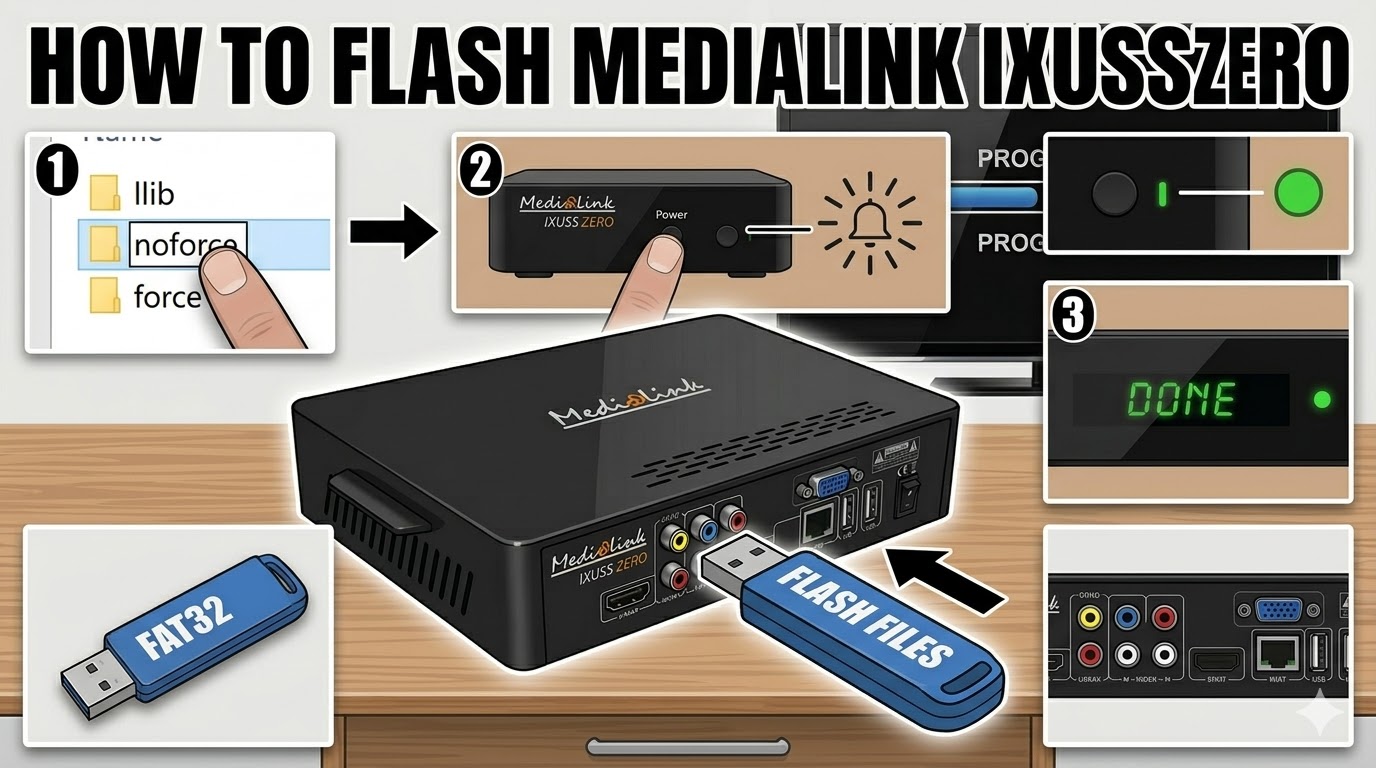
[HOW TO FLASH] how to flash Medialink ixuss zero
The Medialink Ixuss Zero is a compact Enigma2 receiver, and the flashing process is very similar to its bigger brother, the Ixuss One, with a few specific timing cues you need to watch for.
Preparation
-
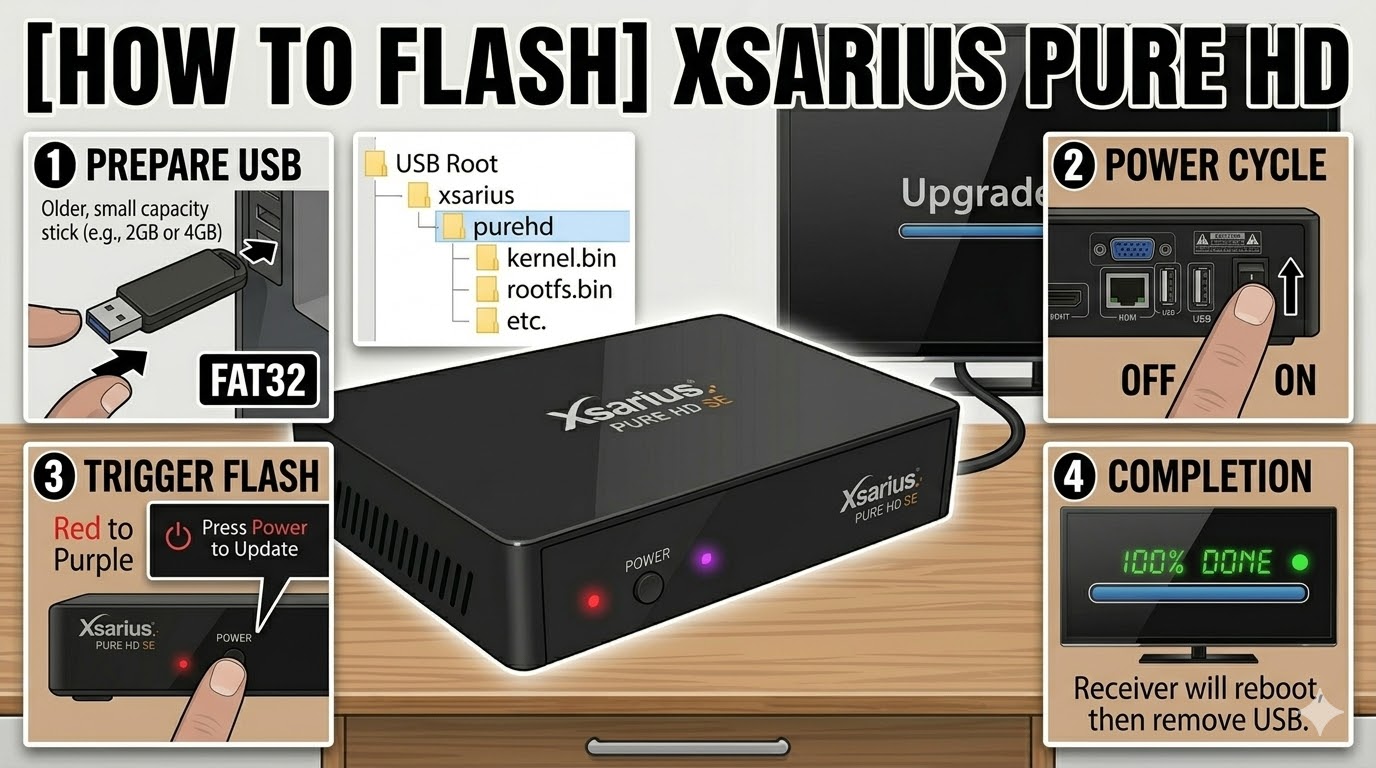
USB Stick: Use a FAT32 formatted USB drive (ideally 2GB or 4GB for maximum compatibility).
-
The Files: Extract your chosen image (OpenATV, etc.). You should see a folder named
ixusszero. -
Root Directory: Copy the entire
ixusszerofolder to the root of your USB stick.
Flashing Steps
-
Power Off: Turn off the Ixuss Zero using the power switch at the back (or unplug the power cable).
-
Insert USB: Plug the USB stick into the rear USB port.
-
Power On: Turn the receiver back on.
-
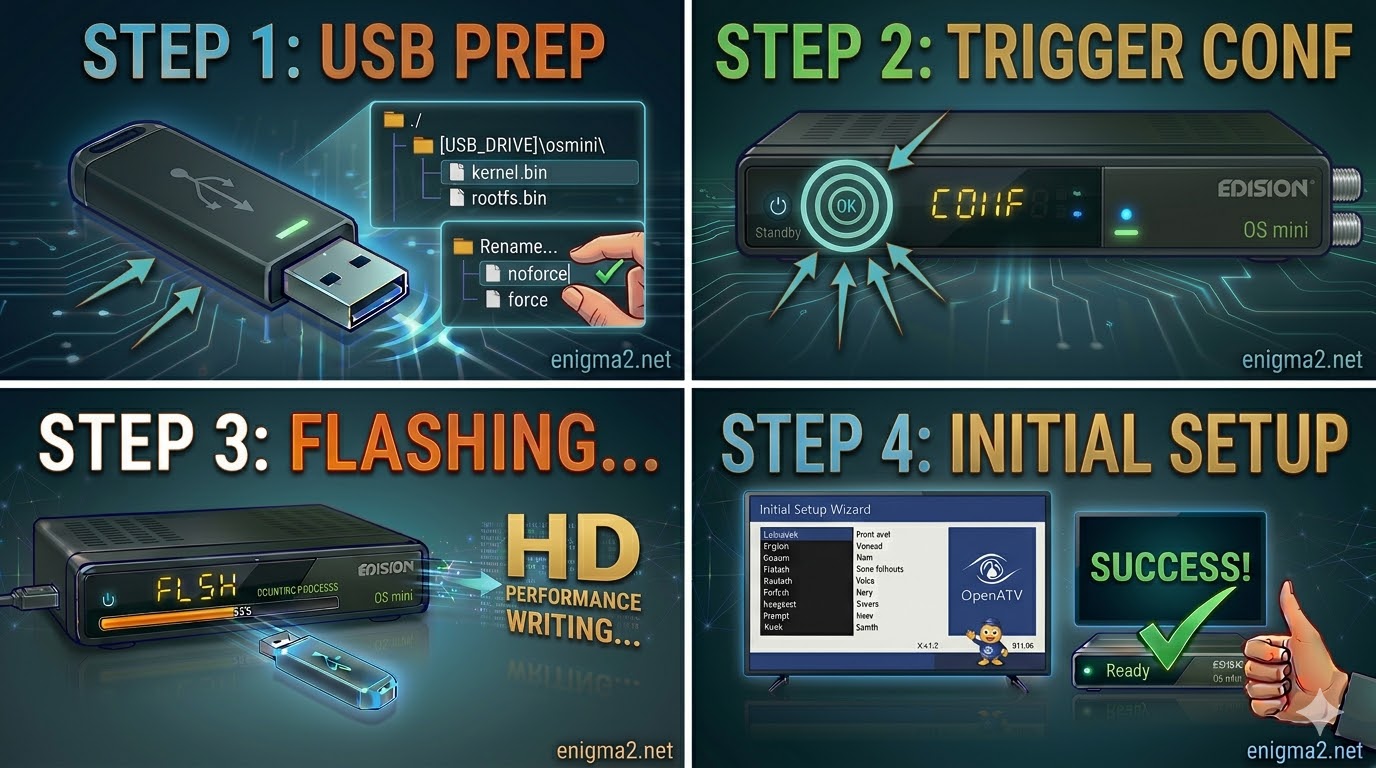
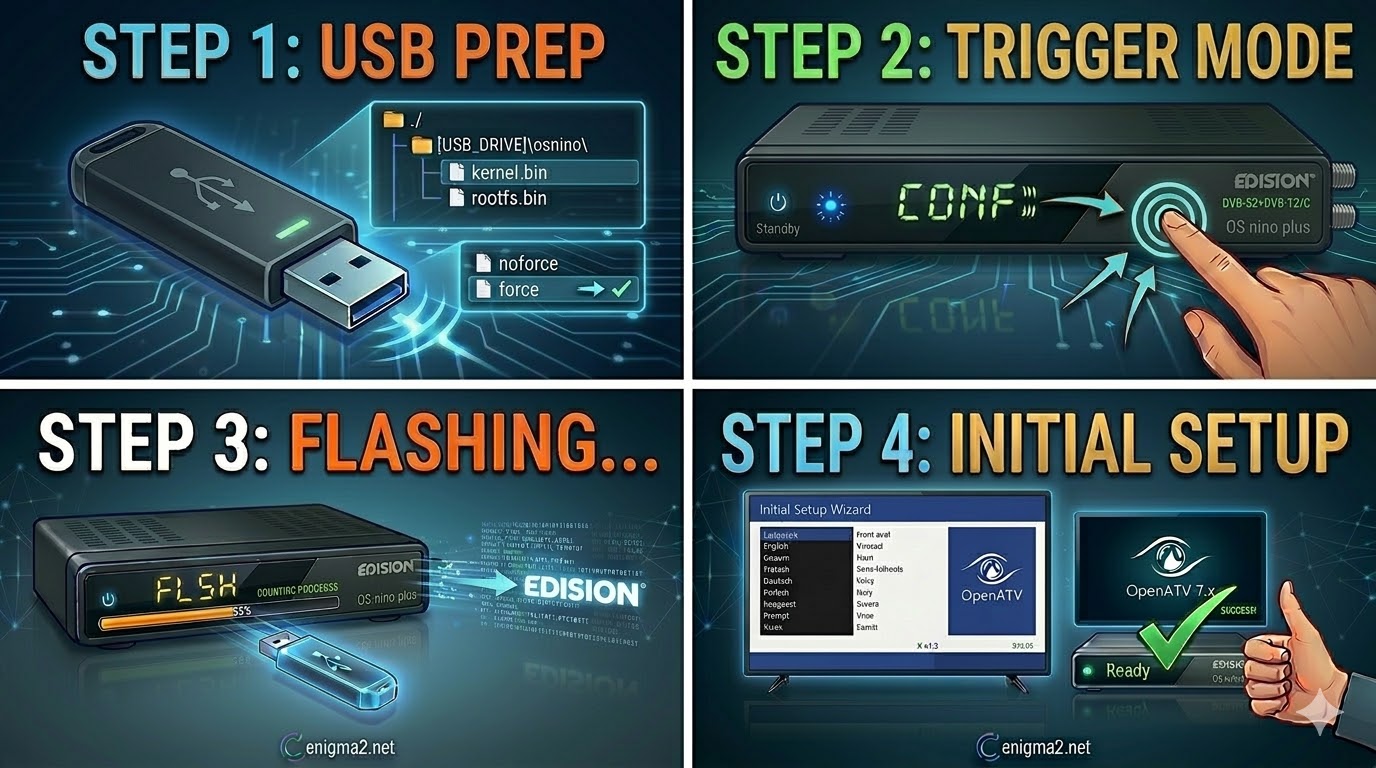
The Trigger: Watch the front panel LED or the TV screen:
-
As soon as the receiver powers up and detects the USB, the front LED will likely blink or change color (often flashing between red/green or blue).
-
Press the Power Button on the front panel (or sometimes the CH+ button) to confirm you want to flash.
-
-
Flashing Process: The LED will begin to blink rapidly, indicating the update is in progress.
-
Note: Unlike the Ixuss One, the Zero lacks a detailed VFD display, so the LED color/pattern is your only indicator.
-
-
Completion: Once the LED stops blinking or turns a solid color (usually green), the process is finished.
-
Reboot: Remove the USB stick and power-cycle the box.
Quick Tips for Success
-
The “No-Prompt” Method: If the box won’t trigger the flash, rename the file
noforcetoforceinside theixusszerofolder. This will make the box flash automatically upon boot without needing a button press. -
Rear Port Only: Always use the rear USB port for flashing; the internal bus often prioritizes it during the bootloader phase.

The flashing process should take approximately two to four minutes to complete, while the receiver
is being flashed it is vitally important that you DO NOT power the receiver down for any reason as
this can cause serious and or permanent damage.